This guide shows how to build in-person payment flows on iOS using the Finix iOS SDK with the PAX D135 Bluetooth card reader.
When ordering a PAX D135 your Finix point of contact will have you designate which environment you wish to use it in. Finix will notify you which device serial number corresponds to each environment.
A D135 device can be designated to be used for either Sandbox development or Production transaction processing but not both. We recommend requesting enough devices to utilize in both your Sandbox development and Production testing.
- Your PAX D135 device is fully charged.
- iOS 18.1 or higher.
Charge the battery only with PAX-approved power supplies. Using others may damage the product and void the warranty.
Charging time must not exceed 24 hours. If the battery is empty, recharge it fully, then disconnect the device to avoid shortening its life.
The SDK supports the use of either ROLE_PARTNER or ROLE_MERCHANT credentials. If you would like to scope your device to a single merchant it is recommended to use ROLE_MERCHANT credentials. If you plan to use the device across multiple merchants you should use ROLE_PARTNER credentials.
Note that the following functionality requires the use of ROLE_PARTNER credentials.
The following outlines how to create ROLE_MERCHANT credentials. Once created, you can use these credentials across multiple devices as long as the devices are associated to the same Merchant.
- Sandbox serverhttps://finix.sandbox-payments-api.com/identities
curl -i -X POST \
  -u USfdccsr1Z5iVbXDyYt7hjZZ:313636f3-fac2-45a7-bff7-a334b93e7bda \
  https://finix.sandbox-payments-api.com/identities \
  -H 'Content-Type: application/json' \
  -H 'Finix-Version: 2022-02-01' \
  -d '{
    "additional_underwriting_data": {
      "annual_ach_volume": 0,
      "average_ach_transfer_amount": 0,
      "average_card_transfer_amount": 0,
      "business_description": "string",
      "card_volume_distribution": {
        "card_present_percentage": 0,
        "ecommerce_percentage": 0,
        "mail_order_telephone_order_percentage": 0
      },
      "credit_check_allowed": true,
      "credit_check_ip_address": "string",
      "credit_check_timestamp": "string",
      "credit_check_user_agent": "string",
      "merchant_agreement_accepted": true,
      "merchant_agreement_ip_address": "string",
      "merchant_agreement_timestamp": "string",
      "merchant_agreement_user_agent": "string",
      "refund_policy": "MERCHANDISE_EXCHANGE_ONLY",
      "volume_distribution_by_business_type": {
        "business_to_business_volume_percentage": 0,
        "business_to_consumer_volume_percentage": 0,
        "consumer_to_consumer_volume_percentage": 0,
        "other_volume_percentage": 0,
        "person_to_person_volume_percentage": 0
      }
    },
    "entity": {
      "ach_max_transaction_amount": 0,
      "amex_mid": 0,
      "annual_card_volume": 0,
      "business_address": {
        "city": "string",
        "country": "string",
        "line1": "string",
        "line2": "string",
        "postal_code": "string",
        "region": "string"
      },
      "business_name": "string",
      "business_phone": "string",
      "business_tax_id": "string",
      "business_type": "ASSOCIATION_ESTATE_TRUST",
      "default_statement_descriptor": "string",
      "discover_mid": 0,
      "dob": {
        "day": 1,
        "month": 1,
        "year": 1900
      },
      "doing_business_as": "string",
      "email": "string",
      "first_name": "string",
      "has_accepted_credit_cards_previously": true,
      "incorporation_date": {
        "day": 0,
        "month": 0,
        "year": 0
      },
      "last_name": "string",
      "max_transaction_amount": 0,
      "mcc": "string",
      "ownership_type": "PRIVATE",
      "personal_address": {
        "line1": "string",
        "line2": "string",
        "city": "string",
        "region": "string",
        "postal_code": "string",
        "country": "ABW"
      },
      "phone": "string",
      "principal_percentage_ownership": 0,
      "short_business_name": "string",
      "tax_authority": "string",
      "tax_id": "string",
      "title": "string",
      "url": "string"
    },
    "identity_roles": [
      "SELLER"
    ],
    "tags": {
      "property1": "string",
      "property2": "string"
    },
    "type": "BUSINESS"
}'{
"id": "USoR21bF52KLZpbQCptrexpH",
"created_at": "2025-12-08T18:35:51.41Z",
"updated_at": "2025-12-08T18:35:51.41Z",
"created_by": "USfdccsr1Z5iVbXDyYt7hjZZ",
"email": null,
"enabled": true,
"first_name": null,
"identity": "IDjvxGeXBLKH1V9YnWm1CS4n",
"last_name": null,
"last_used_date": null,
"password": "f2fd7118-66c3-495c-8942-8178e0ea9d0c",
"role": "ROLE_MERCHANT",
"tags": {},
"_links": {
"self": {
"href": "https://finix.sandbox-payments-api.com/users/USoR21bF52KLZpbQCptrexpH"
},
"applications": {
"href": "https://finix.sandbox-payments-api.com/applications"
},
"application": {
"href": "https://finix.sandbox-payments-api.com/applications/APc9vhYcPsRuTSpKD9KpMtPe"
}
}
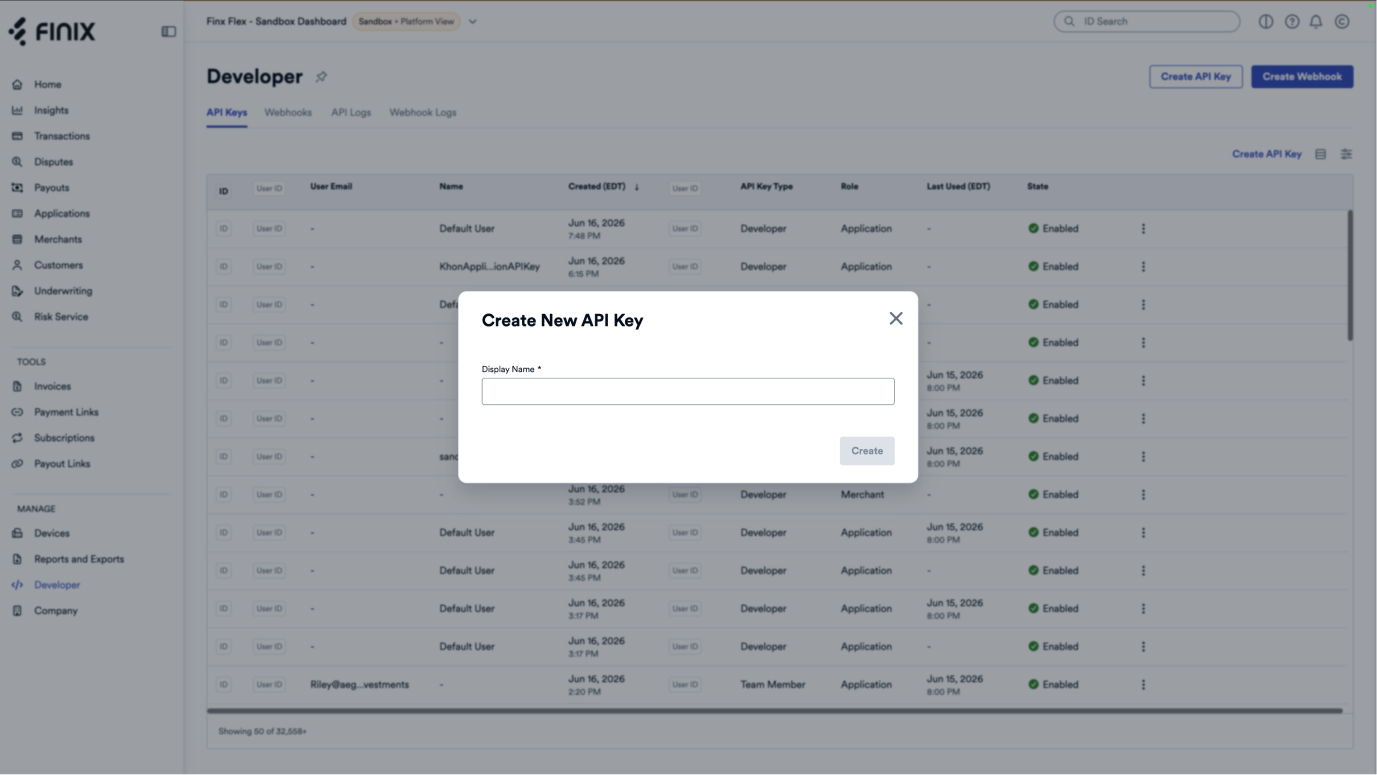
}The following explains how to create a new set of ROLE_PARTNER api credentials.
- Login to the Finix dashboard.
- Select the environment for which you would like to create the api credentials (Sandbox or Live)
- In the bottom left hand corner select the
Developersection - In the Api Keys section. Select
Create Api Key
Creating a device resource can be done either via the Finix dashboard or via api. Below are the steps for creating a device via API.
Create a Device under the Merchant provisioned to process In-Person Payments. Include the Device.model of the payment terminal you'll be using to process cards.
For more details about the payment terminals available, see our available devices.
curl -i -X POST \
  -u USfdccsr1Z5iVbXDyYt7hjZZ:313636f3-fac2-45a7-bff7-a334b93e7bda \
  https://finix.sandbox-payments-api.com/merchants/MUwfZPNW3r4EqLMzwgr6txw4/devices \
  -H 'Accept: application/hal+json' \
  -H 'Content-Type: application/json' \
  -d '{
    "description": "Cashier Three",
    "model": "PAX_D135",
    "name": "My PAX_D135 Finix Device",
    "serial_number": "19046260947"
    }
}'{
"id": "DVxcL2fiBdt9frYCKAbZikZK",
"created_at": "2025-05-21T19:01:32.000581Z",
"updated_at": "2025-05-21T19:01:32.000581Z",
"configuration_details": {
"allow_debit": true,
"check_for_duplicate_transactions": true,
"prompt_amount_confirmation": true,
"prompt_manual_entry": false,
"signature_threshold_amount": 10000,
"bypass_device_on_capture": true,
"prompt_receipt_confirmation": true,
"display_tip_on_receipt": false,
"prompt_tip_on_screen": false,
"allow_standalone_authorizations": false,
"allow_standalone_sales": false,
"allow_standalone_refunds": false,
"tipping_details": {
"percent_tipping_threshold": 0,
"percent_options": [18, 20, 22],
"fixed_options": [100, 150, 200]
},
"idle_message": null,
"idle_image_file_id": null,
"automatic_receipt_delivery_methods": null,
"available_receipt_methods": null,
"prompt_for_signature": "NEVER",
"surcharge_basis_points": null
},
"description": "Cashier Three",
"enabled": false,
"idle_message": null,
"merchant": "MU7noQ1wdgdAeAfymw2rfBMq",
"model": "PAX_D135",
"name": "My PAX_D135 Finix Device",
"serial_number": "19046260947",
"tags": {},
"_links": {
"self": {
"href": "https://finix.sandbox-payments-api.com/devices/DVxcL2fiBdt9frYCKAbZikZK"
},
"merchant": {
"href": "https://finix.sandbox-payments-api.com/merchants/MU7noQ1wdgdAeAfymw2rfBMq"
},
"transfers": {
"href": "https://finix.sandbox-payments-api.com/transfers"
},
"authorizations": {
"href": "https://finix.sandbox-payments-api.com/authorizations"
}
}
}Add the SDK to your project via Swift Package Manager using:
https://github.com/finix-payments/finix-pax-mpos-ios-sdkPre-requisites
- iOS 15.6 or later
- iOS device. Simulator not supported
- Add Bluetooth permission in Info.plist using key Privacy -
Bluetooth Always Usage Description
To interact with the MPOS device, first initialize the SDK
import PaxMposSDK
let finixClient = FinixClient(config: FinixConfig(
environment: TEST_ENVIRONMENT,
credentials: Finix.APICredentials(username: TEST_USERNAME, password: TEST_PASSWORD),
application: TEST_APPLICATION,
version: TEST_VERSION,
merchantId: TEST_MERCHANT_ID,
mid: TEST_MERCHANT_MID,
deviceType: .Pax,
deviceId: "") //Device ID - device registers with Finix, starting with DV (i.e. DVxxxx)
)
finixClient.delegate = self
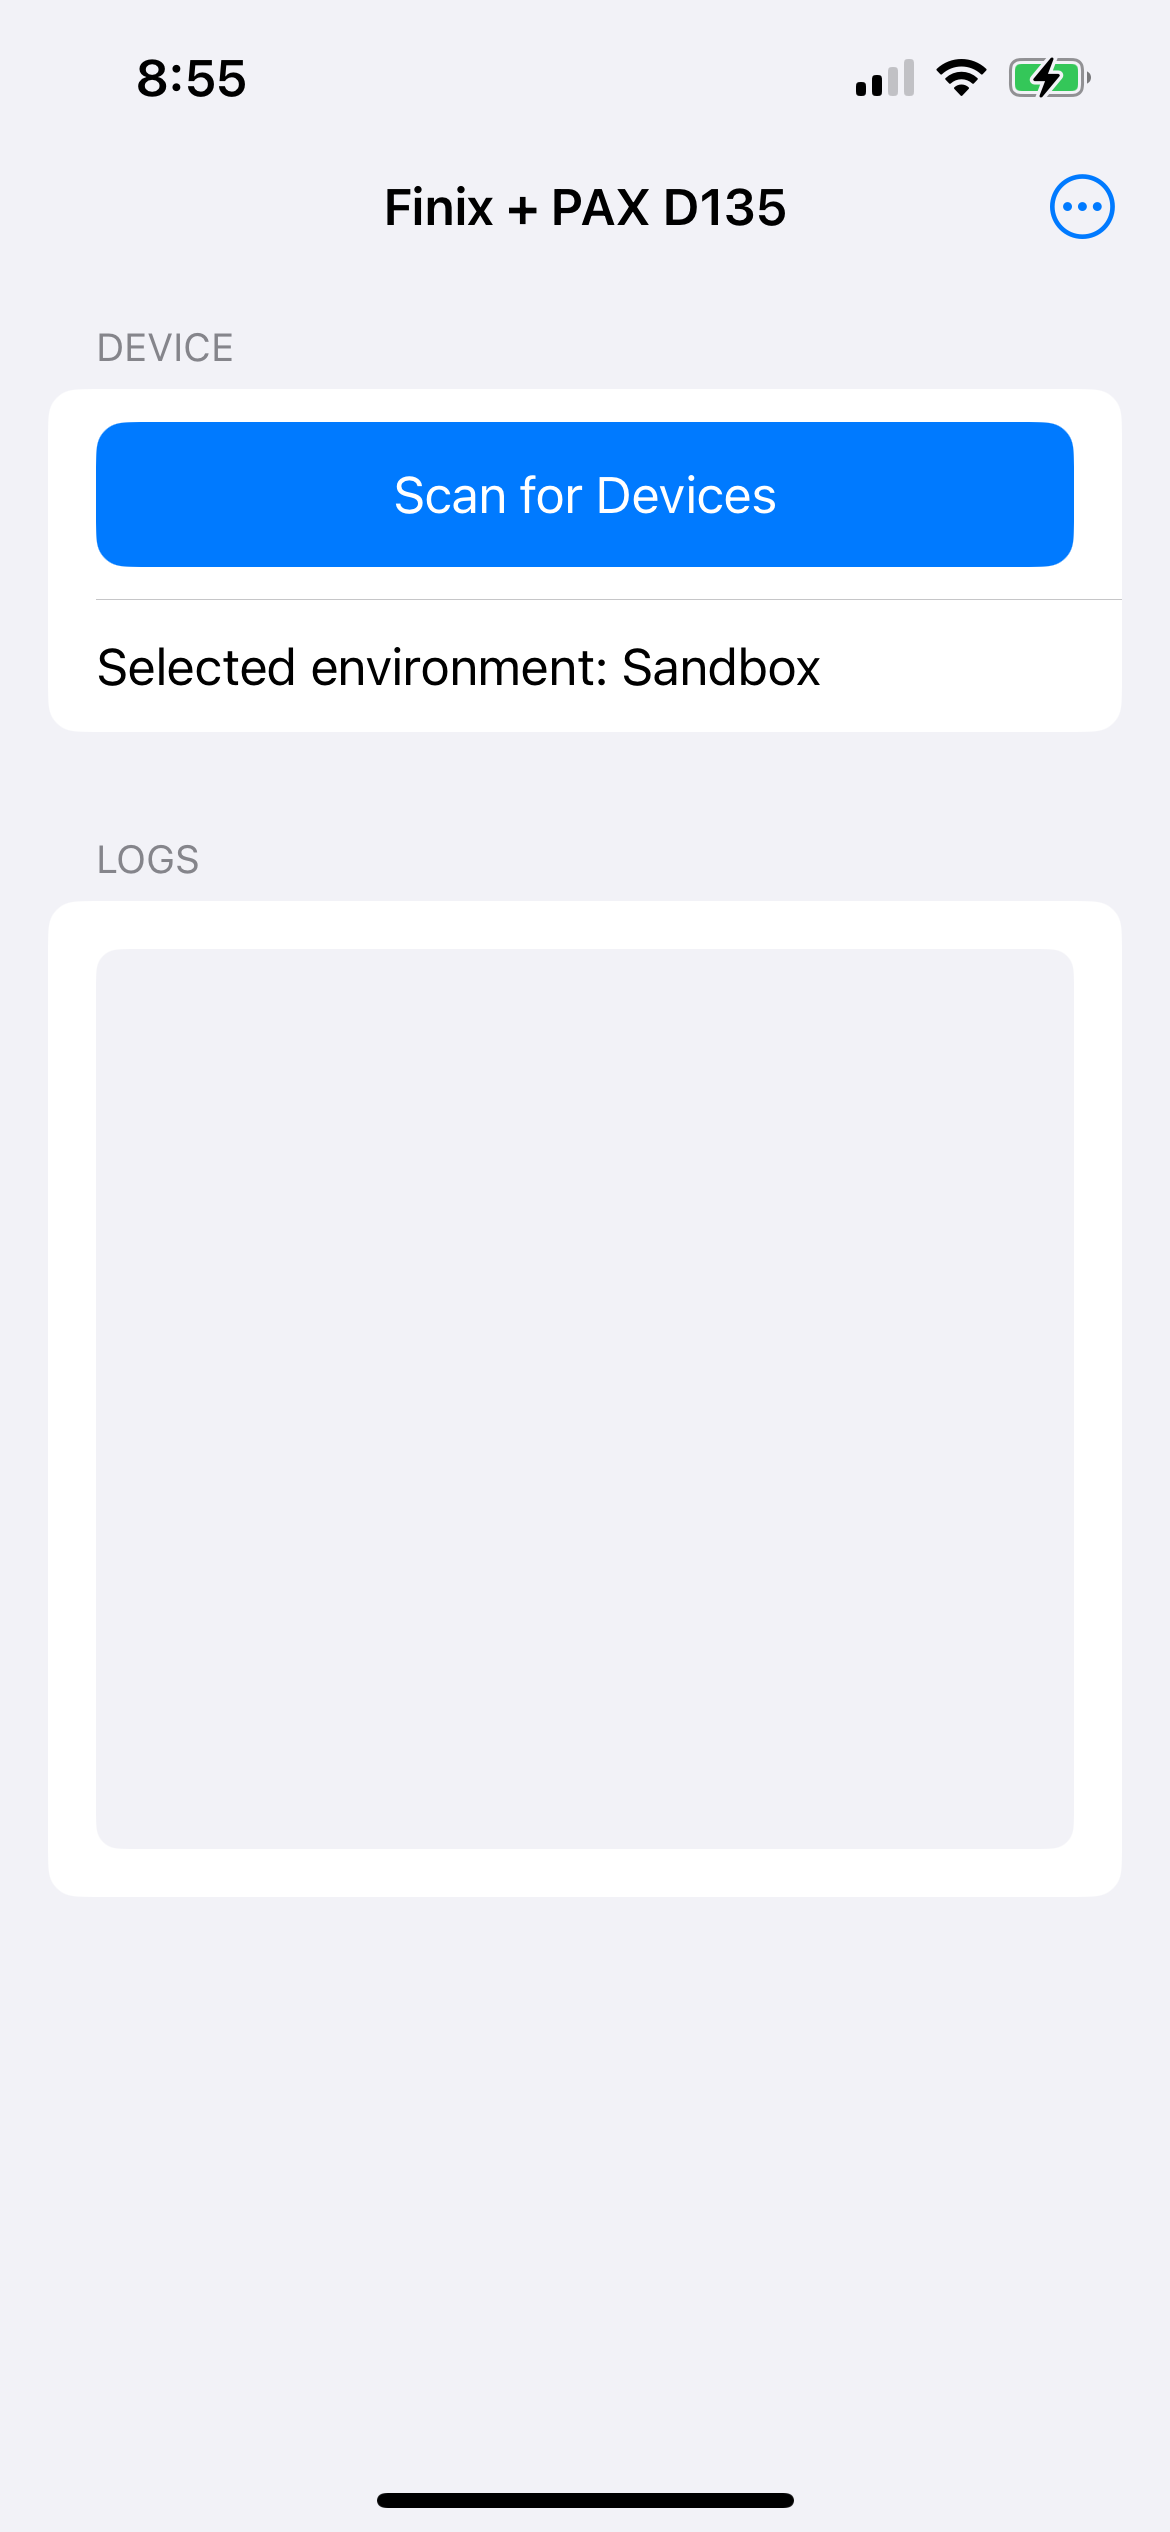
finixClient.interactionDelegate = selfOnce initialized, connect to the device. When the device is ready for pairing, it will show an orange light and green light. Once connected, the orange light will disappear and only the green light will stay on.
When first pairing a PAX D135 the initial configuration may take a few minutes to complete. We recommended that the user experience you build factors in the configuration time to ensure that the user knows the device configuration is in progress.
Scan for devices:
finixClient.startScan()

extension ViewController: FinixDelegate {
    func didDiscoverDevice(_ deviceInfo: DeviceInfo) {
        devices.append(deviceInfo)
    }
}
Connect to device:
The value for device.id will be the device's bluetooth id.
finixClient.connectDevice(device.id)

extension ViewController: FinixDelegate {
    func deviceDidConnect(_ deviceInfo: DeviceInfo) {
        connectedDevice = deviceInfo
    }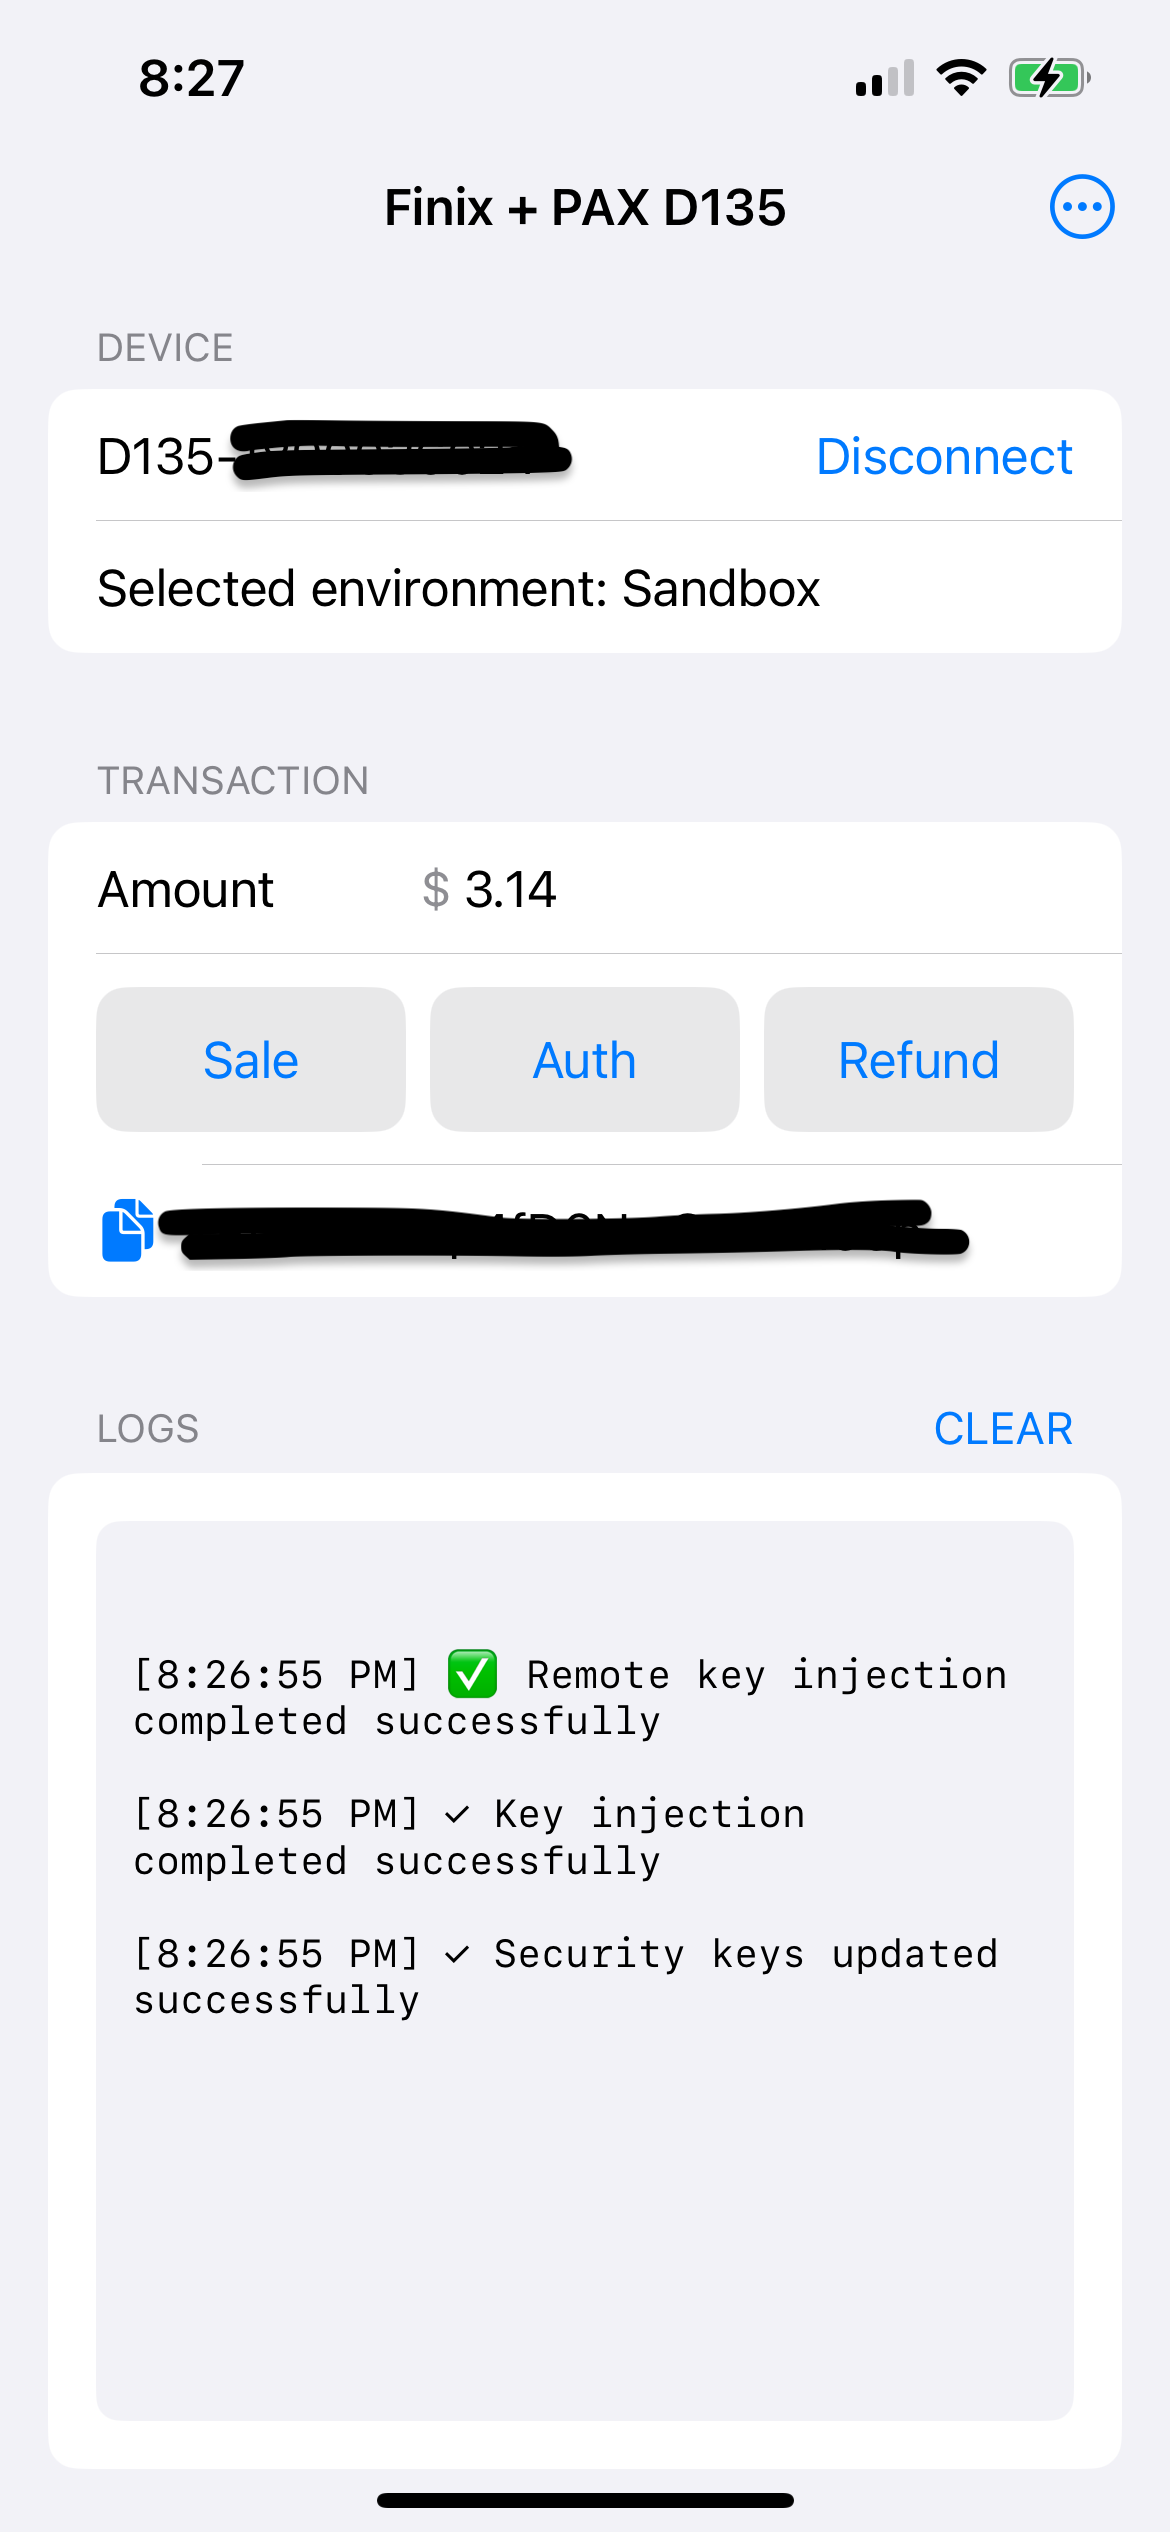
}To start a transaction, first, update the client with the Finix device ID (DVxxxx). Then call the function startTransaction(). This will prep the mPOS device to accept card input (swipe, tap, insert). A blue status light will be shown. Once any action is performed with the card the device would show a red light to indicate, the card has been read and to remove it.
finixClient.update(deviceId: "DVxxxxx")let transactionAmount = Currency(amount: Int(amountDouble * 100), code: .USD)
finixClient.startTransaction(amount: transactionAmount, type: transactionType, splitTransfers: [SplitTransfer]? = nil, tags: ResourceTags? = nil, buyerIdentityId: String? = nil
) { transferResponse, error in
Task { @MainActor in
// Handle using transferResponse and error
}
}A referenced refund, refunds the amount specified (refund amount) of a particular transaction (transaction id) to the card on file
/// Start a referenced refund
    func startRefund(transactionID: String, amount: Currency, completion: ((RefundResponse?, Error?) -> Void)?) {
        let mainCompletion: (RefundResponse?, Error?) -> Void = { response, error in
            if let error {
                self.logger.error("startRefund failed with error: \(error)")
            }

            DispatchQueue.main.async {
                completion?(response, error)
            }
        }

        let externalEndpoint = FinixAPIEndpoint.externalEndpoint(config.environment)
        let endPoint = "transfers/\(transactionID)/reversals"
        guard let url = URL(string: endPoint, relativeTo: externalEndpoint) else {
            mainCompletion(nil, FinixError(code: .MalformedRequest, message: "Could not encode path!"))
            return
        }

        guard let request = requestBuilder(url: url, method: .POST, payload: ["refund_amount": amount.amount]) else {
            mainCompletion(nil, FinixError(code: .CannotEncodeParameters, message: "Cannot encode request parameters"))
            return
        }

        finixRequest(request: request) { (response: RefundResponse?, error: Error?) in
            print(response as Any, error as Any)
            mainCompletion(response, error)
        }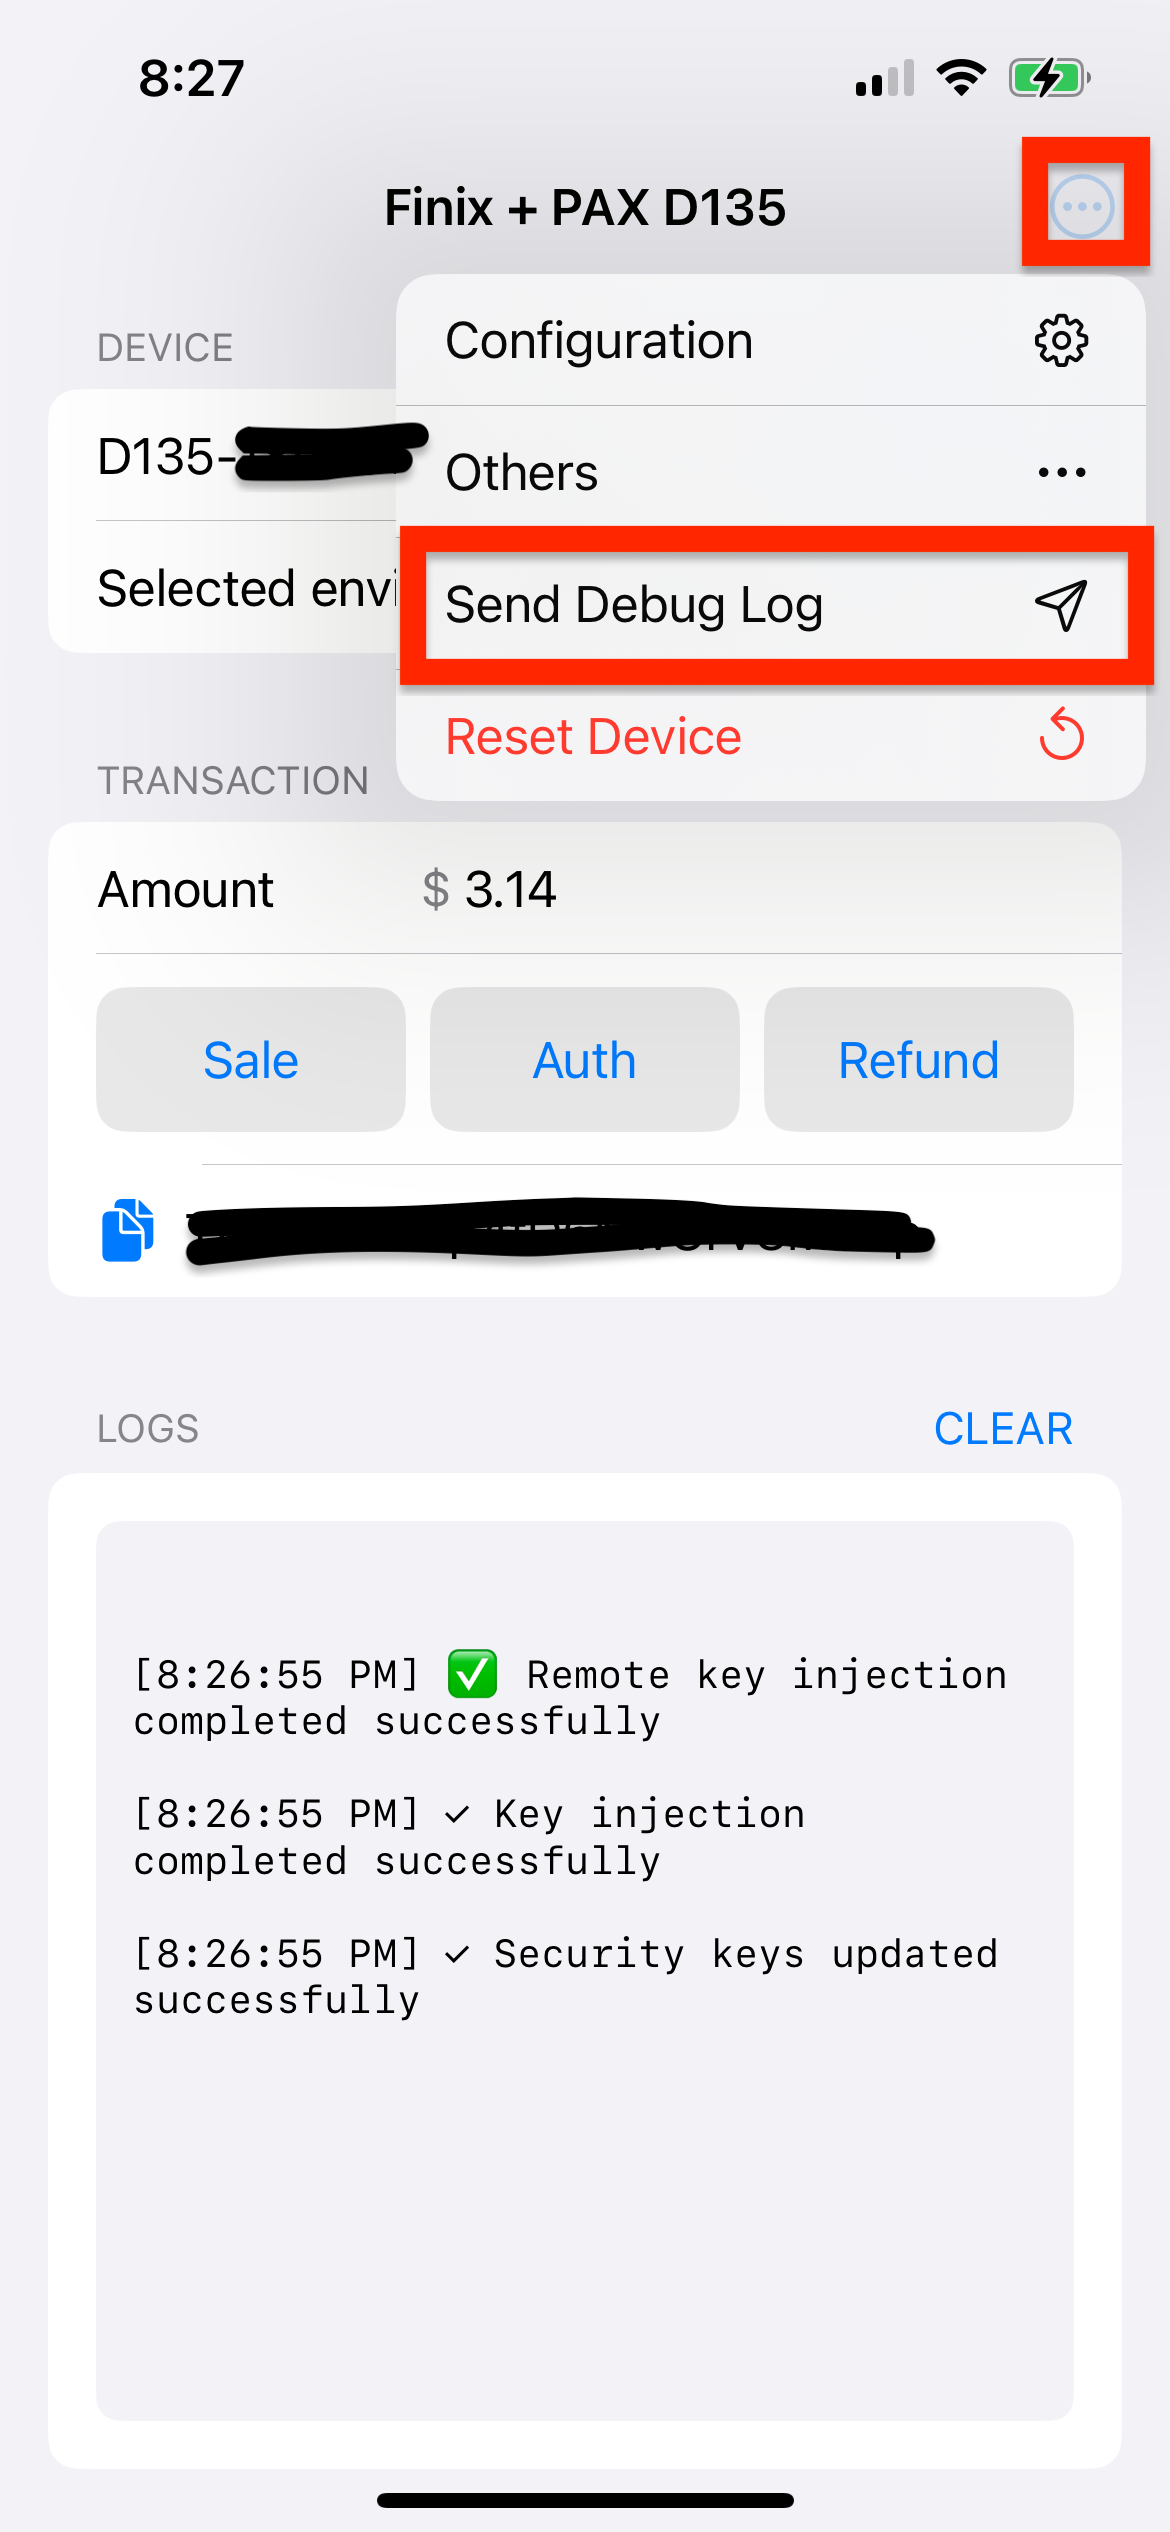
}If you encounter issues with a PAX D135 while using the SDK you can reach out to the Finix Support Team at support@finix.com. Before reaching out to support, please follow the steps below to provide the necessary information to help us troubleshoot the issue.
A sample app showing how to integrate the iOS D135 SDK can be found here.
If you encounter issues with a PAX D135 that is in the field with a customer you can reach out to the Finix Support Team at support@finix.com.
We strongly recommend that you build in the function below to collect the necessary information from the device that will be used to troubleshoot the issue. Not doing so may delay the resolution of the issue.
func sendDebugData() {}