This guide shows how to build in-person payment flows on Android using the Finix Device Reader SDK with the PAX Android based terminals.
- Registered as developer with Pax
The SDK supports the use of either ROLE_PARTNER or ROLE_MERCHANT credentials. If you would like to scope your app to a single merchant it is recommended to use ROLE_MERCHANT credentials. If you plan to use your app credentials for multiple devices you should use ROLE_PARTNER credentials.
Note that the following functionality requires the use of ROLE_PARTNER credentials.
The following outlines how to create ROLE_MERCHANT credentials. Once created, you can use these credentials across multiple devices as long as the devices are associated to the same Merchant.
- Sandbox serverhttps://finix.sandbox-payments-api.com/identities
curl -i -X POST \
  -u USfdccsr1Z5iVbXDyYt7hjZZ:313636f3-fac2-45a7-bff7-a334b93e7bda \
  https://finix.sandbox-payments-api.com/identities \
  -H 'Content-Type: application/json' \
  -H 'Finix-Version: 2022-02-01' \
  -d '{
    "additional_underwriting_data": {
      "annual_ach_volume": 0,
      "average_ach_transfer_amount": 0,
      "average_card_transfer_amount": 0,
      "business_description": "string",
      "card_volume_distribution": {
        "card_present_percentage": 0,
        "ecommerce_percentage": 0,
        "mail_order_telephone_order_percentage": 0
      },
      "credit_check_allowed": true,
      "credit_check_ip_address": "string",
      "credit_check_timestamp": "string",
      "credit_check_user_agent": "string",
      "merchant_agreement_accepted": true,
      "merchant_agreement_ip_address": "string",
      "merchant_agreement_timestamp": "string",
      "merchant_agreement_user_agent": "string",
      "refund_policy": "MERCHANDISE_EXCHANGE_ONLY",
      "volume_distribution_by_business_type": {
        "business_to_business_volume_percentage": 0,
        "business_to_consumer_volume_percentage": 0,
        "consumer_to_consumer_volume_percentage": 0,
        "other_volume_percentage": 0,
        "person_to_person_volume_percentage": 0
      }
    },
    "entity": {
      "ach_max_transaction_amount": 0,
      "amex_mid": 0,
      "annual_card_volume": 0,
      "business_address": {
        "city": "string",
        "country": "string",
        "line1": "string",
        "line2": "string",
        "postal_code": "string",
        "region": "string"
      },
      "business_name": "string",
      "business_phone": "string",
      "business_tax_id": "string",
      "business_type": "ASSOCIATION_ESTATE_TRUST",
      "default_statement_descriptor": "string",
      "discover_mid": 0,
      "dob": {
        "day": 1,
        "month": 1,
        "year": 1900
      },
      "doing_business_as": "string",
      "email": "string",
      "first_name": "string",
      "has_accepted_credit_cards_previously": true,
      "incorporation_date": {
        "day": 0,
        "month": 0,
        "year": 0
      },
      "last_name": "string",
      "max_transaction_amount": 0,
      "mcc": "string",
      "ownership_type": "PRIVATE",
      "personal_address": {
        "line1": "string",
        "line2": "string",
        "city": "string",
        "region": "string",
        "postal_code": "string",
        "country": "ABW"
      },
      "phone": "string",
      "principal_percentage_ownership": 0,
      "short_business_name": "string",
      "tax_authority": "string",
      "tax_id": "string",
      "title": "string",
      "url": "string"
    },
    "identity_roles": [
      "SELLER"
    ],
    "tags": {
      "property1": "string",
      "property2": "string"
    },
    "type": "BUSINESS"
}'{
"id": "USoR21bF52KLZpbQCptrexpH",
"created_at": "2025-12-08T18:35:51.41Z",
"updated_at": "2025-12-08T18:35:51.41Z",
"created_by": "USfdccsr1Z5iVbXDyYt7hjZZ",
"email": null,
"enabled": true,
"first_name": null,
"identity": "IDjvxGeXBLKH1V9YnWm1CS4n",
"last_name": null,
"last_used_date": null,
"password": "f2fd7118-66c3-495c-8942-8178e0ea9d0c",
"role": "ROLE_MERCHANT",
"tags": {},
"_links": {
"self": {
"href": "https://finix.sandbox-payments-api.com/users/USoR21bF52KLZpbQCptrexpH"
},
"applications": {
"href": "https://finix.sandbox-payments-api.com/applications"
},
"application": {
"href": "https://finix.sandbox-payments-api.com/applications/APc9vhYcPsRuTSpKD9KpMtPe"
}
}
}The following explains how to create a new set of ROLE_PARTNER api credentials.
- Login to the Finix dashboard.
- Select the environment for which you would like to create the api credentials (Sandbox or Live)
- In the bottom left hand corner select the
Developersection - In the Api Keys section. Select
Create Api Key
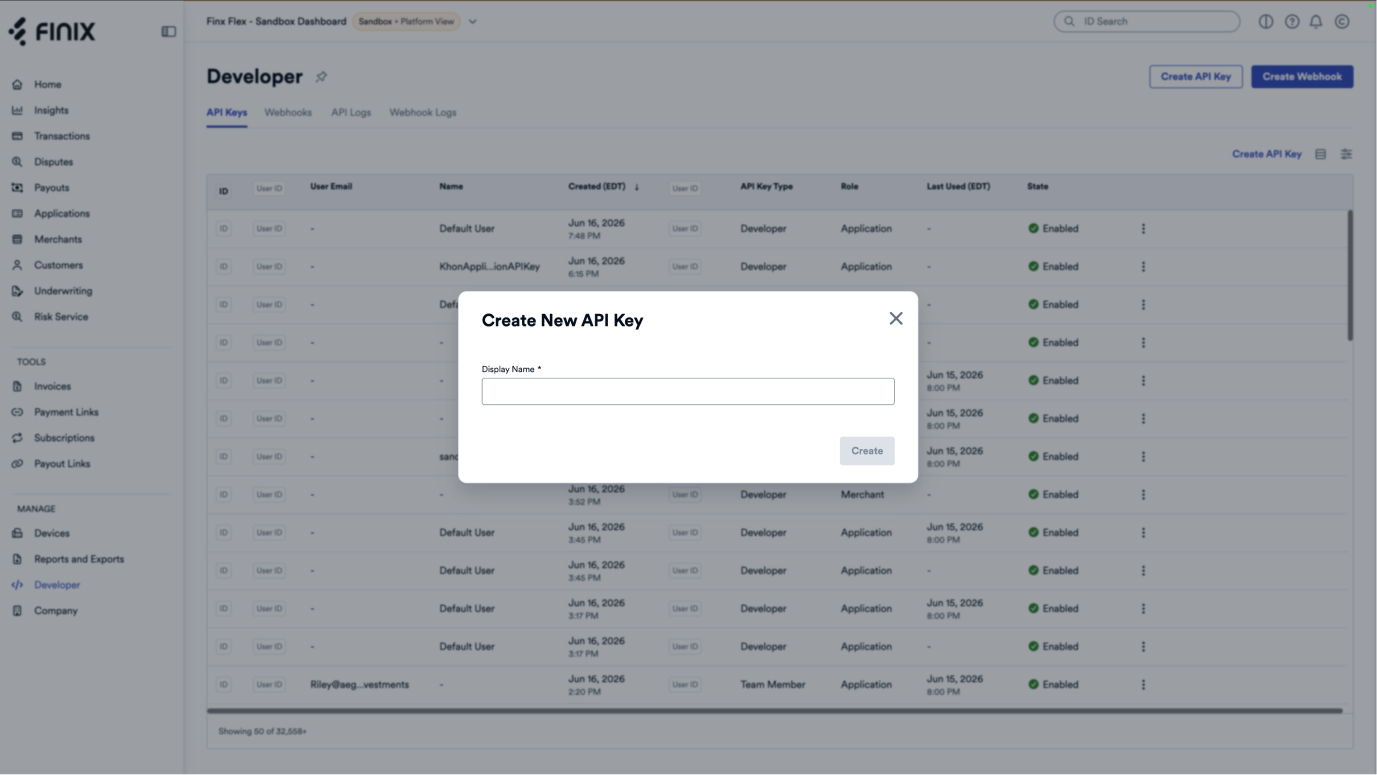
Creating a device resource can be done either via the Finix dashboard or via api. Below are the steps for creating a device via API.
Create a Device under the Merchant provisioned to process In-Person Payments. Include the Device.model of the payment terminal you'll be using to process cards. Use integration_mode of SDK. This will designate that this device will be using the Finix Device Reader SDK.
For more details about the payment terminals available, see our available devices.
curl -i -X POST \
  -u USfdccsr1Z5iVbXDyYt7hjZZ:313636f3-fac2-45a7-bff7-a334b93e7bda \
  https://finix.sandbox-payments-api.com/merchants/MUwfZPNW3r4EqLMzwgr6txw4/devices \
  -H 'Accept: application/hal+json' \
  -H 'Content-Type: application/json' \
  -d '{
    "description": "Cashier Three",
    "model": "PAX_A800",
    "name": "PAX_A800 Finix Device Reader SDK",
    "integration_mode": "SDK",
    "serial_number": "19046260947"
    }
}'{
"id": "DVxcL2fiBdt9frYCKAbZikZK",
"created_at": "2025-05-21T19:01:32.000581Z",
"updated_at": "2025-05-21T19:01:32.000581Z",
"configuration_details": null,
"description": "Cashier Three",
"enabled": false,
"idle_message": null,
"integration_mode": "SDK",
"merchant": "MU7noQ1wdgdAeAfymw2rfBMq",
"model": "PAX_A800",
"name": "PAX_A800 Finix Device Reader SDK",
"serial_number": "19046260947",
"tags": {},
"_links": {
"self": {
"href": "https://finix.sandbox-payments-api.com/devices/DVxcL2fiBdt9frYCKAbZikZK"
},
"merchant": {
"href": "https://finix.sandbox-payments-api.com/merchants/MU7noQ1wdgdAeAfymw2rfBMq"
},
"transfers": {
"href": "https://finix.sandbox-payments-api.com/transfers"
},
"authorizations": {
"href": "https://finix.sandbox-payments-api.com/authorizations"
}
}
}Add dependency in gradle file. See Maven Central or MVN Repository for the latest version.
implementation("com.finix:pax-device-reader-sdk:0.1.0")Add permission to AndroidManifest to interact with mPOS device via Bluetooth
<!-- For network communication -->
<uses-permission android:name="android.permission.INTERNET"/>
<uses-permission android:name="android.permission.ACCESS_WIFI_STATE"/>
To interact with the device, it first needs to be initialized. This can be done by initializing the class TODO.
class mposFinix(private val context: Context, private val merchantData: MerchantData)

context: Android application context
merchantData: Specific values which help identify the merchant

class MerchantData(
    // Merchant Id from Finix starting with MUxxxx
    val merchantId: String,

    // Finix mid (GUID representation)
    val mid: String,

    // Device ID - device registers with Finix, starting with DVxxxx
    val deviceId: String,

    val currency: Currency = Currency.USD,

    // Sandbox or Production
    val env: EnvEnum = EnvEnum.SB,

    // ROLE_MERCHANT or ROLE_PARTNER UserId
    val userId: String,

    //  ROLE_MERCHANT or ROLE_PARTNER password
    val password: String
)

Example : val mpos = mposFinix(
context,
MerchantData(
    merchantId = "MUxxxxxx",
    mid = "",
    deviceId = "DVxxxxx",
    env = EnvEnum.SB,
    userId = "USxxxxxxxxx",
    password = ""
)
)
To interact with the device, it first needs to be registered and created.
VendorBindings.register(driver: VendorTerminalDriver)
FinixTerminalSDK.createDevice(
    activity: Activity,
    merchantData: MerchantData,
    options: TerminalOptions,
)

driver: The type of device (ie. PaxTerminalDriver)
activity: Android activity
merchantData: Merchant data class containing data specific to your merchant
options: Optional data that can affect the transaction processing (no need to set this value for now)


class MerchantData(
    // Merchant Id from Finix starting with MUxxxx
    val merchantId: String,

    // Finix mid (GUID representation)
    val mid: String,

    // Device ID - device registers with Finix, starting with DVxxxx
    val deviceId: String,

    // Application Id from Finix starting with APxxxx
    val applicationId: String,

    // Sandbox or Production
    val env: Environment = Environment.SB,

    // ROLE_MERCHANT or ROLE_PARTNER UserId
    val userId: String,

    //  ROLE_MERCHANT or ROLE_PARTNER password
    val password: String

    // Operating country of merchant
    val country: Country = Country.USA
)

Example : val mpos = mposFinix(
    context,
    MerchantData(
        merchantId = "MUxxxxxx",
        mid = "",
        deviceId = "DVxxxxx",
        env = EnvEnum.SB,
        userId = "USxxxxxxxxx",
        password = ""
    )
)To start a transaction, the function startTransaction() must be called. This will prep the device to accept card input (swipe, tap, insert). The resulting TransactionHandle can then be used to listen to updates during the transaction flow or to cancel the pending transaction.
fun startTransaction(
    request: TransactionRequest
): TransactionHandle

data class TransactionRequest(
    val amount: Long,
    val transactionType: TransactionType,
    val splitTransfers: List<SplitTransfer>? = null,
    val tags: Map<String, String>? = null,
    val buyerIdentityId: String? = null,
    val tipAmount: Long = 0L,
    val surchargeAmount: Long = 0L,
    val idempotencyId: String? = null,
    val disabledCardEntryMethods: Set<CardEntryMethod> = emptySet(),
    val timeoutSeconds: Int = 30
)

interface TransactionHandle(
    val id: String
    val updates: Flow<TransactionUpdate>
    suspend fun cancel(): Result<Unit>
)

sealed class TransactionUpdate(
    data class Processing(val step: TransactionStep) : TransactionUpdate()

    data class Success(val result: TransactionResult) : TransactionUpdate()

    data class Error(val result: TransactionResult, val failureType: CardEntryFailureType) :
        TransactionUpdate()

    data class Retry(
        val disabledCardEntryMethods: Set<CardEntryMethod>,
        val failureType: CardEntryFailureType,
        val cardReadMethod: CardReadMethod
    ) : TransactionUpdate()
)

enum class TransactionStep {
    INITIALIZING,
    AWAITING_CARD,
    READING_CARD,
    CARD_READ_COMPLETE,
    AUTHORIZE_CARD,
    PROCESSING,
    SENT_TO_SERVER
}When a transaction succeeds, a signature upload can be performed if TransactionResult.signaturePending in TransactionUpdate.Success is true.
In this case your app should capture a signature from the user and call uploadSignature.
fun uploadSignature(
    // Base64 encoded png of the signature
    pngEncodedBase64: String,
    // traceId of the successful transaction, found in TransactionResult
    traceId: String,
)An example sample app to help with your integration can be found here sample app.
If you encounter issues while using the SDK you can reach out to the Finix Support Team at support@finix.com.
The Finix Device Reader SDK uses key slots 3 for sandbox and 4 for production. If your app uses remote key injection you will need to avoid using either of these key slots.
Finix will need a list of users that need access to Pax's TMS product. Finix will then invite individuals to be registered for this account. Please reach out to your Finix contact to initiate this process.
All TMS access is granted by Finix through the sub-reseller structure. If you already have an existing PAX account (e.g., from a prior relationship), you can maintain that separately, but Finix-related terminals must be managed exclusively under the Finix sub-reseller account.
When developing your own application on Pax devices you'll need to purchase debug devices directly from Pax. Debug devices allow apps to be installed directly from Android studio but cannot be used in production. You can order debug devices directly through Pax's developer account. Please note that debug devices may have an extended delivery time of 6-8 weeks depending on inventory.