Learn how to quickly create payment links with the Finix Dashboard.
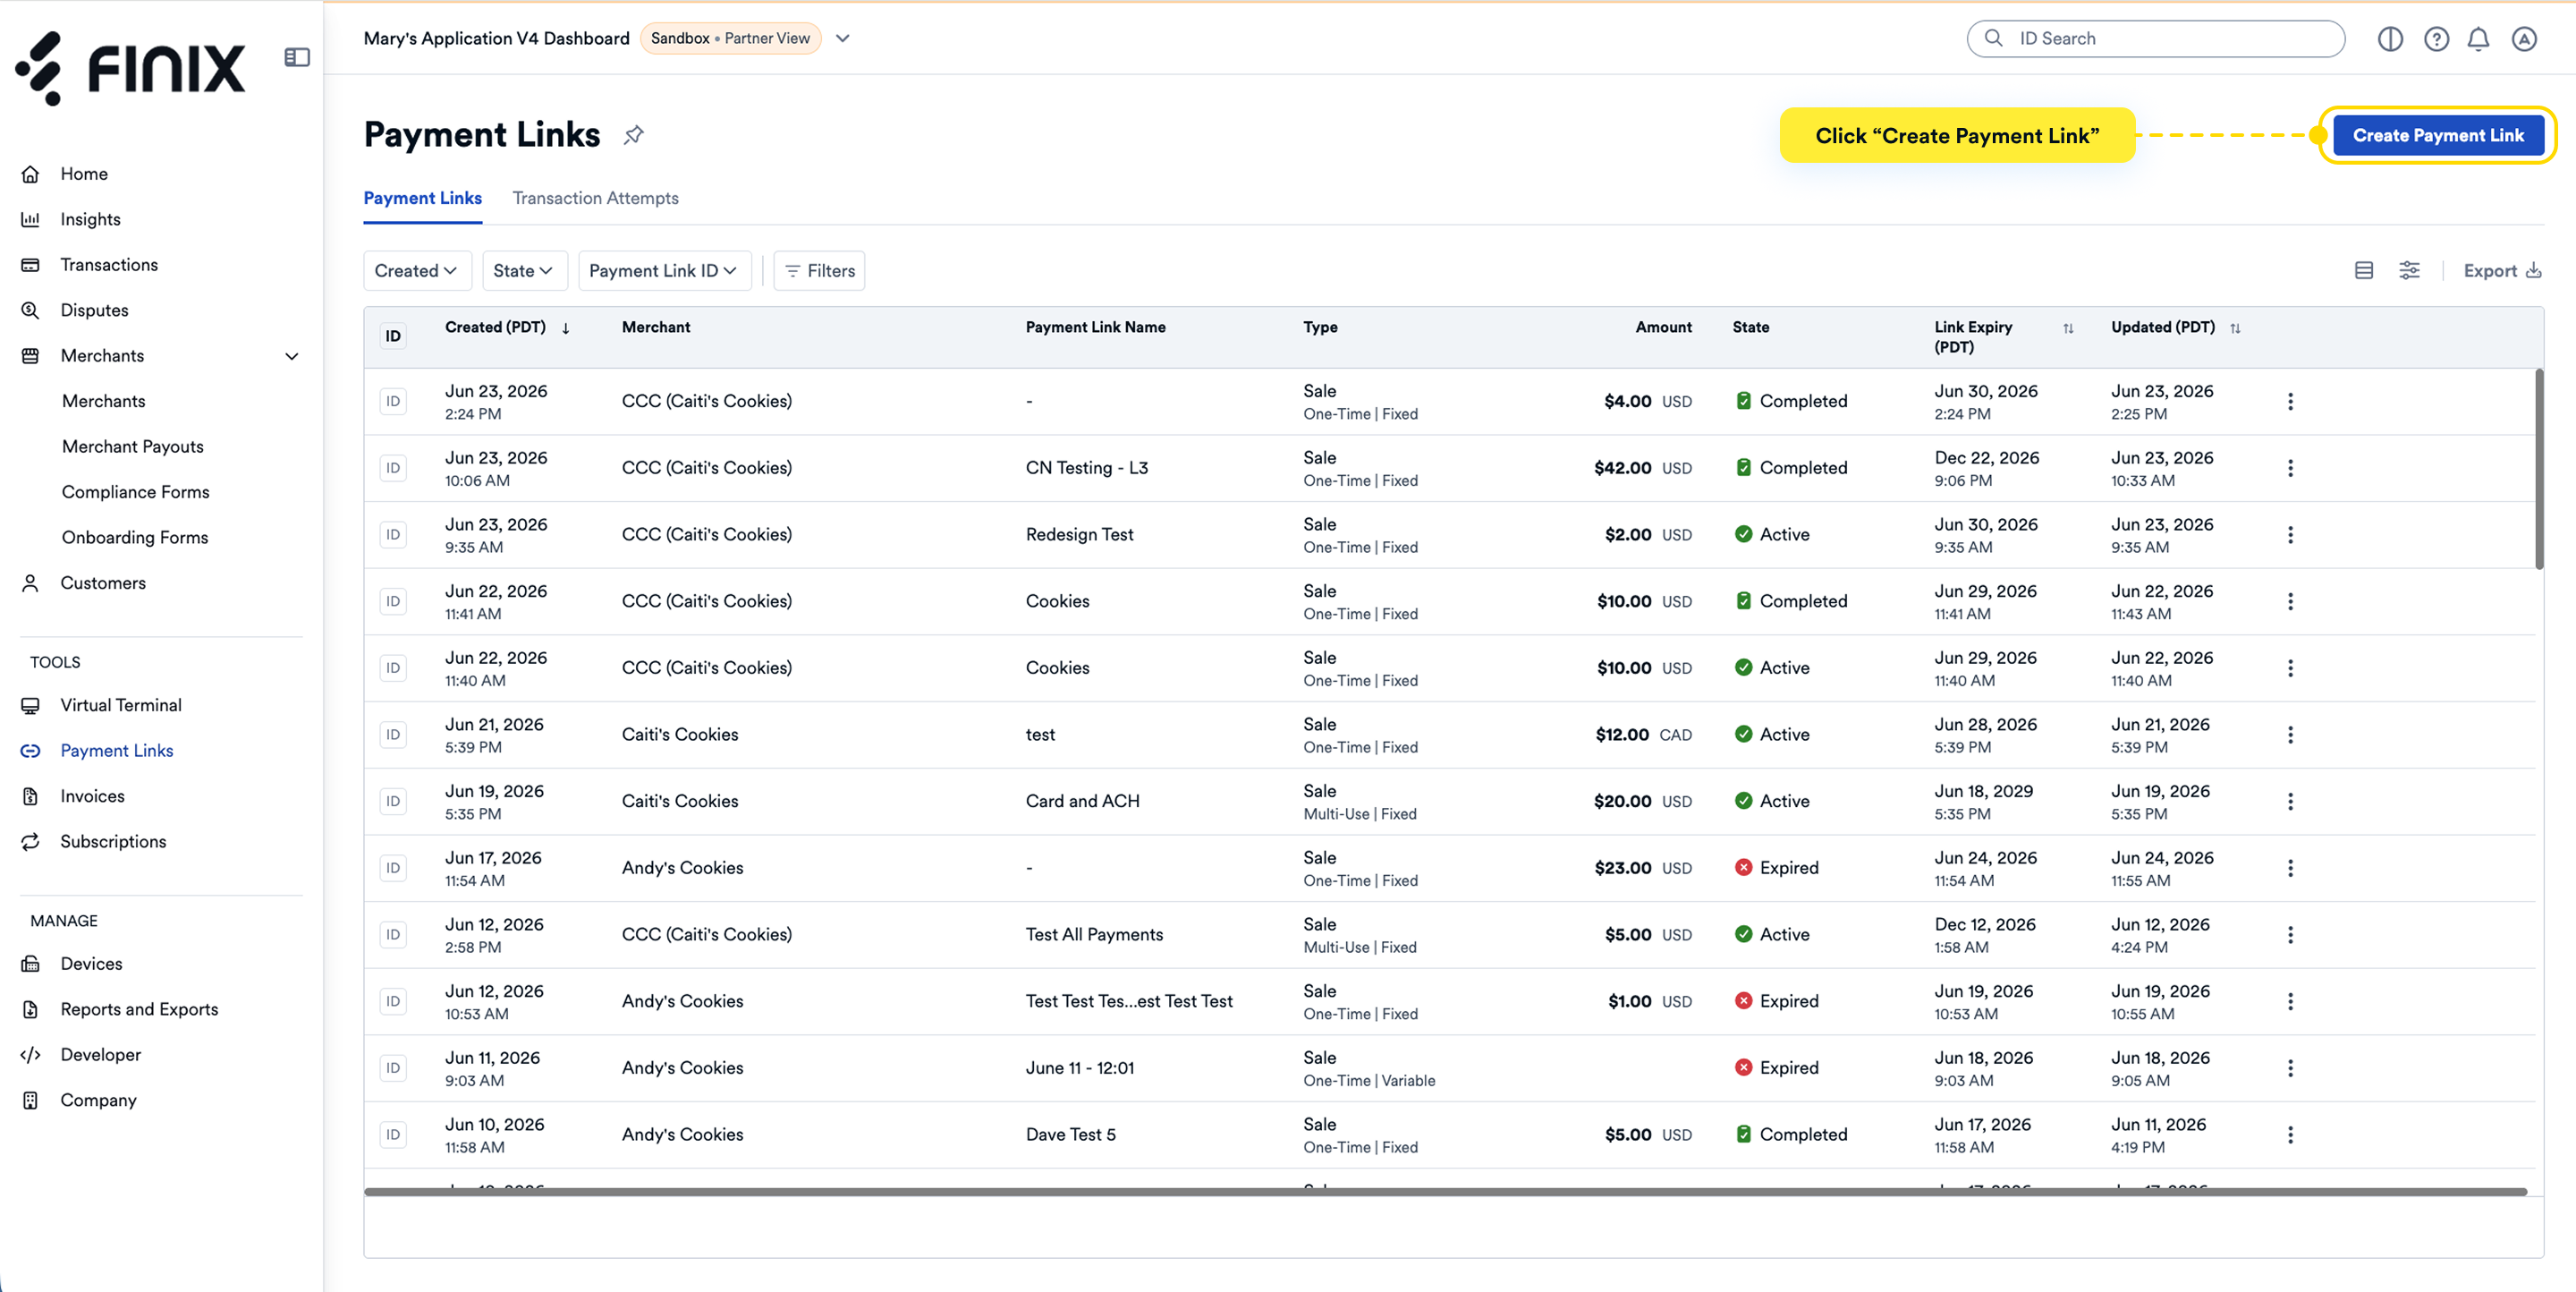
- In the Dashboard, navigate to Tools in the left navigation.
- Click Payment Links.
- Click Create Payment Link.
The creation form displays with a live preview that updates as you fill out each section.
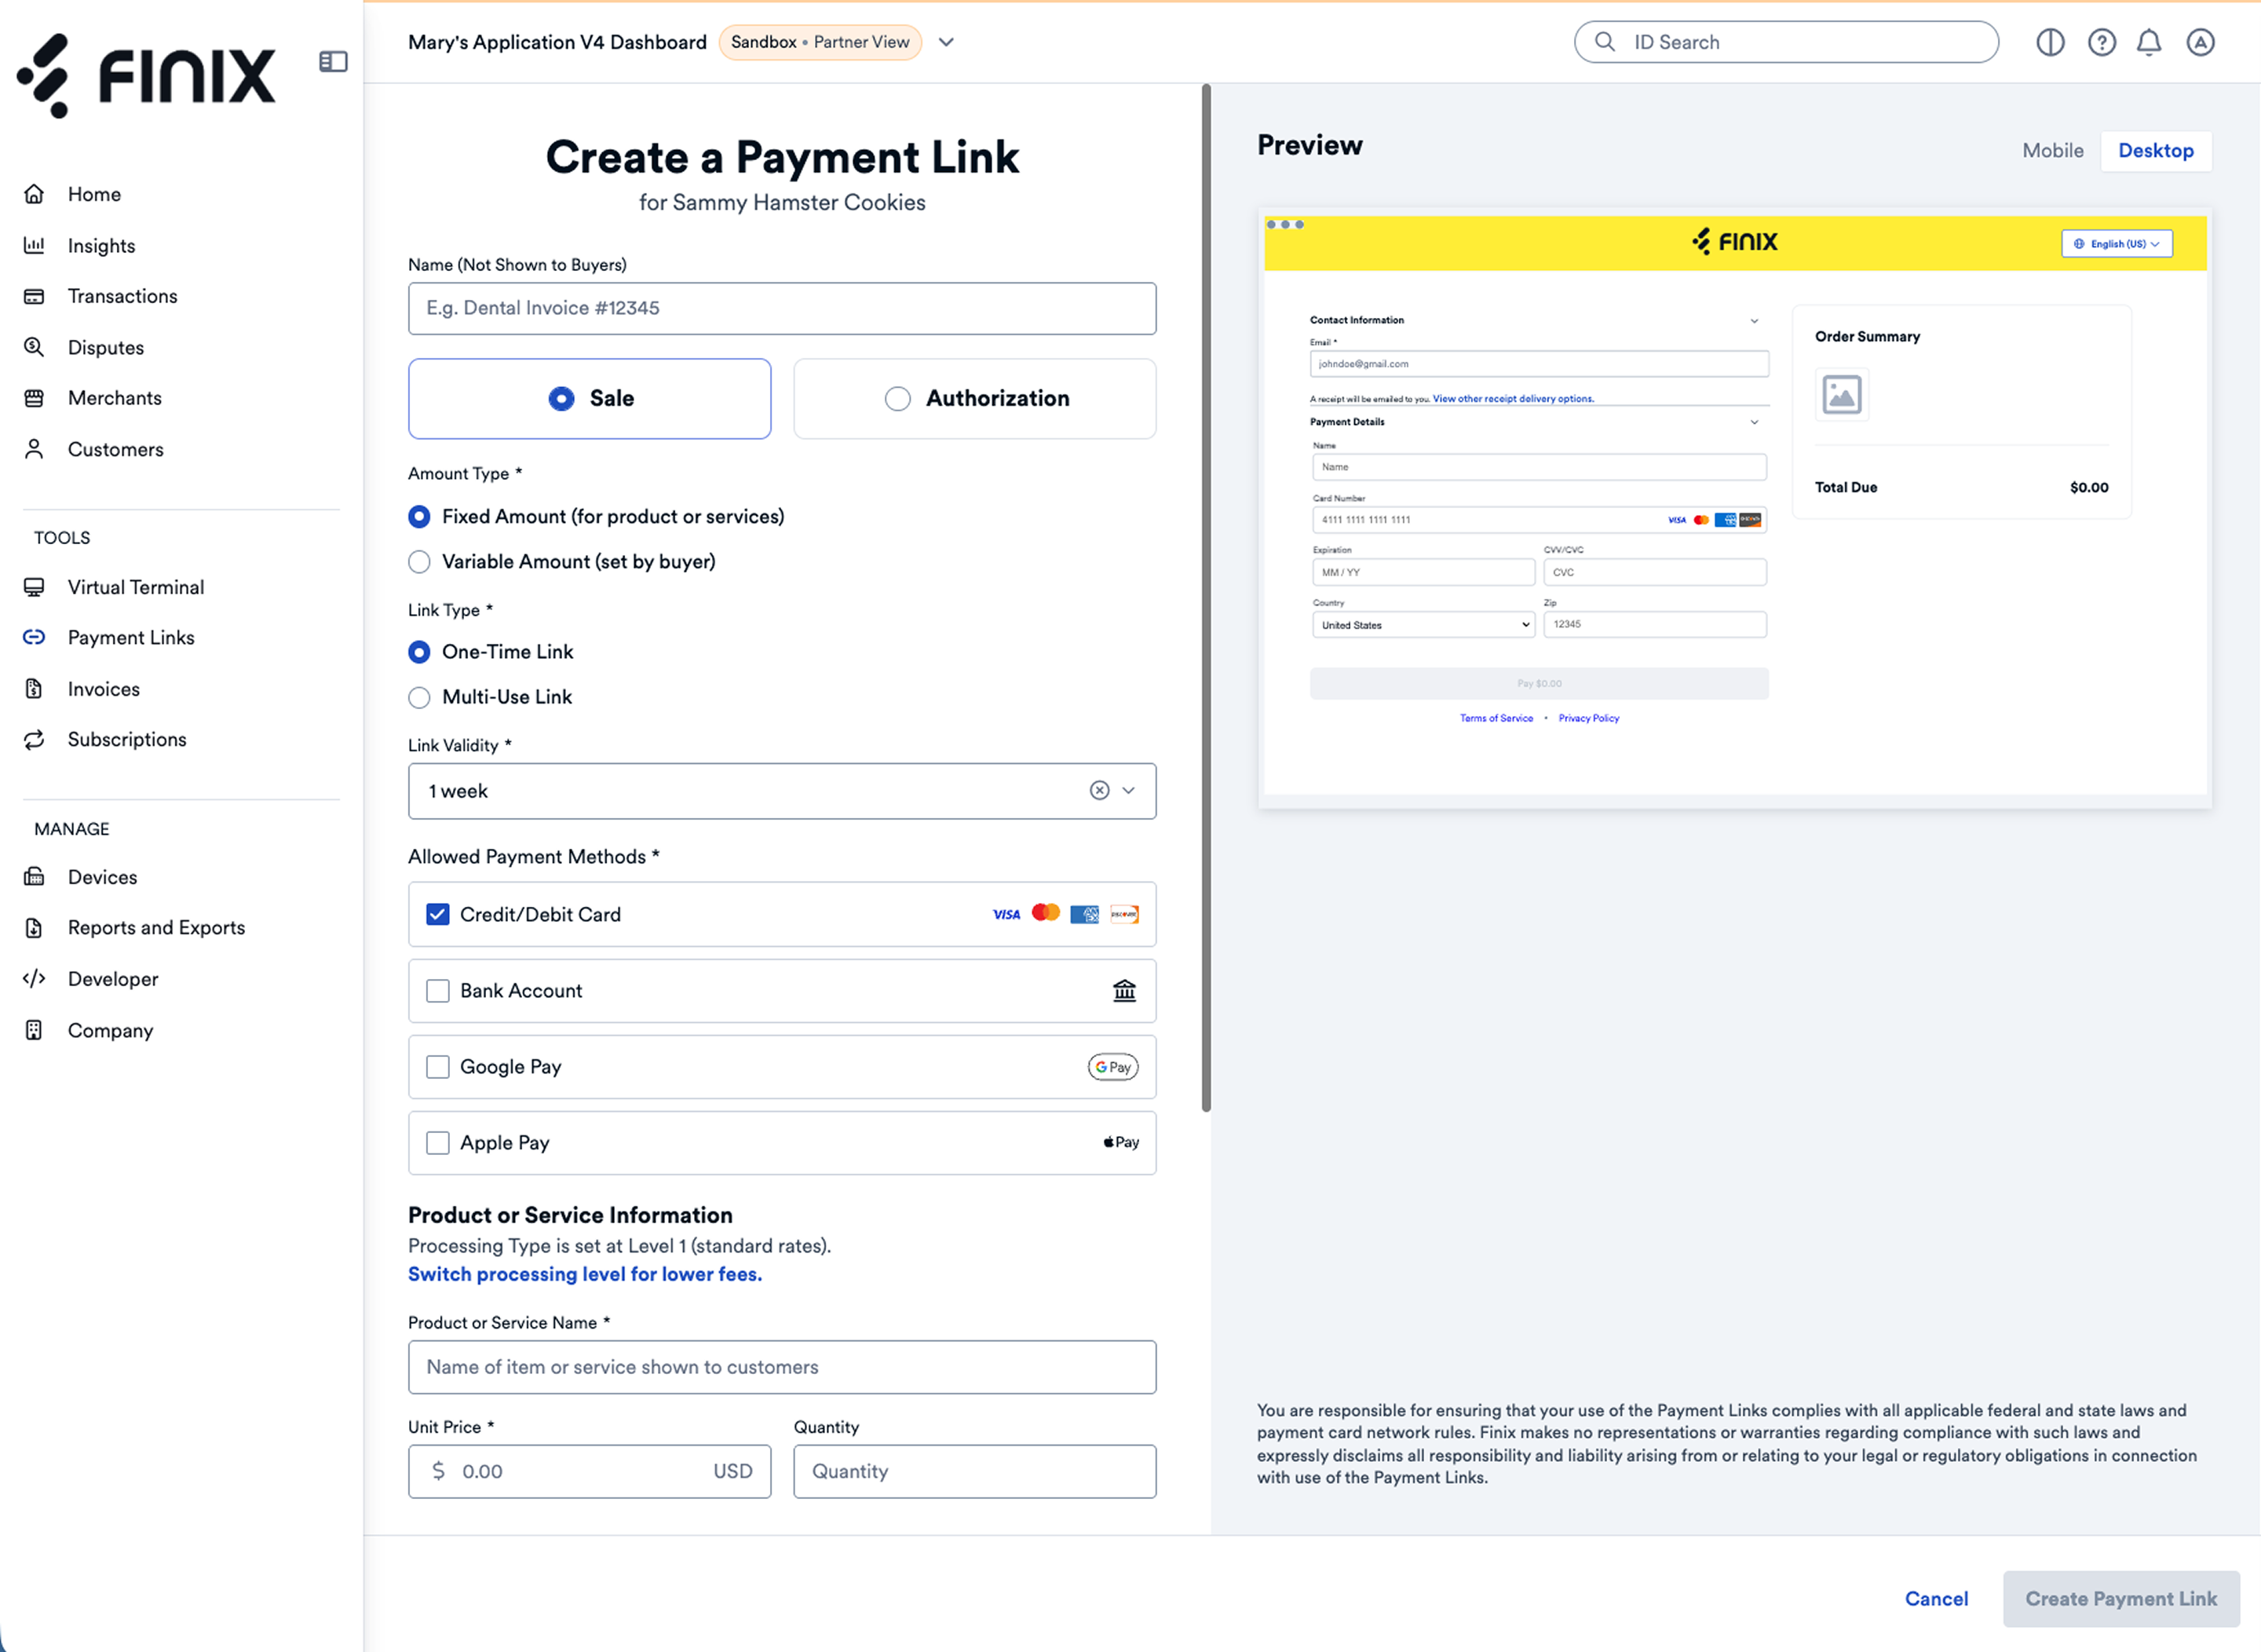
Complete each section of the form as described below.
| Field | Description |
|---|---|
| Payment Link Name | Internal label to identify the link in your records. Not visible to buyers. |
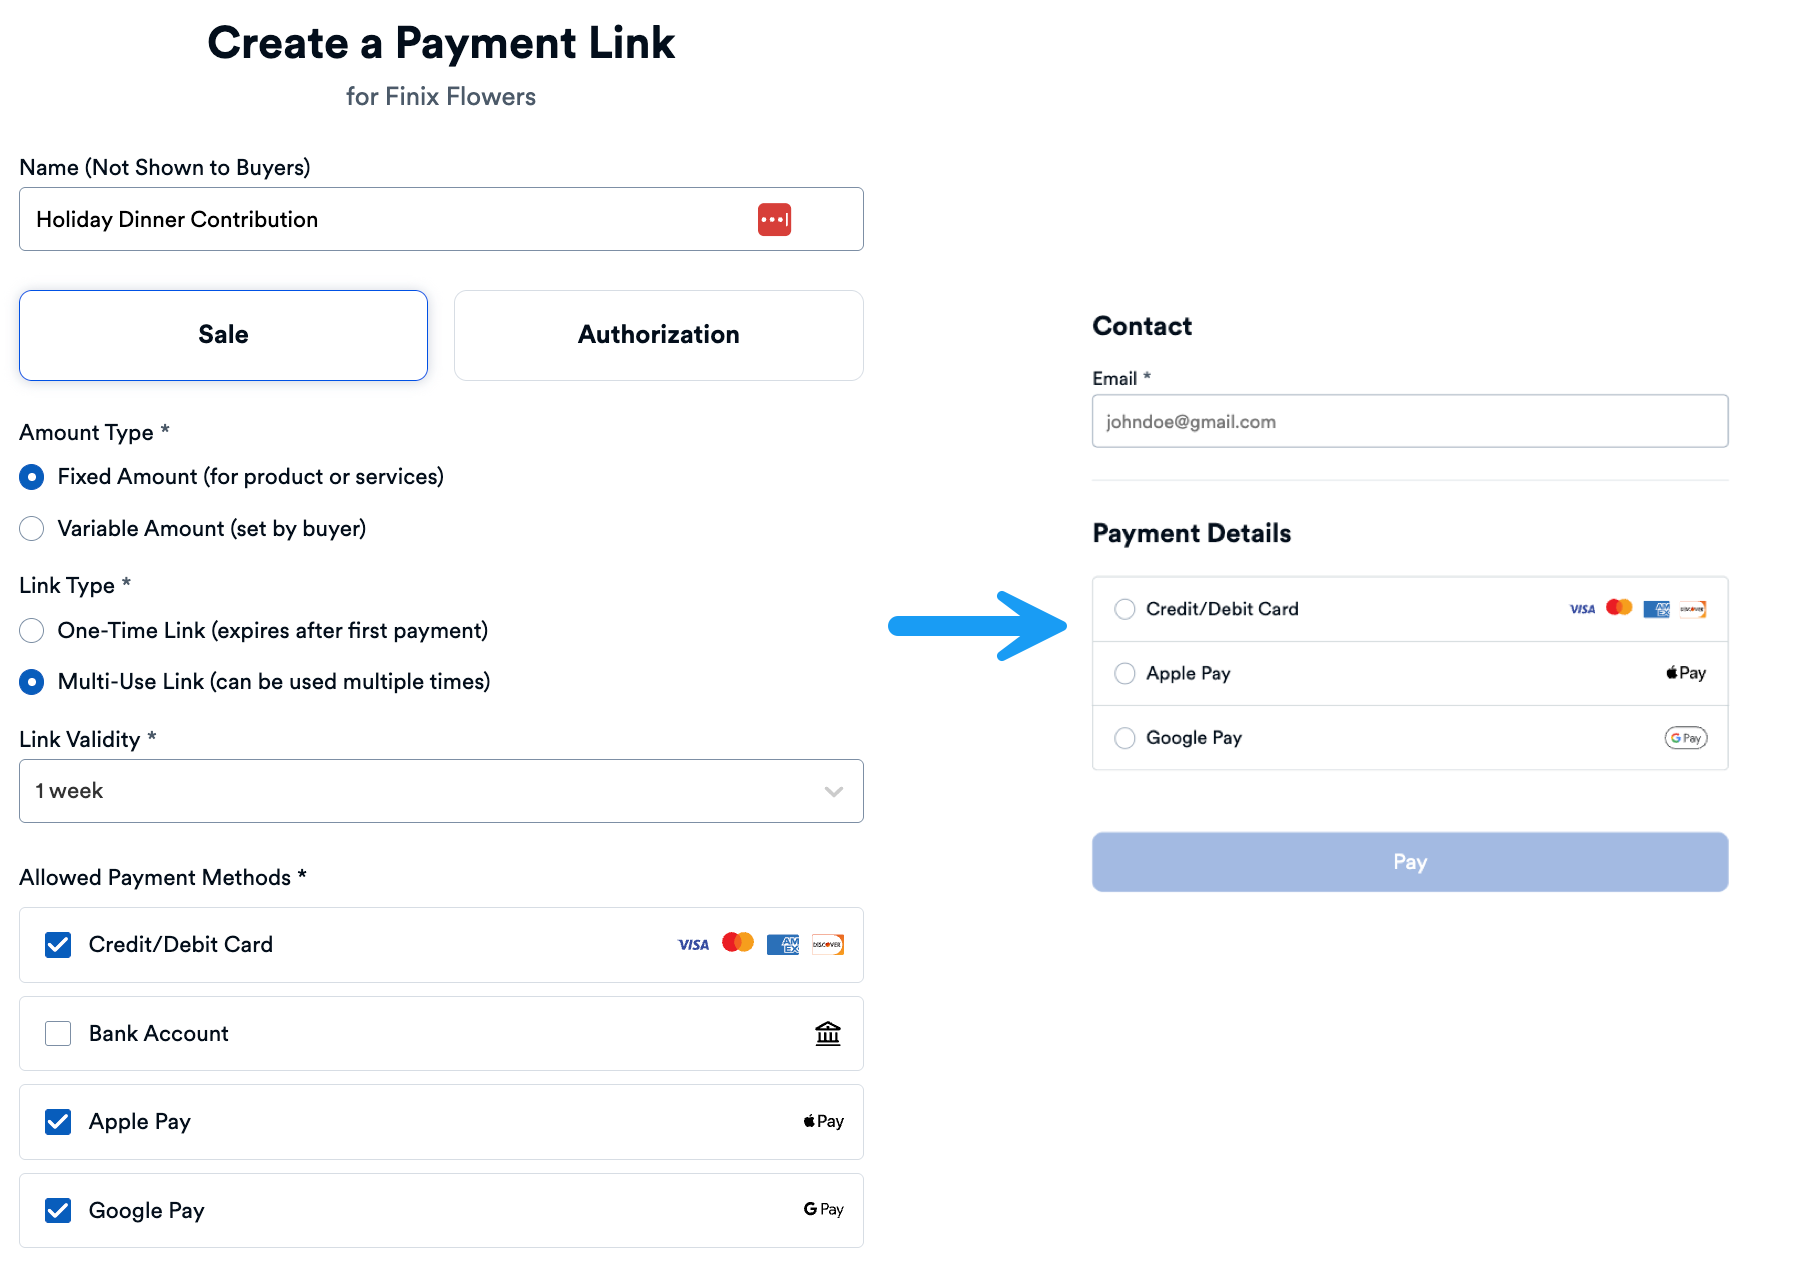
| Transaction Type | Choose Sale or Authorization. If Authorization, you must select Credit/Debit, Apple Pay, or Google Pay as the payment method. |
| Amount Type | Fixed: Set a specific amount for each item. Variable: Let buyers enter an amount within min/max limits you define. |
| Link Type | Single Use: Link works once. Multiple Use: Link can be reused. |
| Link Validity | How long the link remains active before expiring. |
| Allowed Payment Methods | Select which payment options to accept. |
Add one or more products or services you're charging for.

| Field | Description |
|---|---|
| Product/Service Name | What you're charging for. |
| Unit Price | Price per unit. |
| Quantity (optional) | Number of units. |
| Description (optional) | Additional details about the item. |
| Image (optional) | Product image displayed on the payment page. |
Click Add another product to include additional items.
| Field | Description |
|---|---|
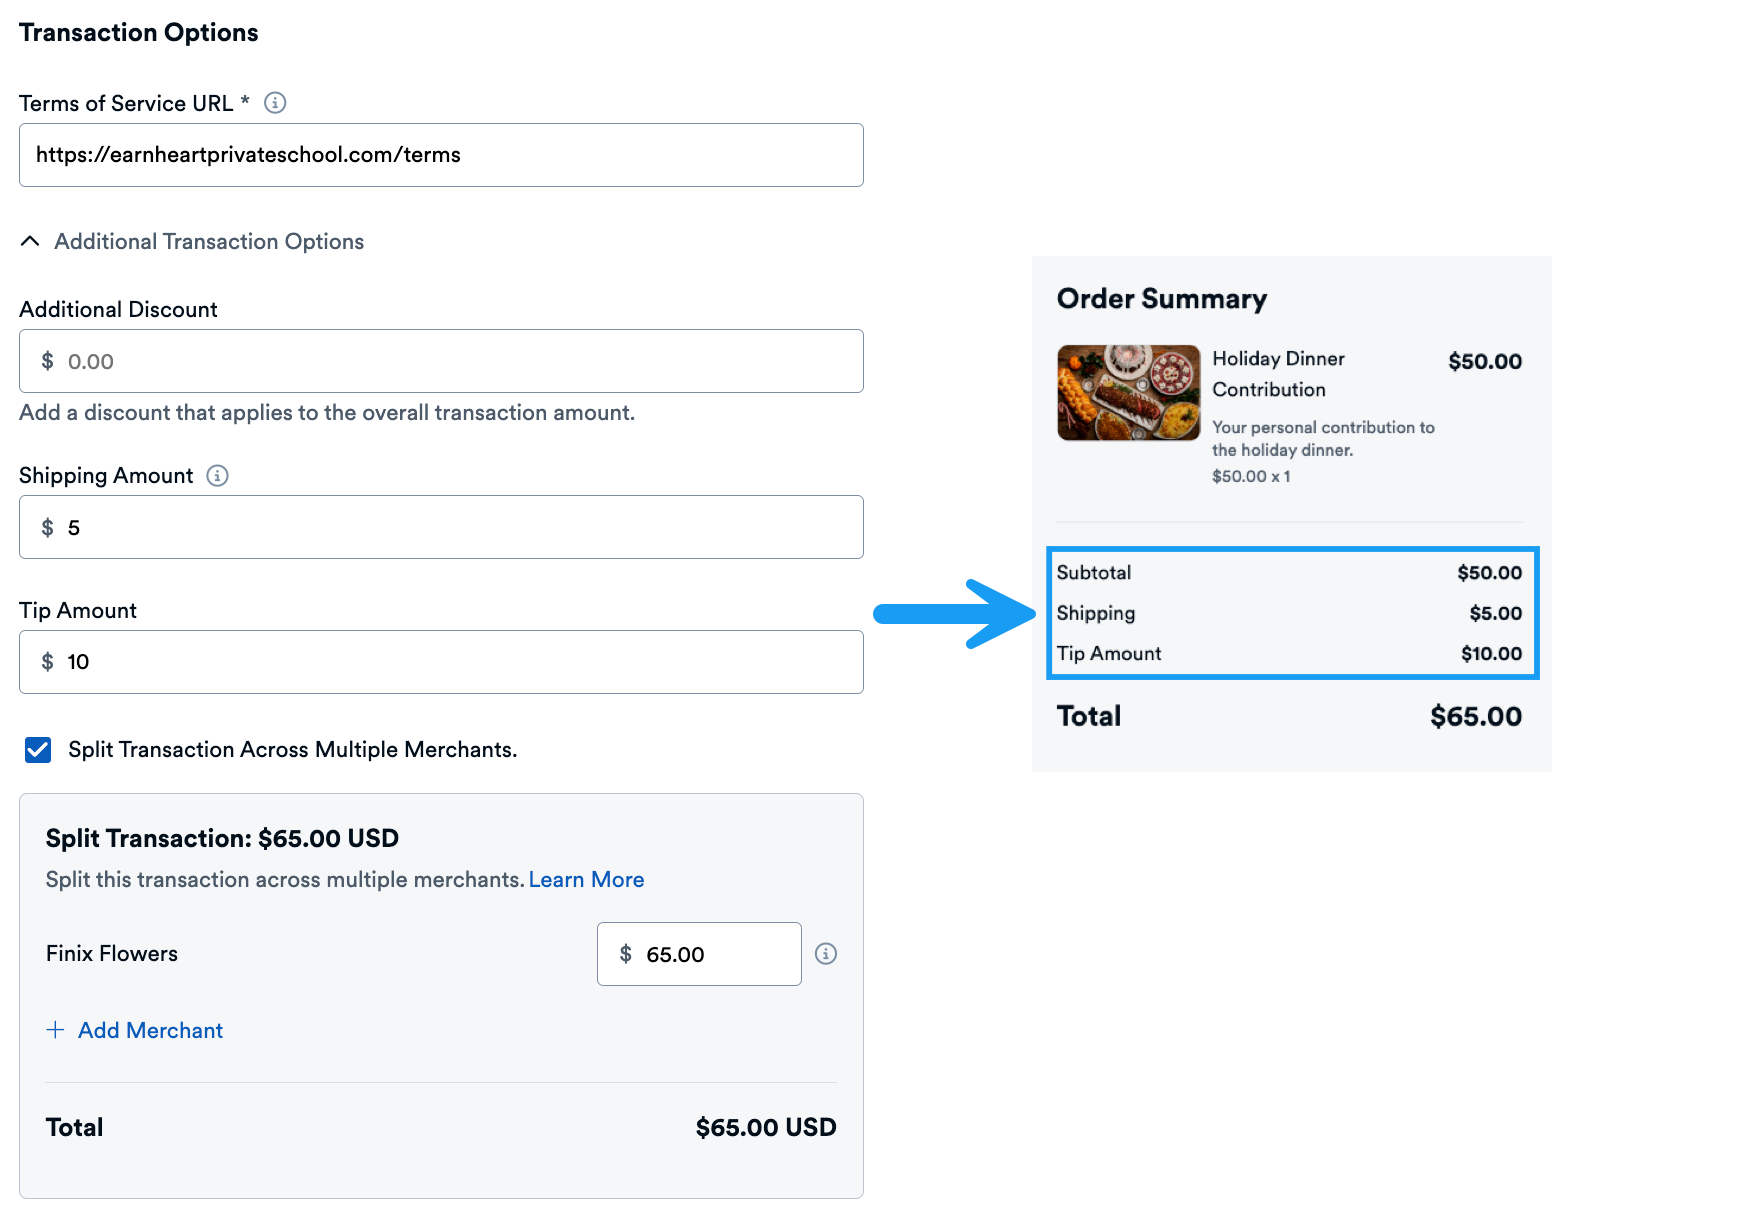
| Terms of Service URL | Link to your terms of service displayed on the payment page. Required for all links. |
| Additional Discount | Discount applied to the total. |
| Shipping Amount | Delivery costs. |
| Tip Amount | Tip added to the total. |
| Split Transaction Across Multiple Merchants | Used to split transactions. |
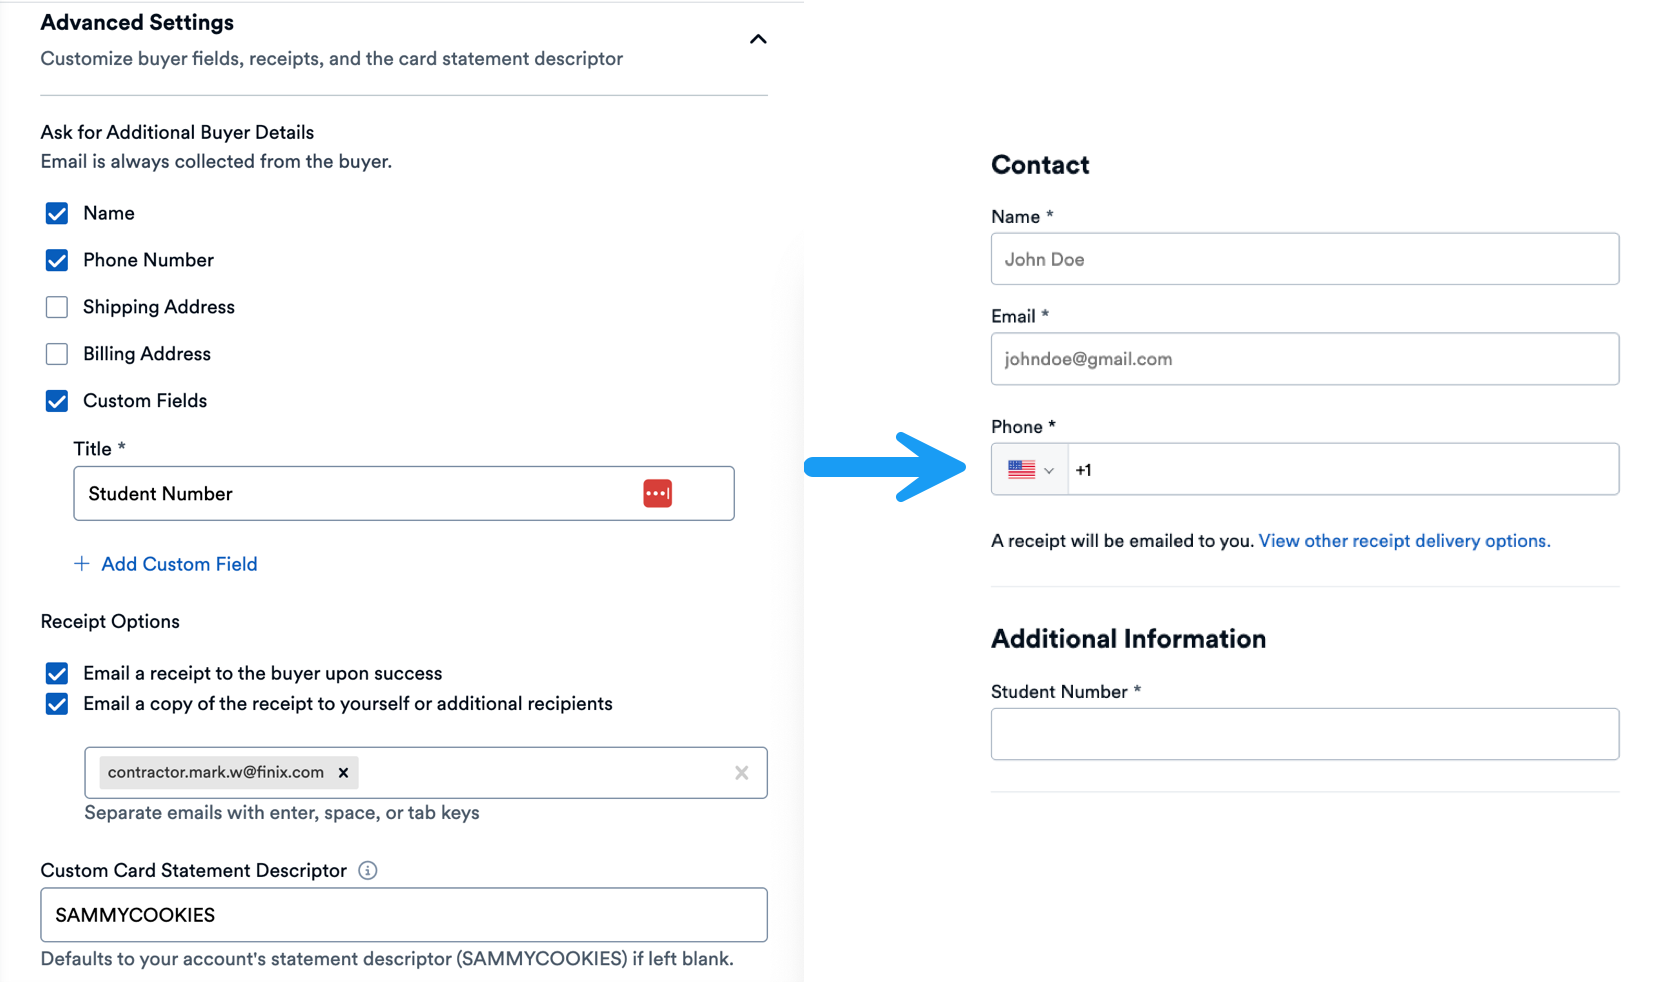
| Setting | Options |
|---|---|
| Additional Buyer Details | Name, Phone Number, Shipping Address, Billing Address, Custom Fields (e.g., account number, project ID). |
| Receipt Options | Email a receipt to the buyer, email a copy to yourself or additional recipients. |
| Custom Card Statement Descriptor | The description of the merchant that appears on the buyer's bank or card statement. |
Customize colors, logos, and button styles. For details, see Customize Branding.
Click Create Payment Link to finalize. You'll see a confirmation and can view the payment link details page.
From the payment link details page, you can
- Share the payment link
- Edit the payment link
- Deactivate the payment link
To edit or deactivate the payment link, click the ... to reveal the additional options.

After creating your link, share it with buyers. Options include:
- Copy the link URL directly
- Send via email
- Embed in your website or app
For detailed instructions, see Sharing Payment Links.
Monitor payment state and view transaction details from the Dashboard. After a buyer completes payment, you can:
- View payment confirmation
- Access transaction details
- Download receipts
For more information, see Tracking Payment Links.
Integrate webhooks to receive real-time notifications when:
- A payment is completed
- A payment fails
- An authorization is created