Follow this guide to activate Standalone Mode on your terminal and process your first transaction.
Finix ships your terminal, and your Point of Contact provides a tracking number. If you order a device using the Device Store, you can find that information in your Finix Dashboard.

The PAX A800 and PAX A920Pro come with a USB-C cable and a power adapter.
To power on the device:
Connect the power adapter or USB-C cable to a power source.
Charge the device to at least 70%.
Once the device is charged, press and hold the power button down for 2 seconds until the LCD backlight turns on.
Your device can connect to the internet via Wi-Fi or ethernet.
To connect via ethernet, you will need a PAX A800 Cable Hub. Follow the provided instructions to connect the device.
To connect to the internet via Wi-Fi:
- From your device’s Home screen, tap on Settings.
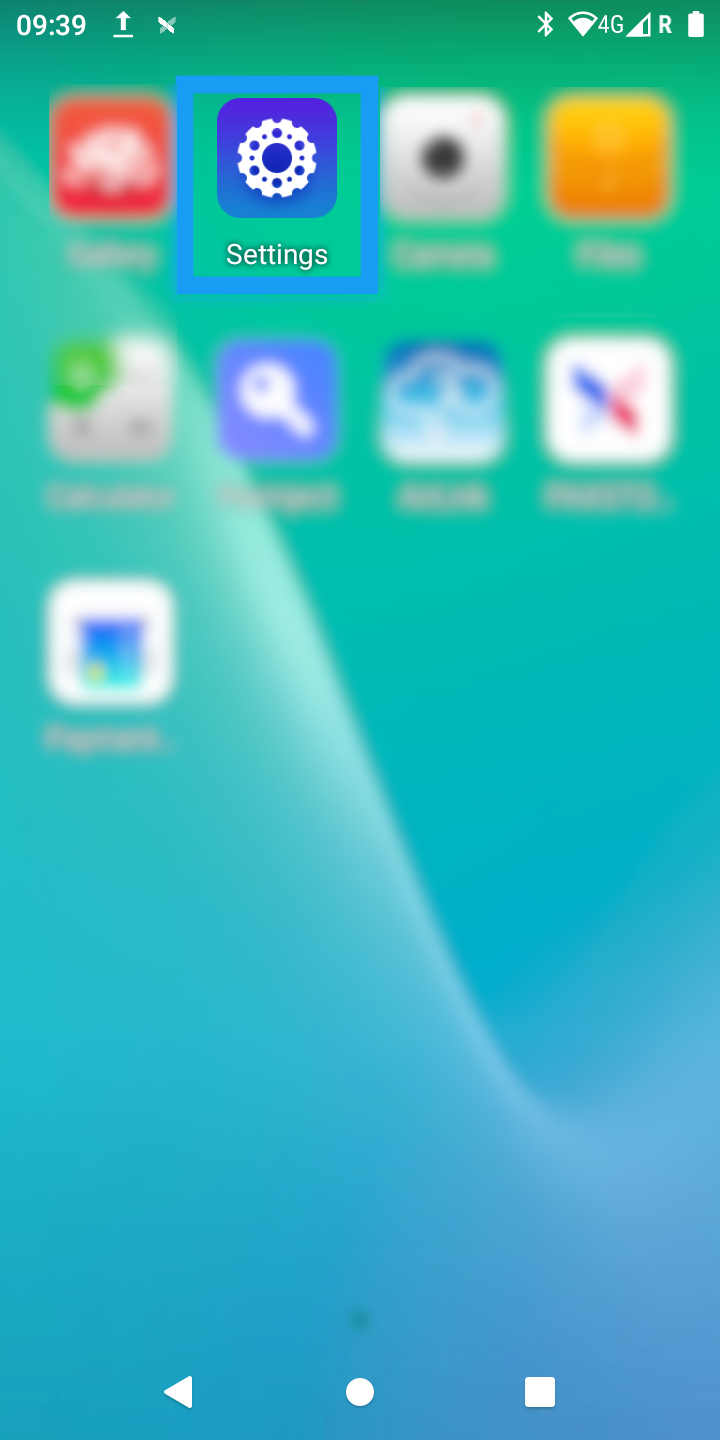
- Tap on Network & Internet.
Periodically, when accessing network settings, you will be prompted to enter a password.
Try these password combinations. Contact Finix Support if none work.
pax9876@@Dev9876@@98769876@@
Tap Wi-Fi.
Tap your network and connect to it.

From the Settings screen, click System Updates to see if any updates are available; if so, update the device to the latest version.
You need the device's S/N to activate it later.
If your device is not activated, you will see the Serial Number in the Payment app.

If the S/N is not displayed, you can find it in two ways.
Find the S/N on the bottom of the device.
To find the S/N within the Payment App:
Go to the Home screen.
Tap the Payment App icon.
- The Payment App displays.

Tap Diagnostics.
- The Diagnostics screen appears.
Under the Overview section, write down the serial number.

Ensure your device is connected to the internet, the Finix Payment App is open, and you have the serial number available.
You should have received your invitation to access your Finix Dashboard account.
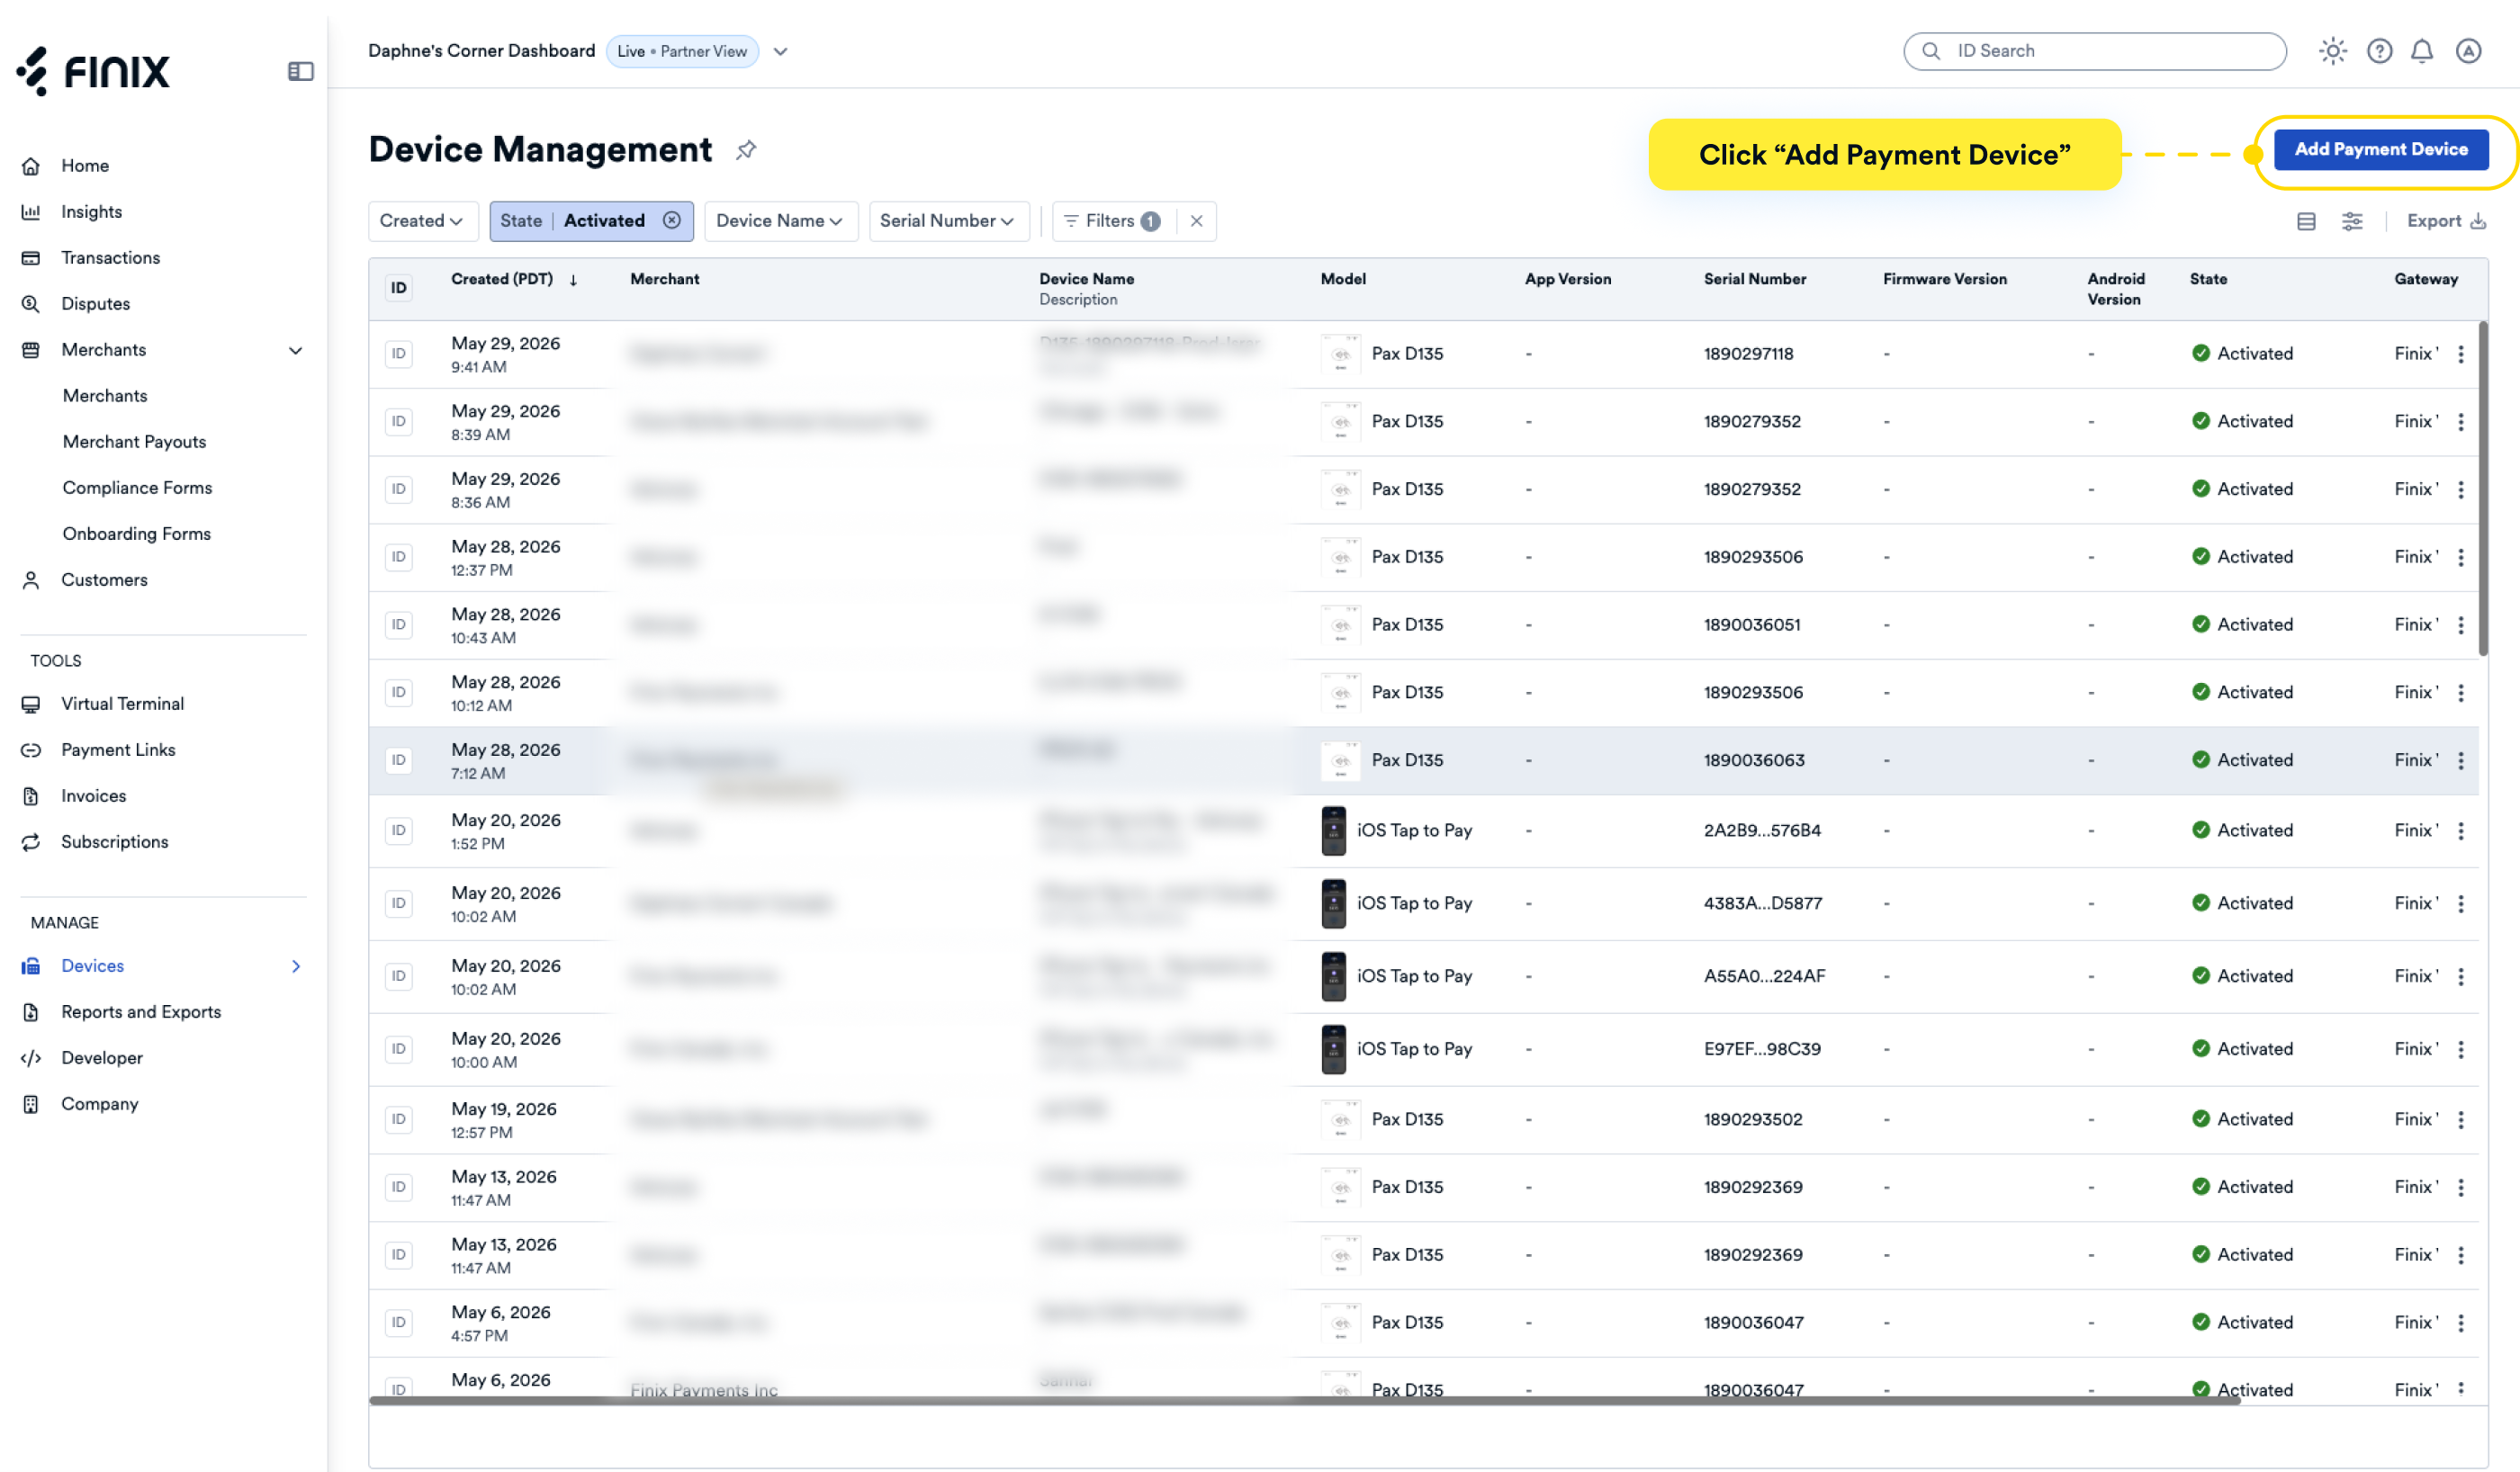
To add a new device:
Log in to the Finix Dashboard.
Click Devices from the left navigation.
Click Add Payment Device.
If you have any questions, contact your Customer Delivery Manager. They can walk you through this activation step.
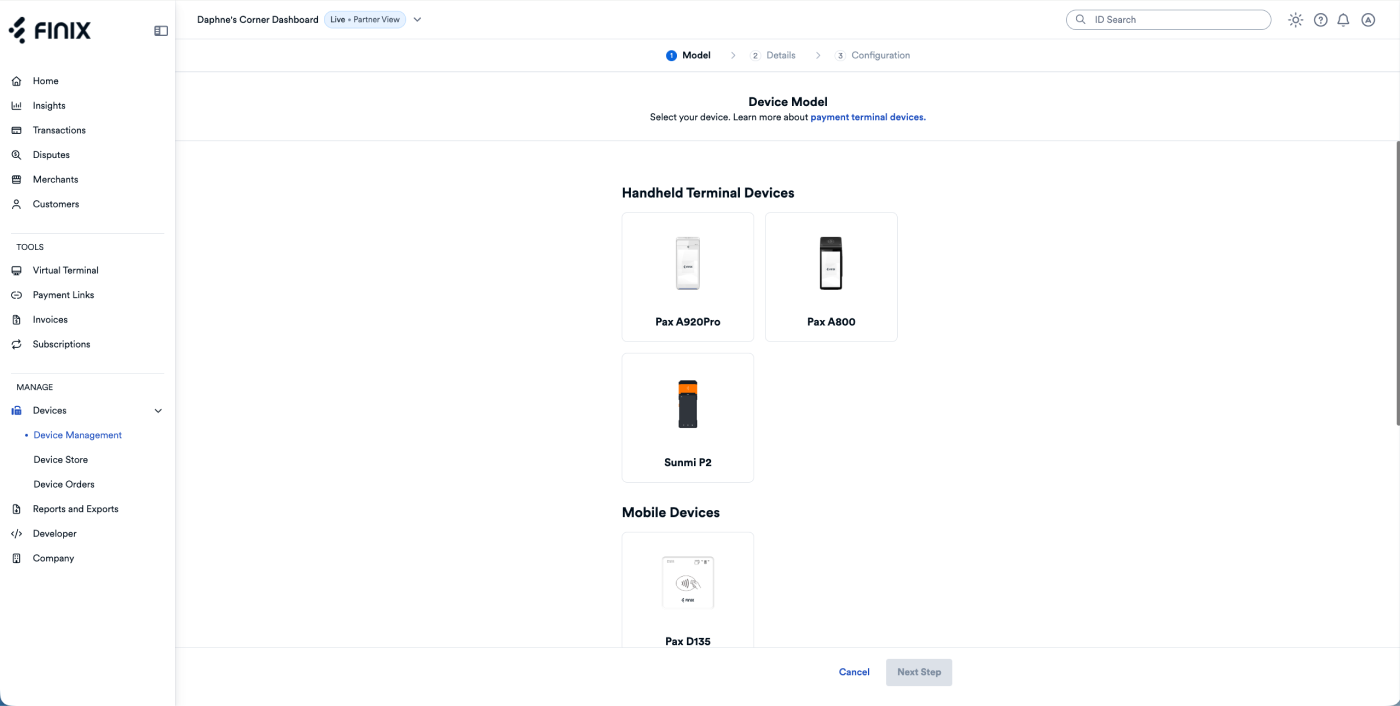
From the Device Model screen, select your device (e.g., PAX A800).
Click Next Step.
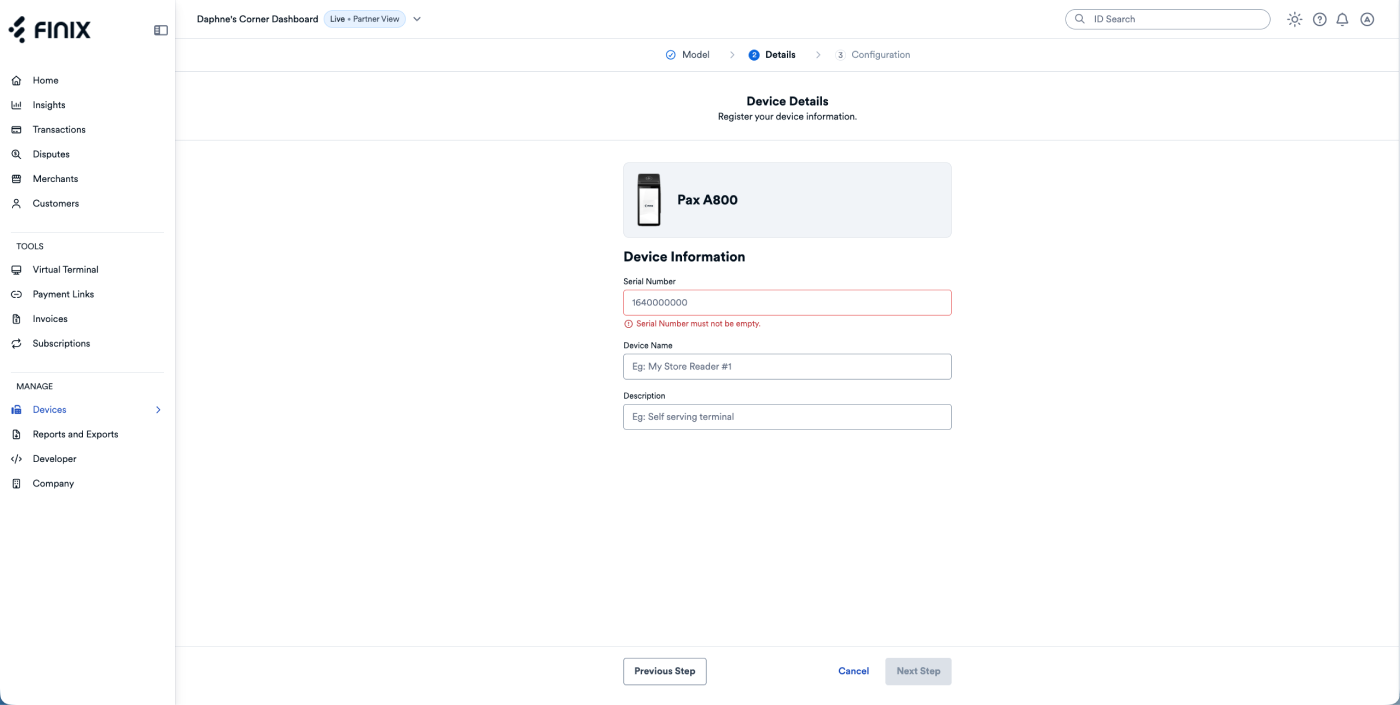
- The Device Details screen displays.
- On the Device Details screen, enter the device's Serial Number.
If you have already activated the device, Finix will display a warning for an existing device with the same serial number. Finix also provides a link to the activated device, warning that adding it again will override previous settings.
Enter a Device Name.
Enter a Description for the device.
Click Next Step.
- The Device Configuration screen displays.
To enable standalone mode:
- Toggle Allow Standalone Mode and, if desired, Allow Standalone Authorizations.
- Toggle any other settings you want to enable on the terminal.
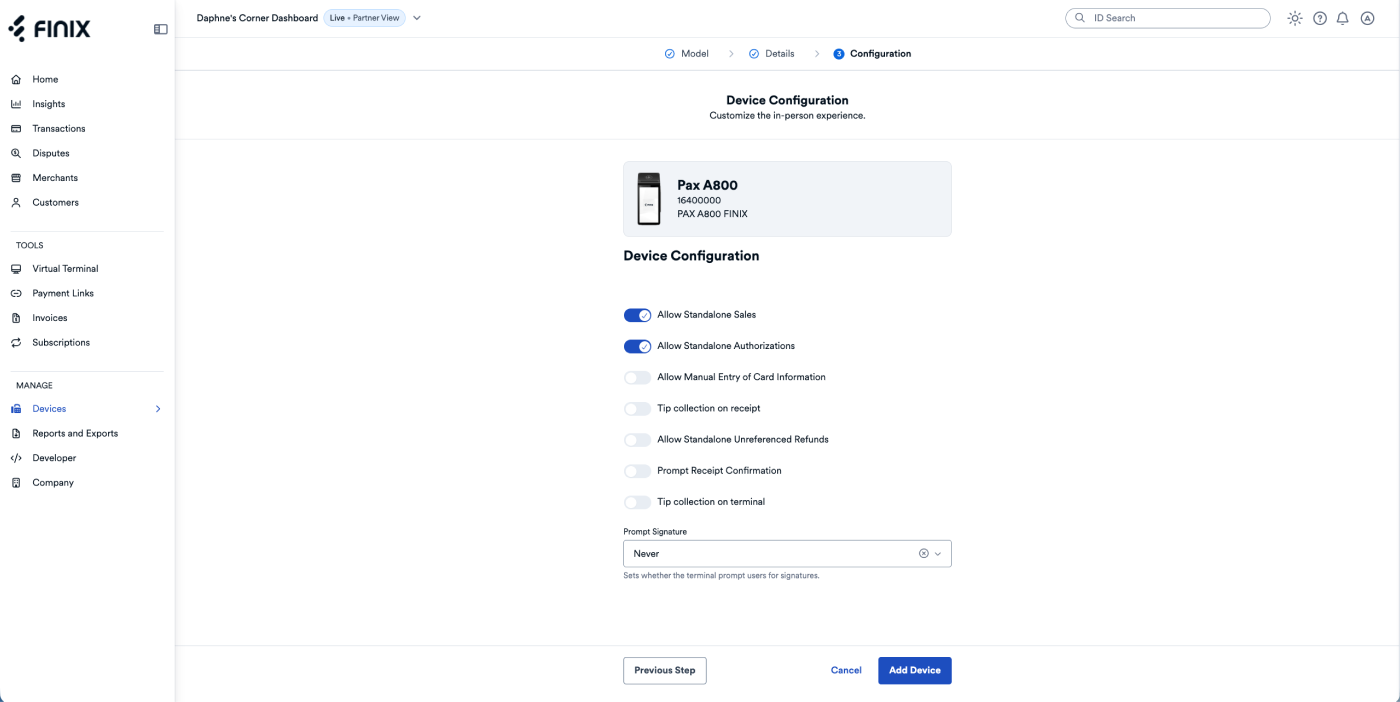
- Click Add Device.
- You will see a confirmation message indicating that you added the device to your dashboard.
- A Payment Device details page displays.
Now that you have added the device to your dashboard, activate it next.
- From the device details page, click Activate Device.
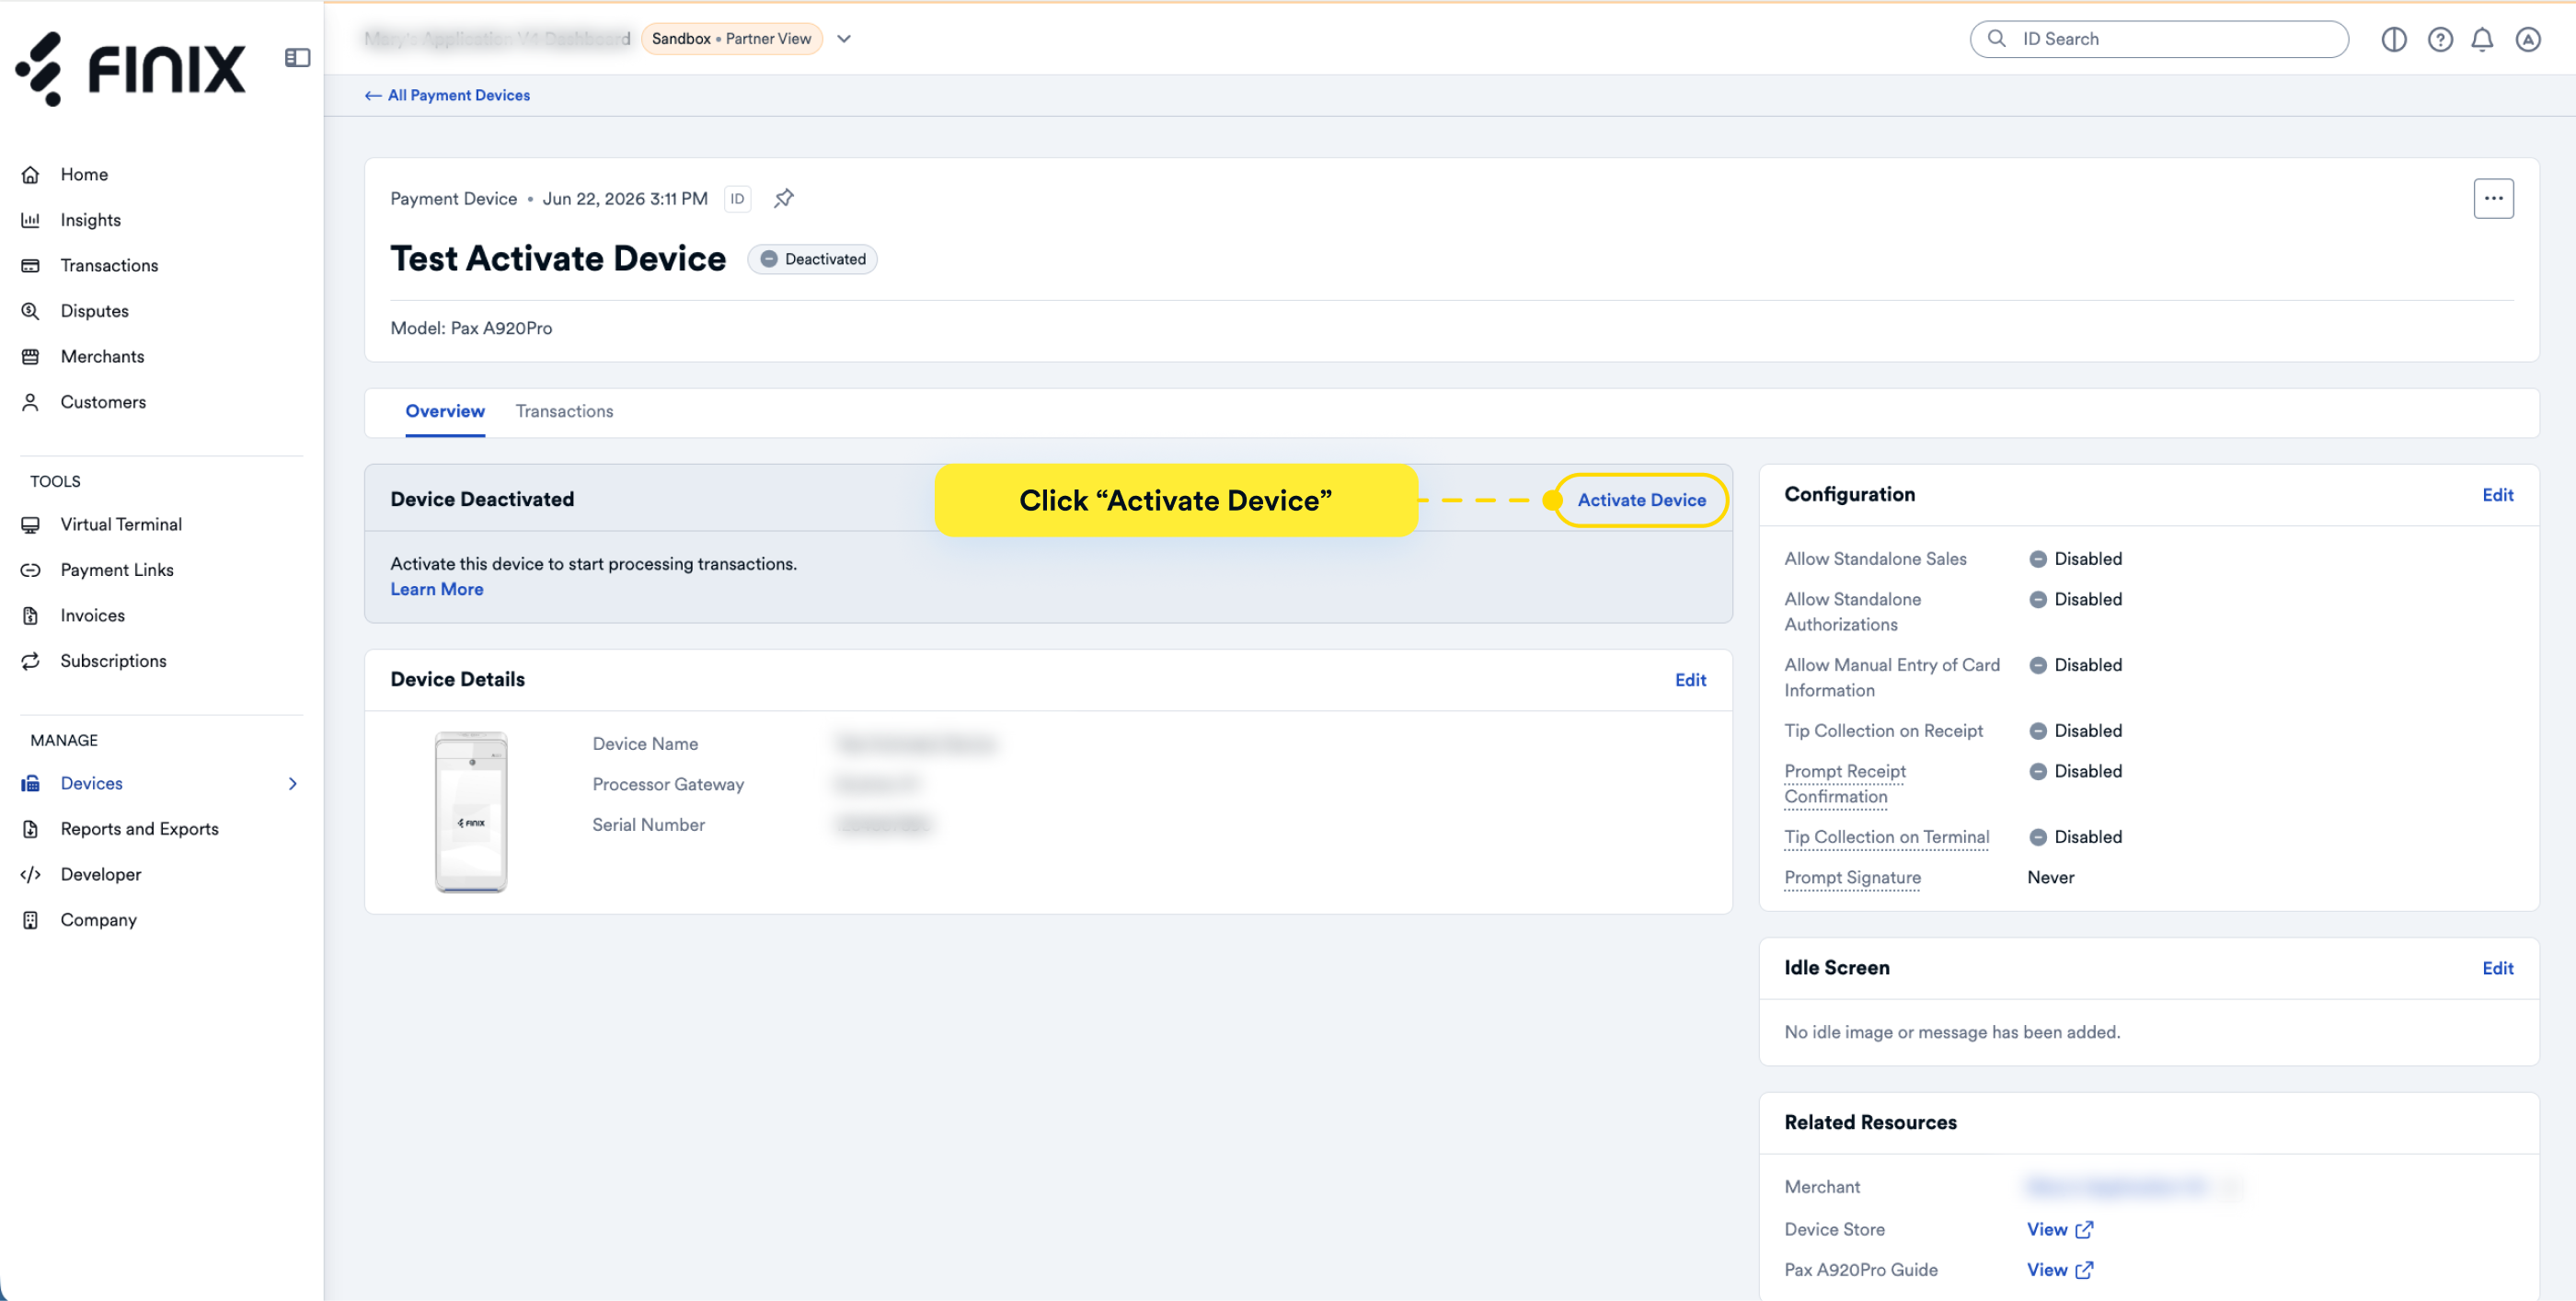
- An Activate Device popup displays.
Open the Payment App on your device.
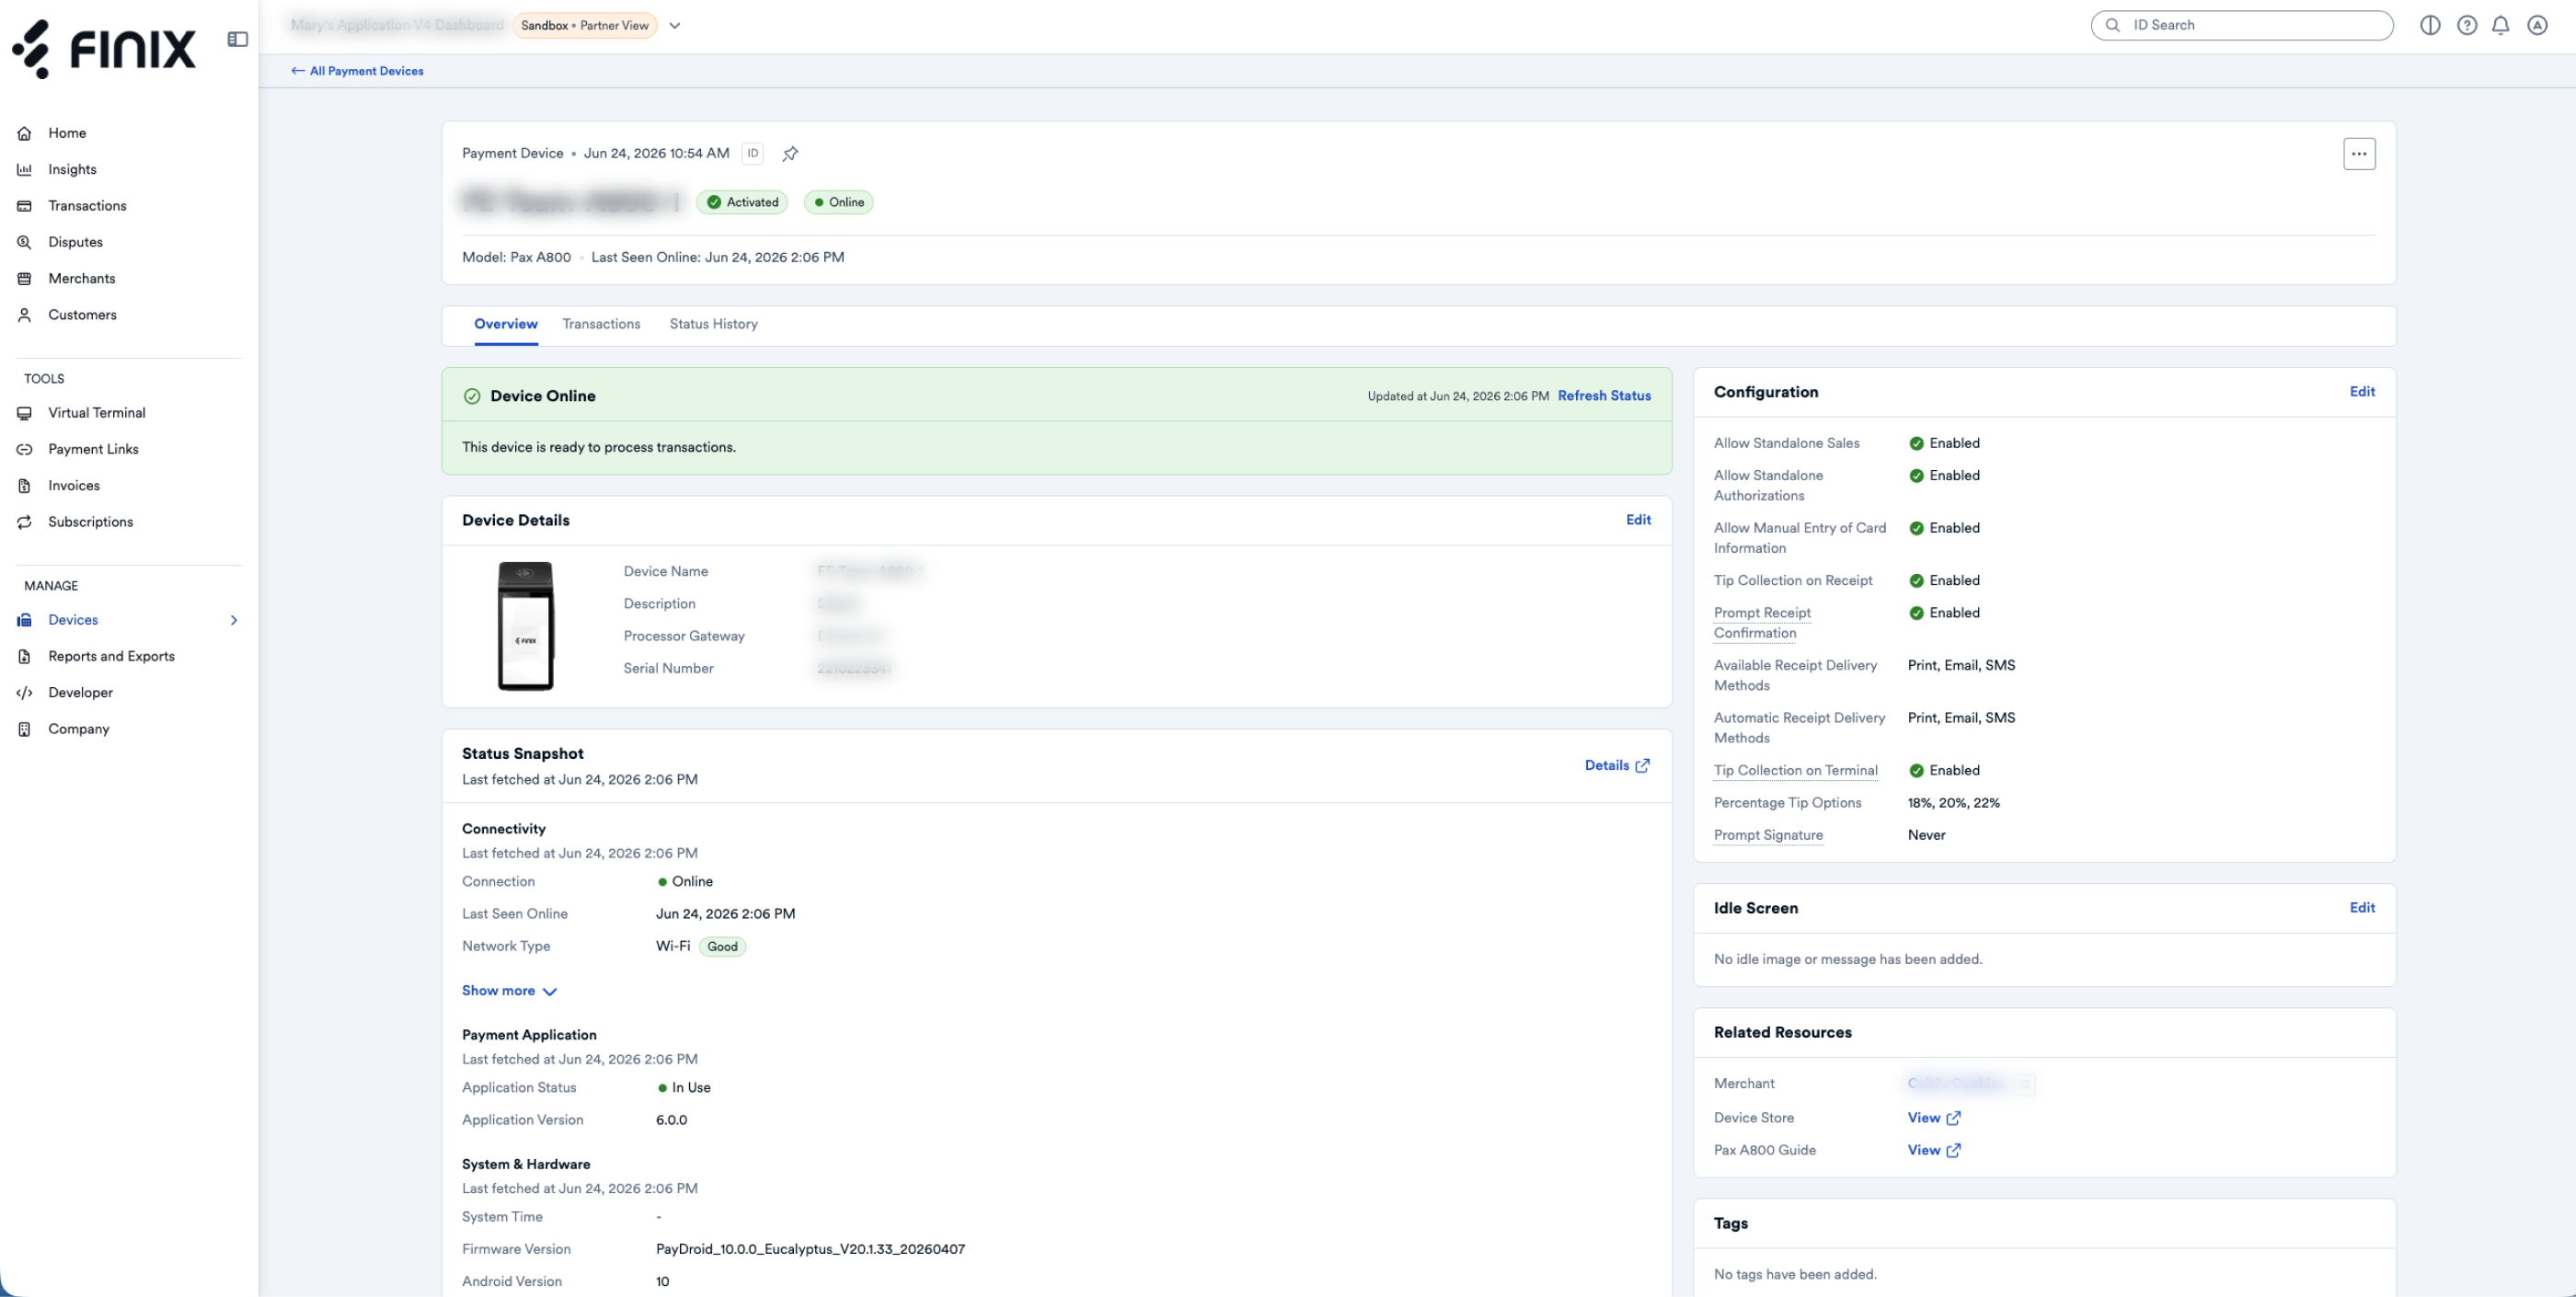
From the dashboard, on the Activate Device popup, click Activate Device.
- A Device Activated confirmation popup displays.
Click Done.
You should now see the device as online on the Payment Device details page.
The payment device displays a screen where you can create a sale or authorization (if you enabled authorizations in standalone mode).
To create a transaction:
Using the keypad, type the amount of the sale.
Tap Next.

Two options:
Tap Confirm and Pay to allow the buyer to tap, insert or swipe their card to pay.
Tap Manually enter a card to manually enter the card details.
If you enabled tips when adding the device, a Tip screen displays that allows the user to leave a tip or tap No Tip to skip it.

A page displays asking the buyer to tap, insert, or swipe their card.
If the payment is approved, a Payment Approved screen displays, asking the user, "Would you like a receipt?". The options include Print, Email, Text, or No Receipt.

Manually enter the card details. You can use one of the test codes.
If the payment is approved, you can print the merchant receipt copy or tap Done to exit.

You have now completed your first transaction in standalone mode.
Besides the Checkout screen, there are two other screens of the payment app that may be useful to know about: Transactions and Settings.
You can view transactions on the Transactions screen in the Payment App. You can filter transactions by Payments, Authorizations, and Refunds, and tap the hamburger icon in the top-right corner to access advanced filtering.

Checkout - Configure device settings like tipping, receipts, surcharging, signatures
Diagnostics - View device, system, and connectivity details
