Accept payments with Finix on Jotform.
Jotform is a leading no-code form builder to create payment forms, surveys, lead capture tools, and workflow automations. It provides a drag-and-drop interface with built-in support for payment collection, conditional logic, and third-party integrations. Finix integrates with Jotform through the Cybersource payment gateway, enabling merchants to collect payments directly within Jotform forms and reconcile transaction data within their Finix Dashboard.
- Finix Live Account
- Active Jotform account
To create a Finix account, you can follow our step-by-step guide or sign up directly for a live or sandbox account.
We recommend choosing Direct Merchant as your Customer Type.
Finix supports Jotform via our Cybersource Gateway integration. Please note that there is an additional fee for using our Cybersource integration.
For more information, please reach out to your Finix point of contact.
- To create a Cybersource integration, navigate to the Integrations page on your Finix Dashboard.
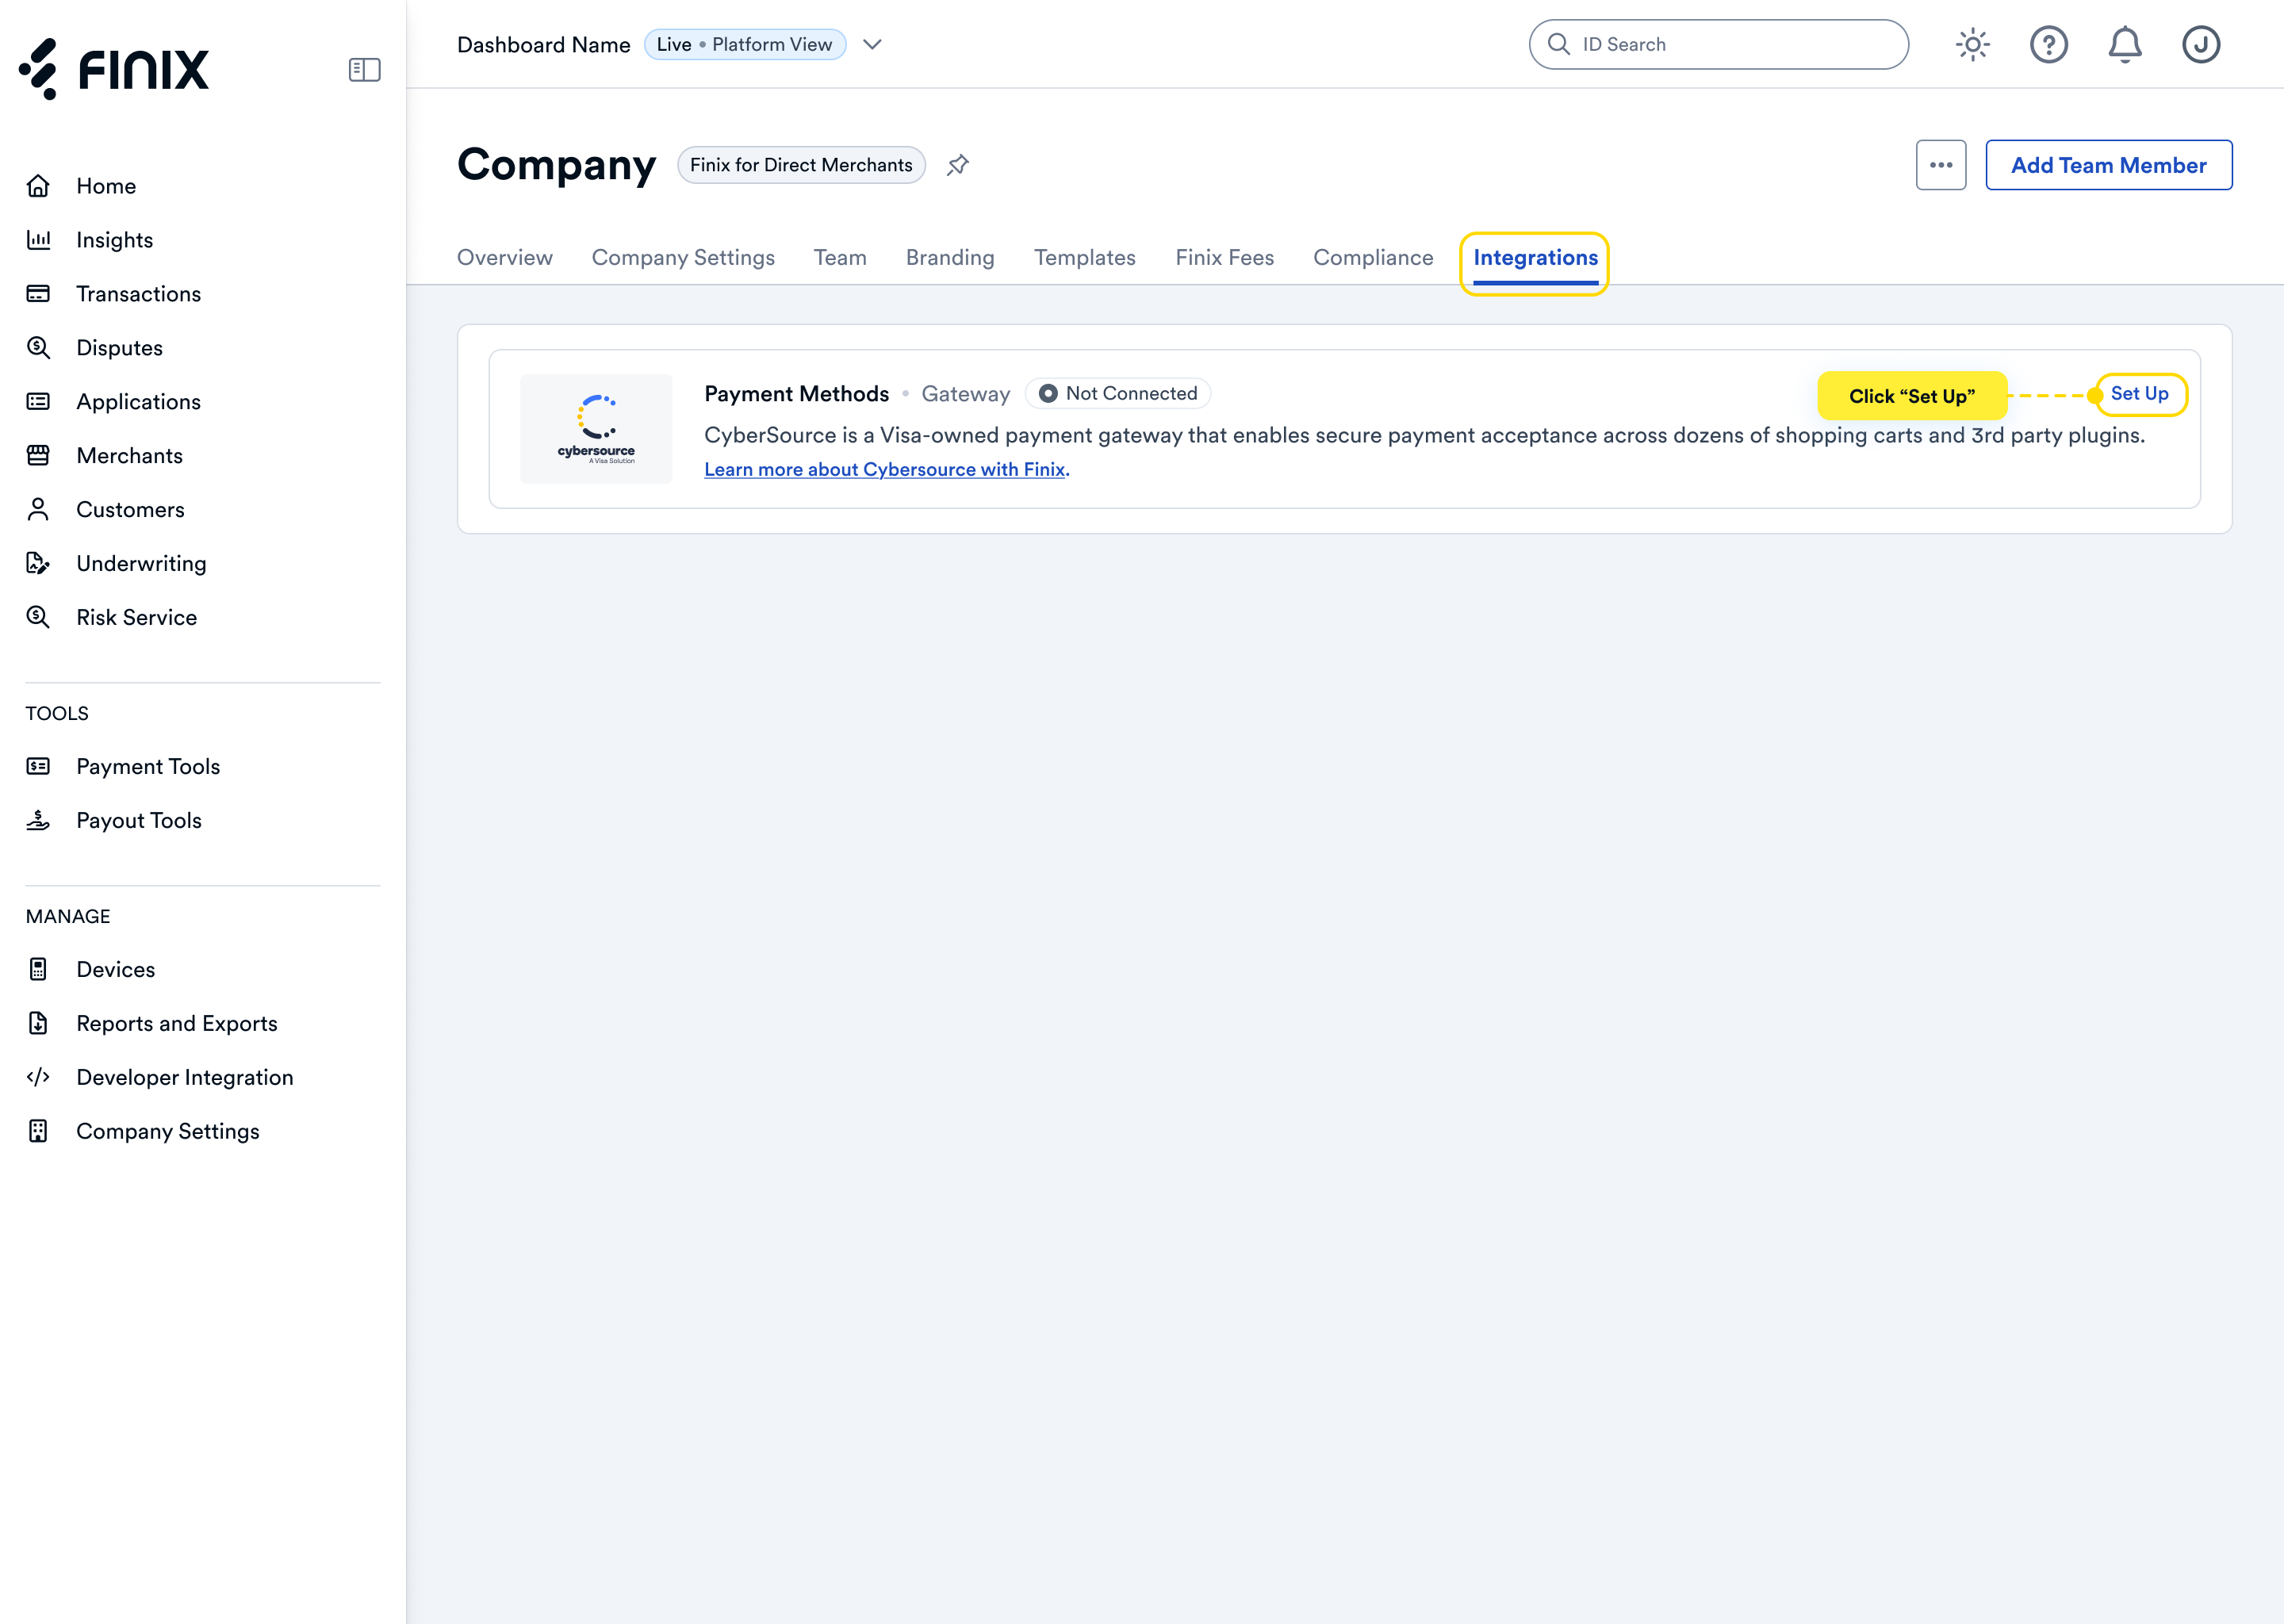
- Sign up for Cybersource. You can view detailed instructions in our guide, here.
- After accepting the Cybersource invitation email, retrieve the following credentials from the Cybersource Business Center — you'll need these to configure Jotform:
- Merchant ID — your unique Cybersource account identifier
- Transaction Key — generated in the Business Center; authorizes and encrypts transaction requests between Jotform and Cybersource
Before you proceed, ensure you have:
- Approved Finix Merchant Account
- Cybersource Gateway Integration linked to your Finix Merchant Account
- Cybersource credentials from Step 2
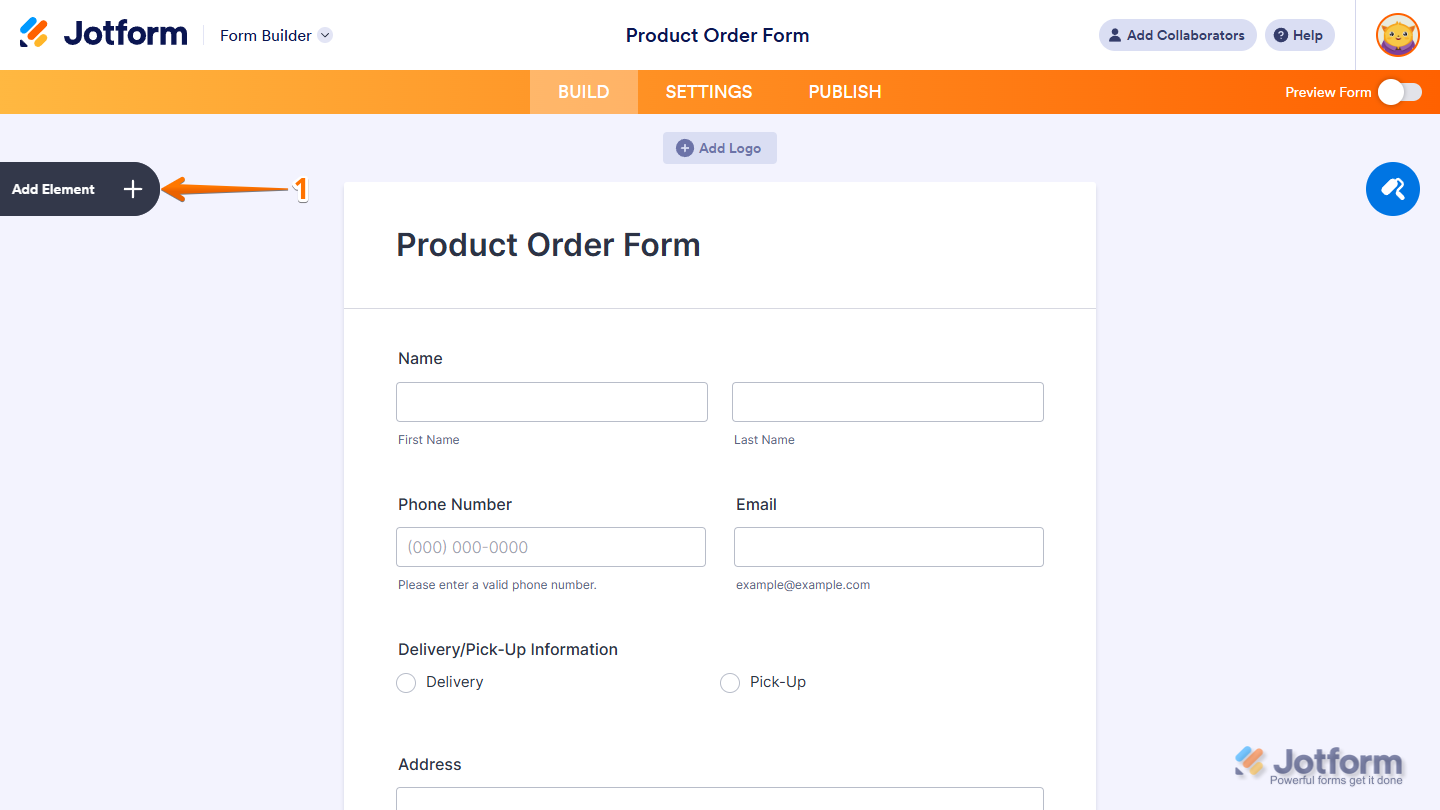
Jotform includes a native CyberSource payment element in the Form Builder.
For full details, refer to the Jotform CyberSource integration guide.
- Open your form in the Jotform Form Builder and click Add Element in the left sidebar.
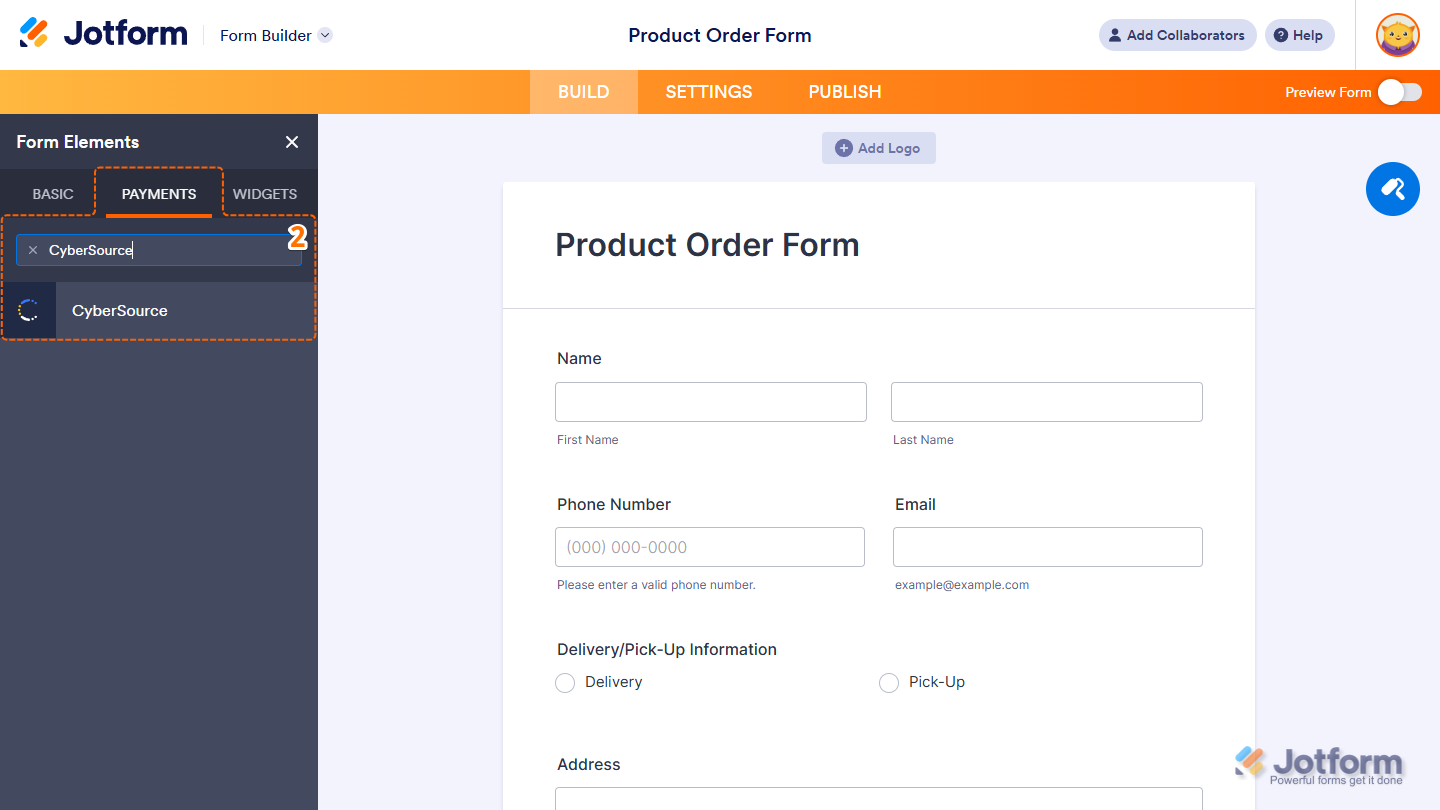
- Navigate to the Payments tab and search for and select CyberSource.
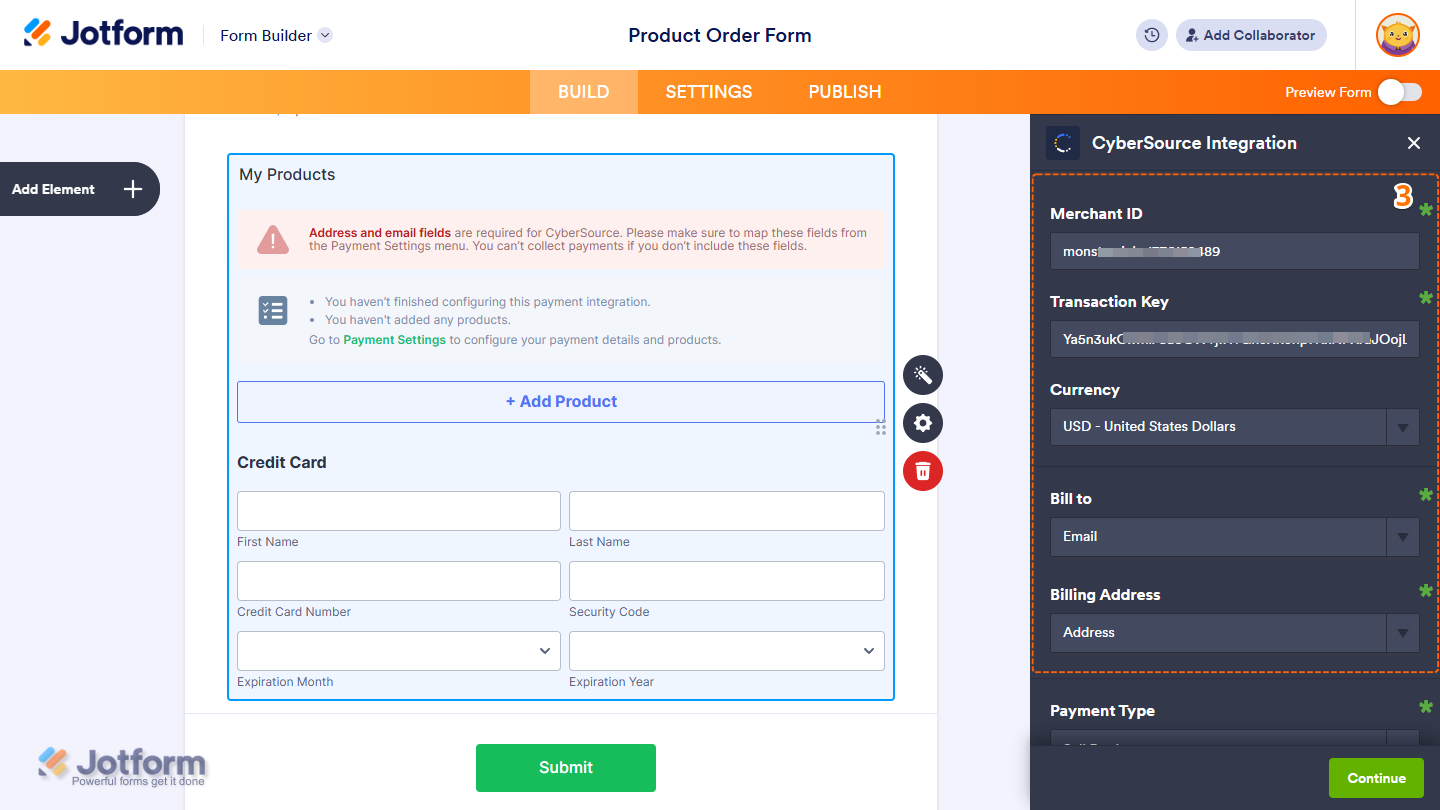
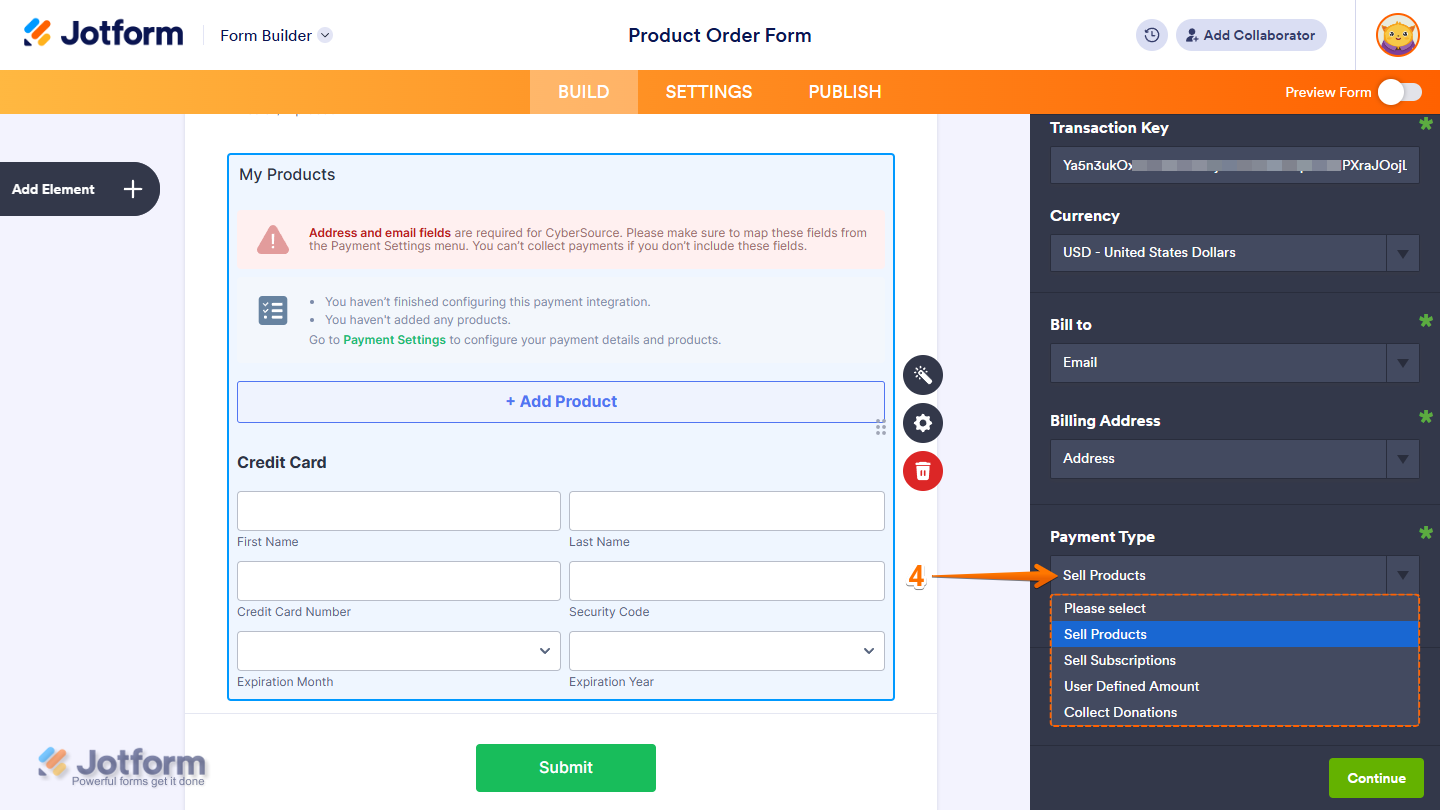
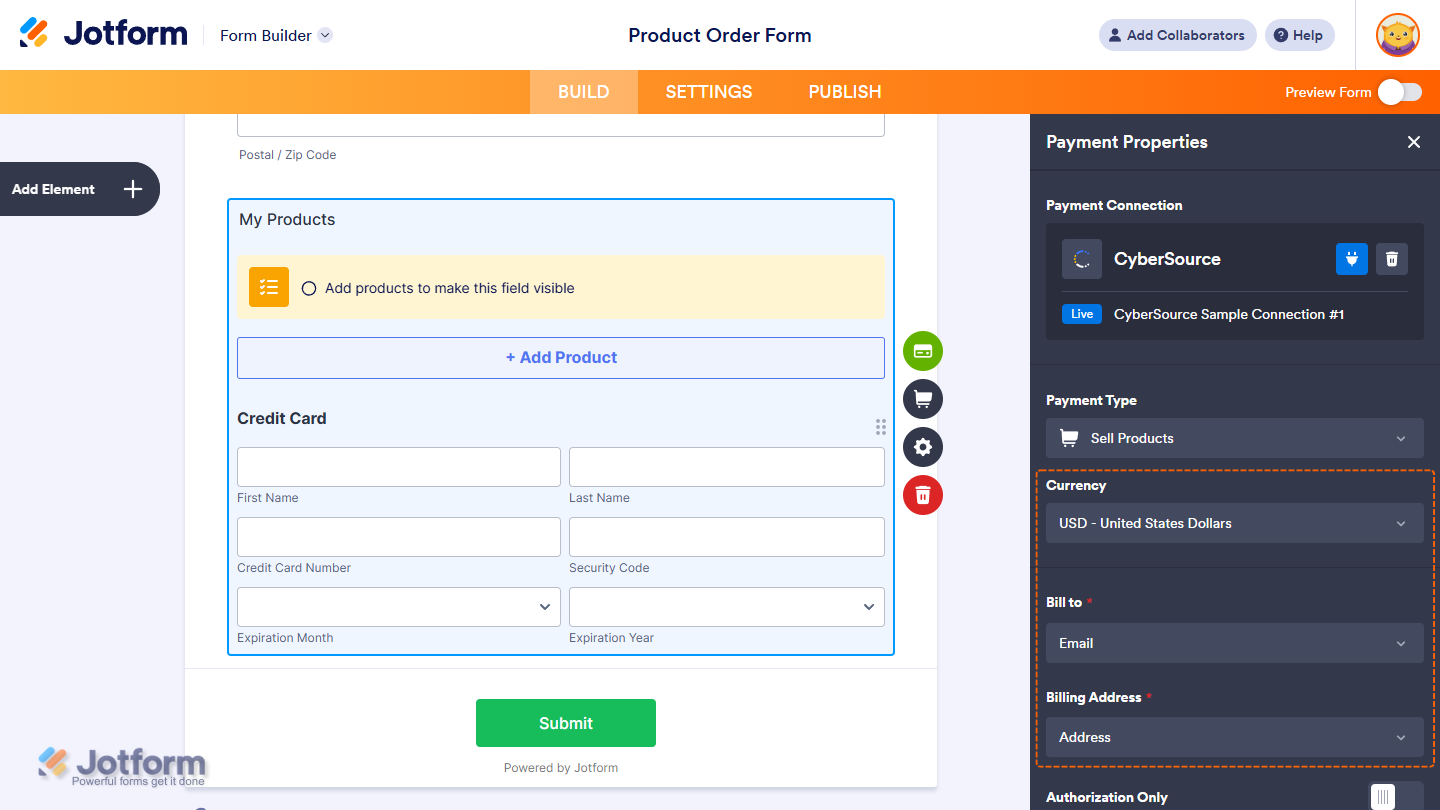
- In the integration window, enter your credentials and configure the following:
- Merchant ID — from Step 2
- Transaction Key — from Step 2
- Currency — select your preferred currency
- Bill to — map to the email address field on your form
- Billing address — map to the address field on your form
- Select your Payment Type:
- Sell Products — one-time purchases at fixed prices
- Sell Subscriptions — recurring charges for services or memberships
- User-Defined Amount — customer-entered amounts with optional suggested minimums
- Collect Donations — voluntary contributions for nonprofits or fundraising
- Expand Additional Gateway Settings to configure optional fields:
- Sandbox Mode — toggle on for testing, off for live payments
- Authorization Only — authorize without immediate capture
- Order Prefix — appended to the Order ID sent to CyberSource
- Show Total Price on Form, Decimal Separator, and other display options
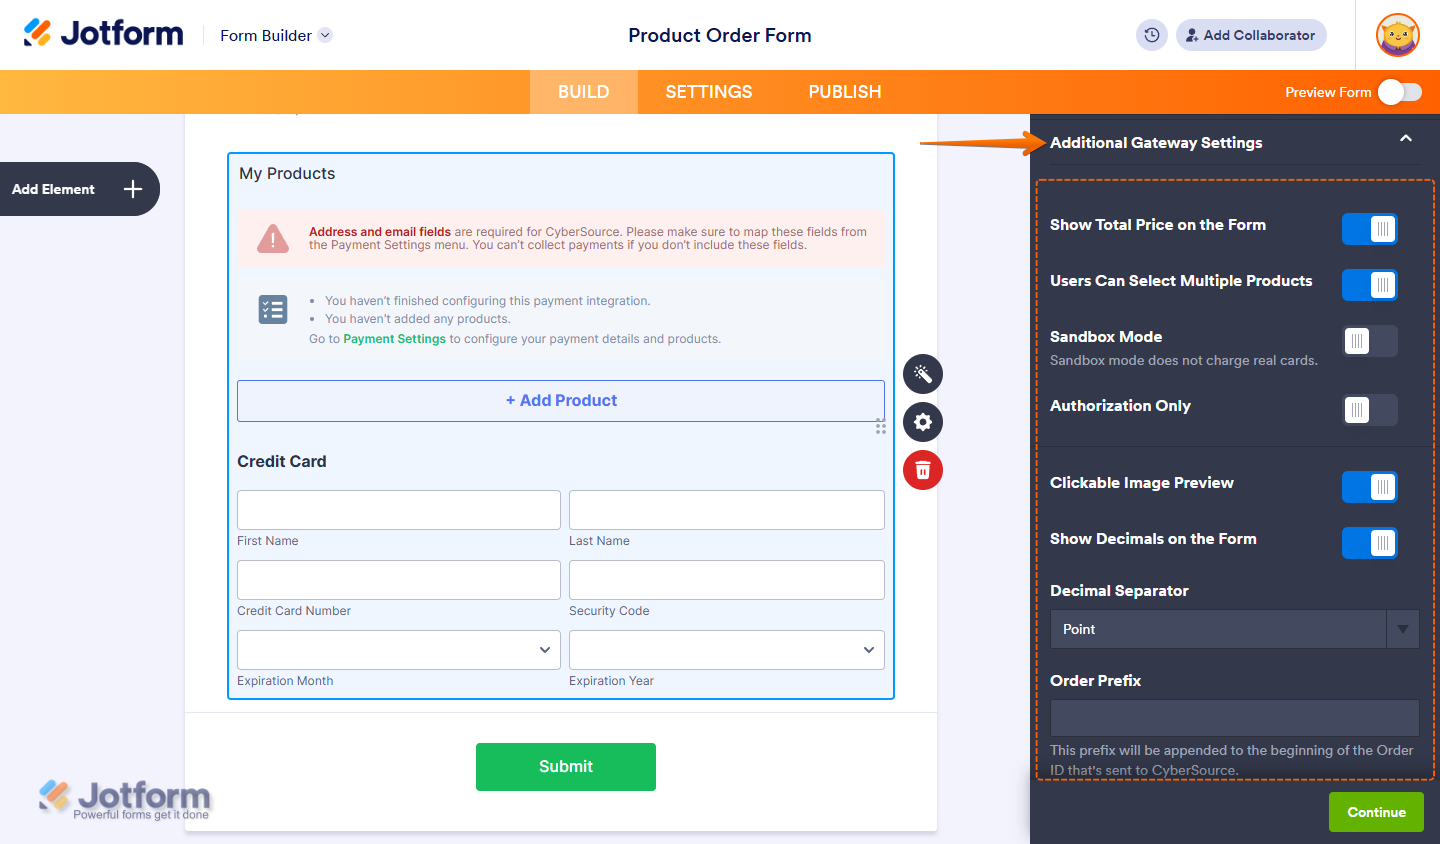
- Click Continue (for products or subscriptions) or Save (for all other payment types).
To reuse your CyberSource credentials across multiple forms:
- In Form Builder, click Add Element on the left side of the page.
- In the Form Elements menu, under the Payments tab, search for CyberSource and click on it — or drag and drop it to the desired location on your form.
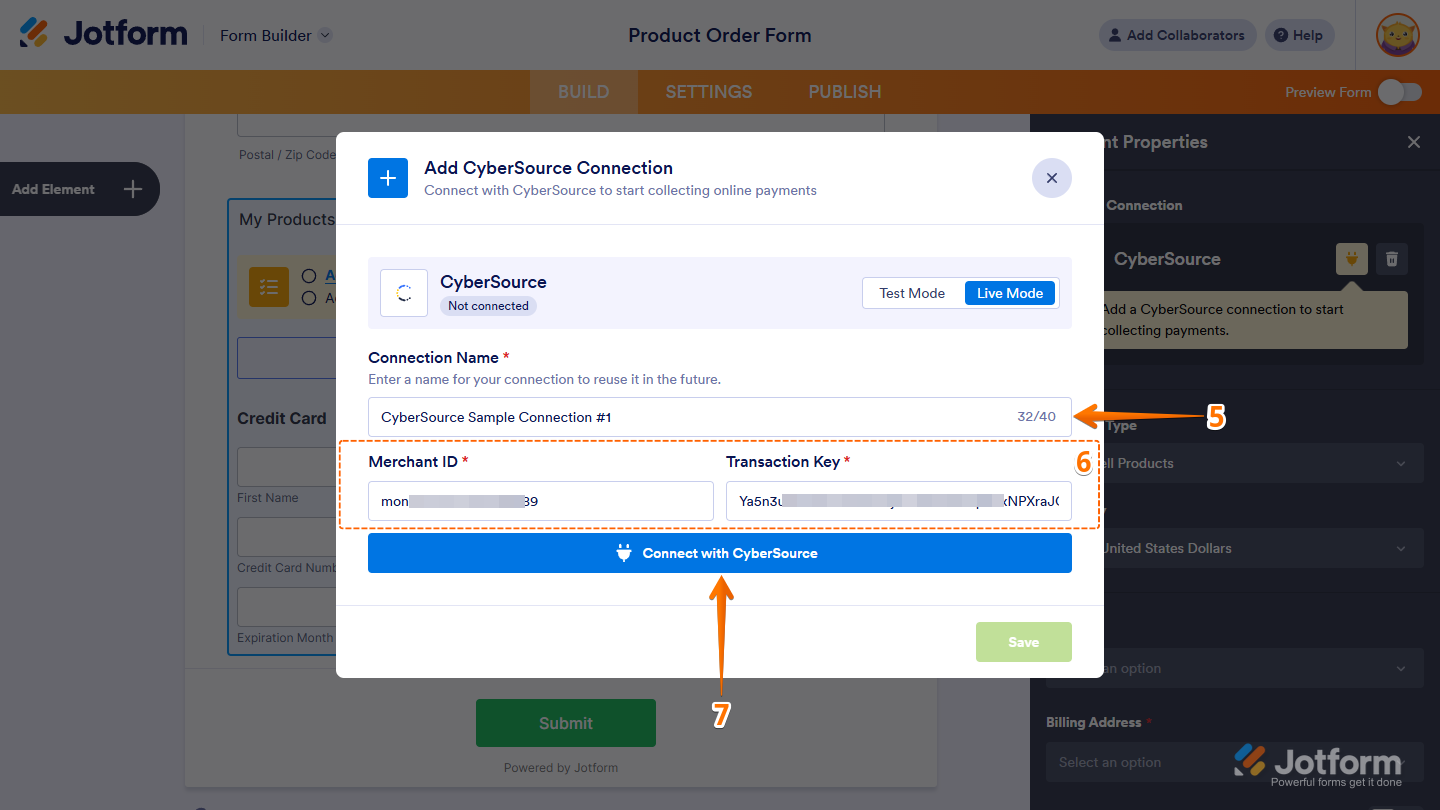
- In Payment Properties, click the plug icon to open connection settings.
- Select Test Mode or Live Mode.
- Enter a Connection Name, your Merchant ID, and your Transaction Key.
- Click Connect With CyberSource, then click Save.
- In the Payment Connections window, select your saved connection and click Use.
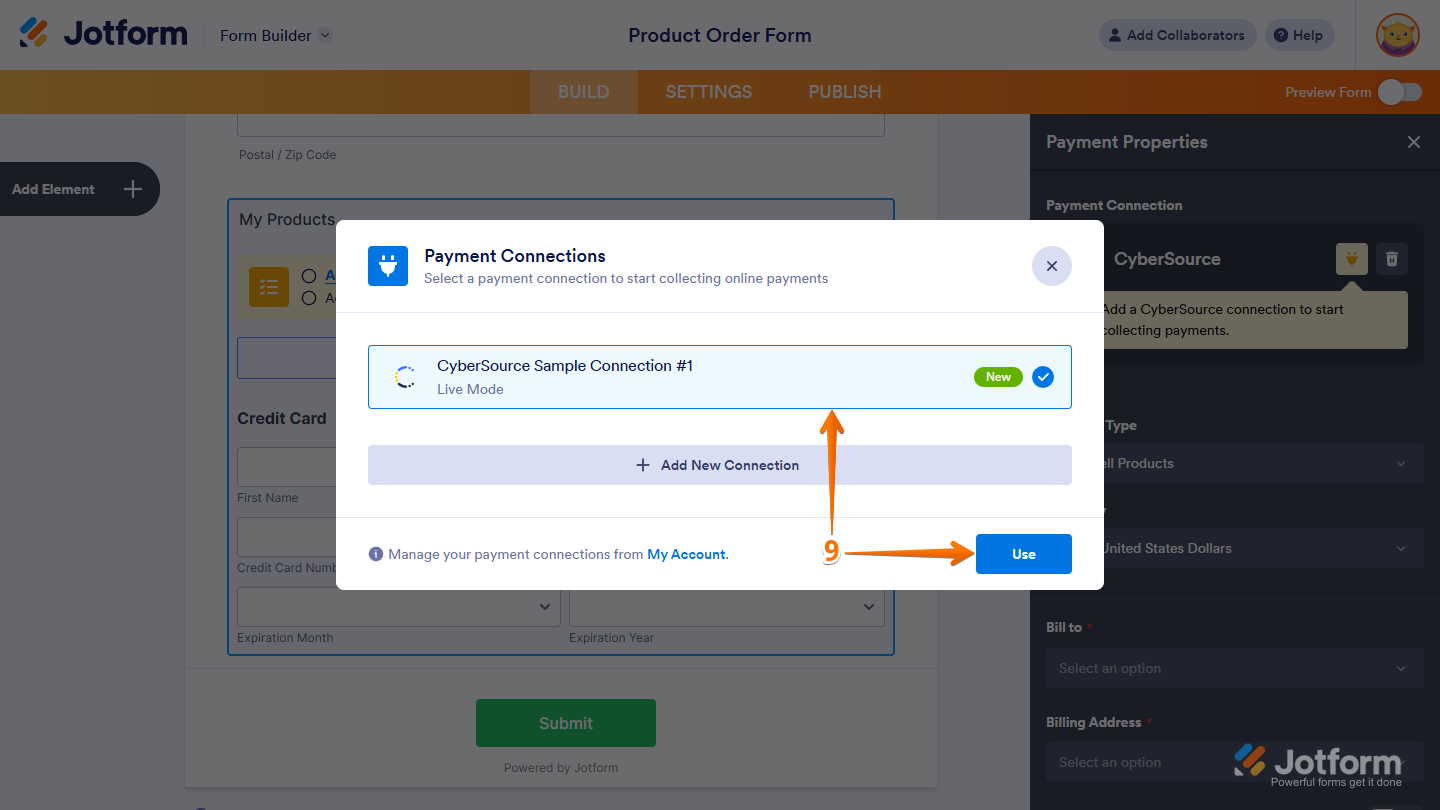
- In Payment Properties, configure your Payment Type, Currency, Bill to, and Billing address.
After completing configuration, you can now take payments through Finix via our Cybersource Gateway Integration.
To learn more about our Cybersource Gateway Integration, you can read our guide.
If you need additional assistance contact support@finix.com.
When you run a transaction on Jotform, you'll see it:
- In your Jotform account under My Forms → Submissions.
- In the Cybersource Business Center.
- In your Finix Dashboard under Transactions → Payments.
These transactions will be ingested by Finix and added to Settlements. To track transfers between Finix and Cybersource, please refer to our guide, here.