Accept payments with Finix on Gravity Forms.
Gravity Forms is a leading WordPress form builder used by more than 1 million sites worldwide. It provides a drag-and-drop interface for building advanced forms with conditional logic, multi-page flows, file uploads, and built-in payment collection. It integrates natively with WordPress and supports hundreds of third-party add-ons for CRM, email marketing, and payment processing. Finix integrates with Gravity Forms through the Cybersource payment gateway, enabling merchants to collect payments directly within their WordPress forms and reconcile transaction data within their Finix Dashboard.
- Finix Live Account
- Active Gravity Forms license with WordPress site
To create a Finix account, you can follow our step-by-step guide or sign up directly for a live or sandbox account.
We recommend choosing Direct Merchant as your Customer Type.
Finix supports Gravity Forms via our Cybersource Gateway integration. Please note that there is an additional fee for using our Cybersource integration.
For more information, please reach out to your Finix point of contact.
- To create a Cybersource integration, navigate to the Integrations page on your Finix Dashboard.
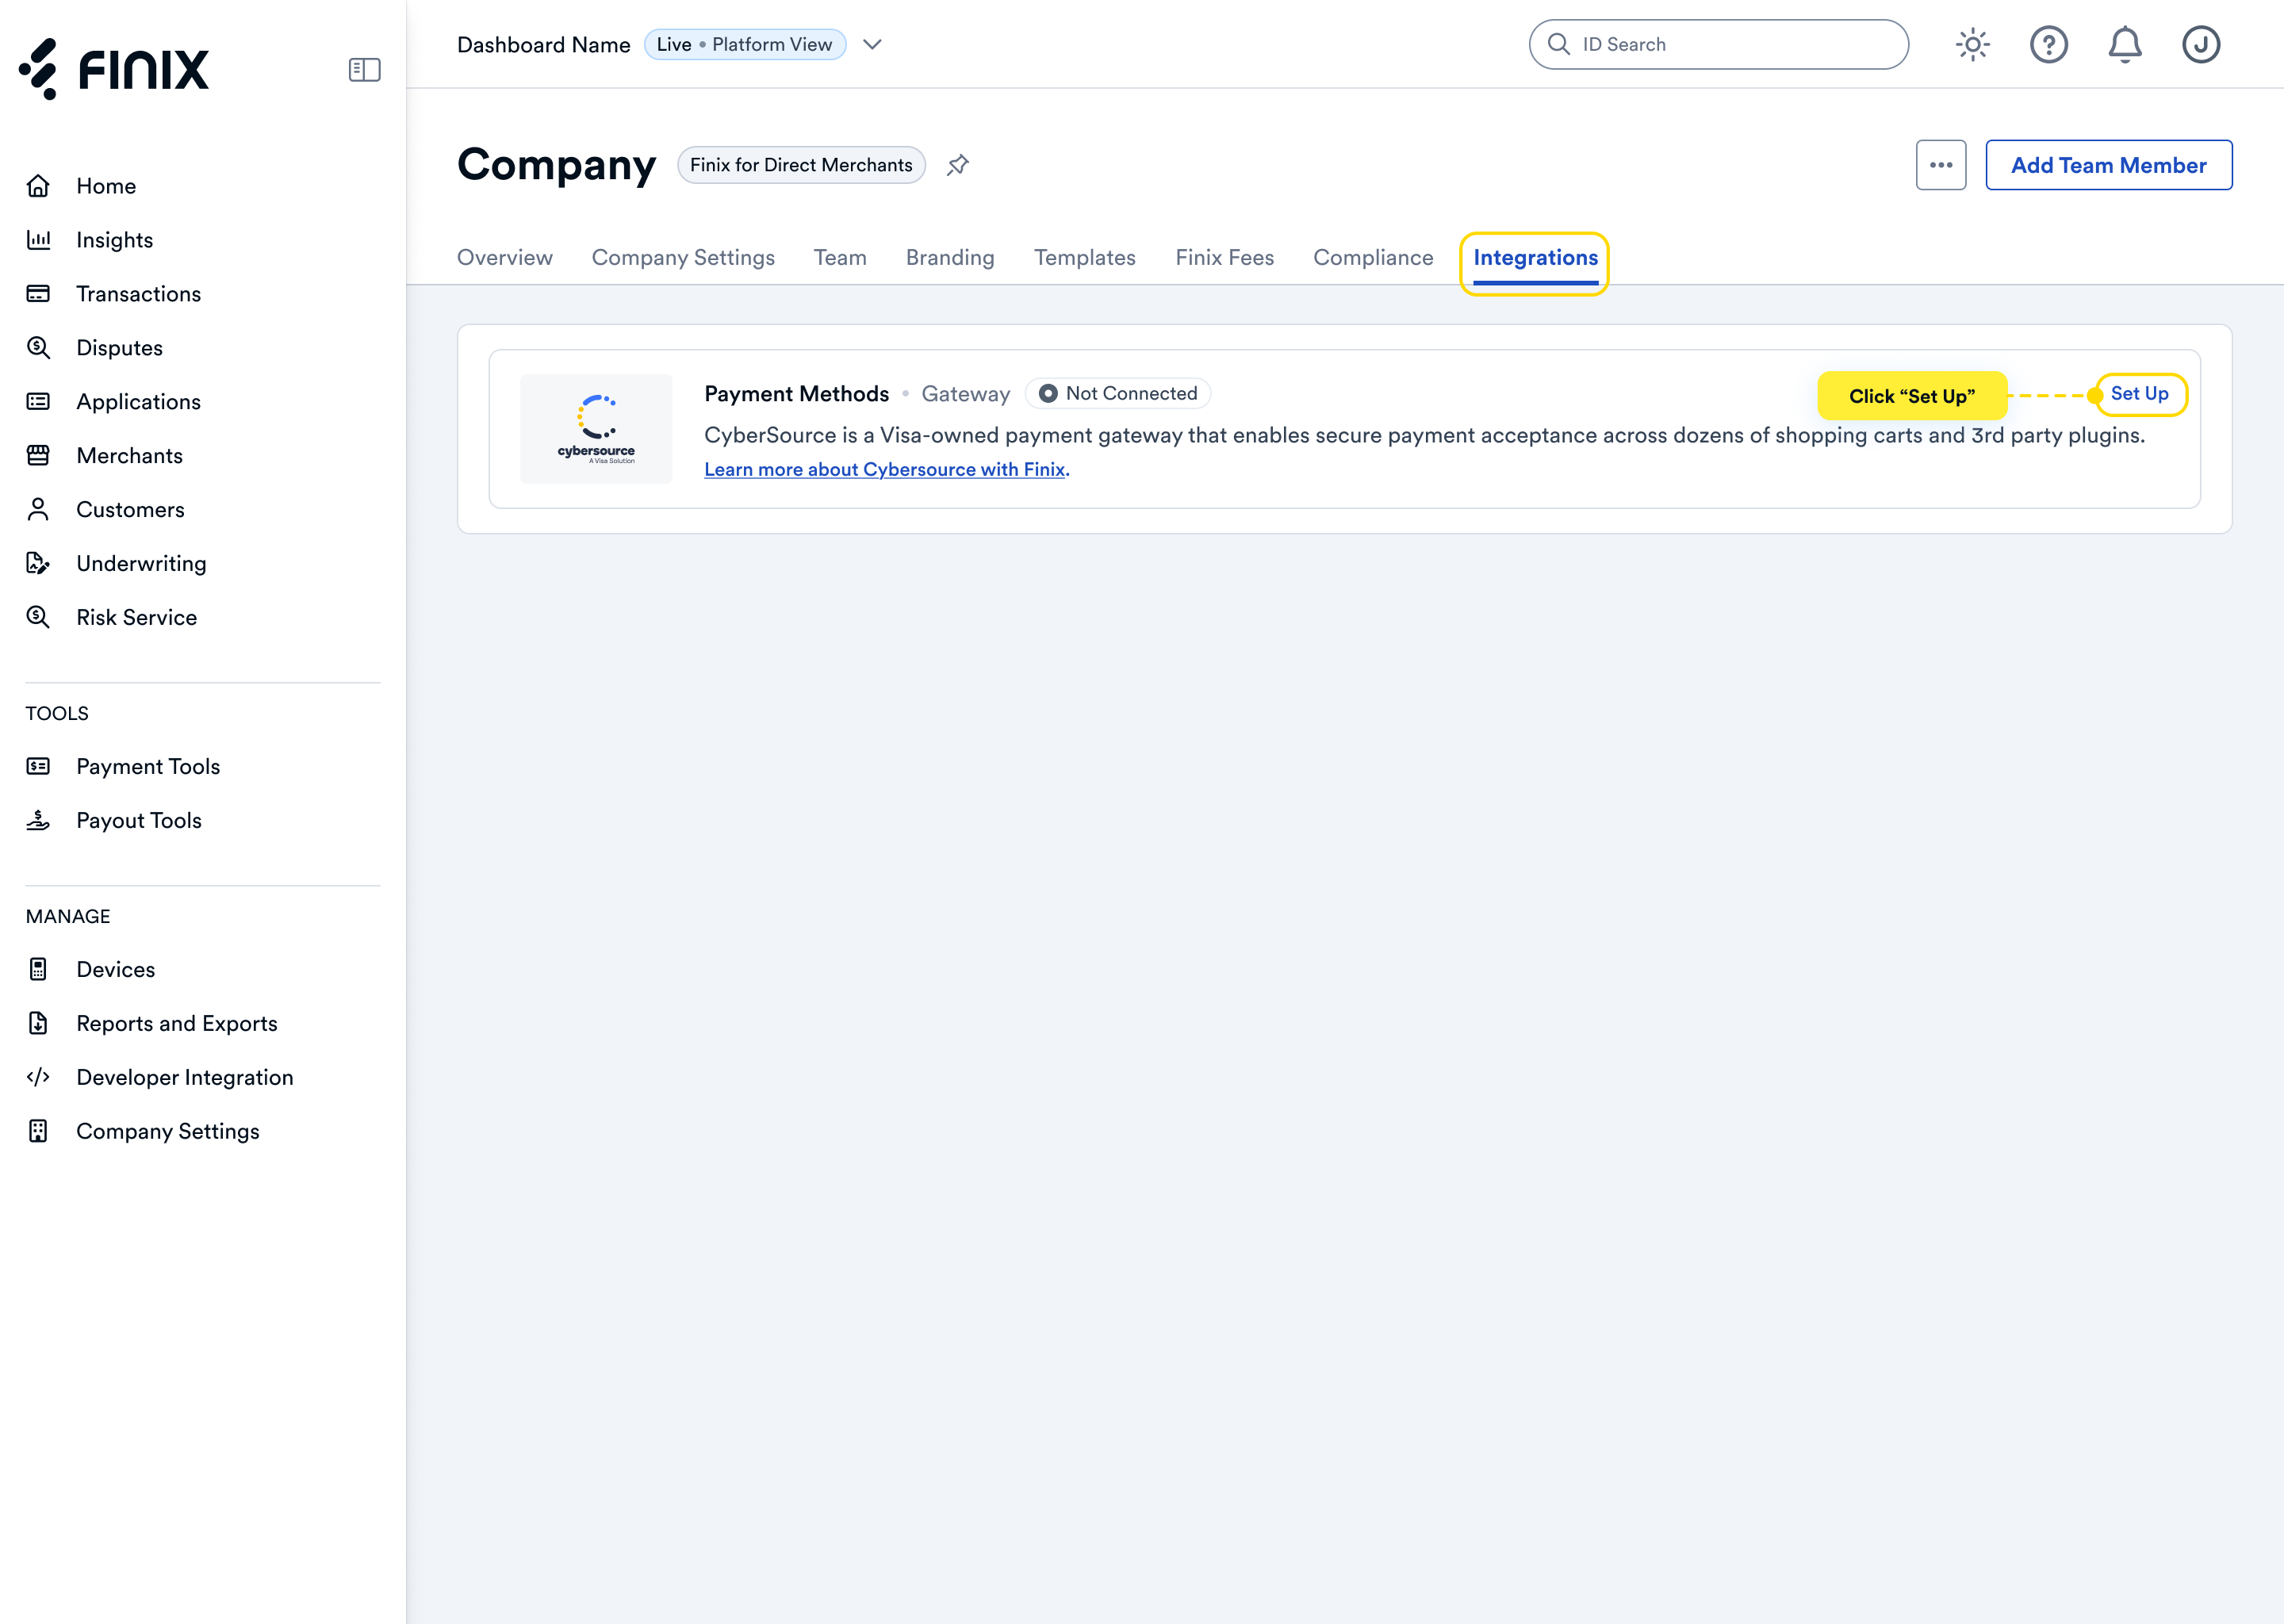
- Sign up for Cybersource. You can view detailed instructions in our guide, here.
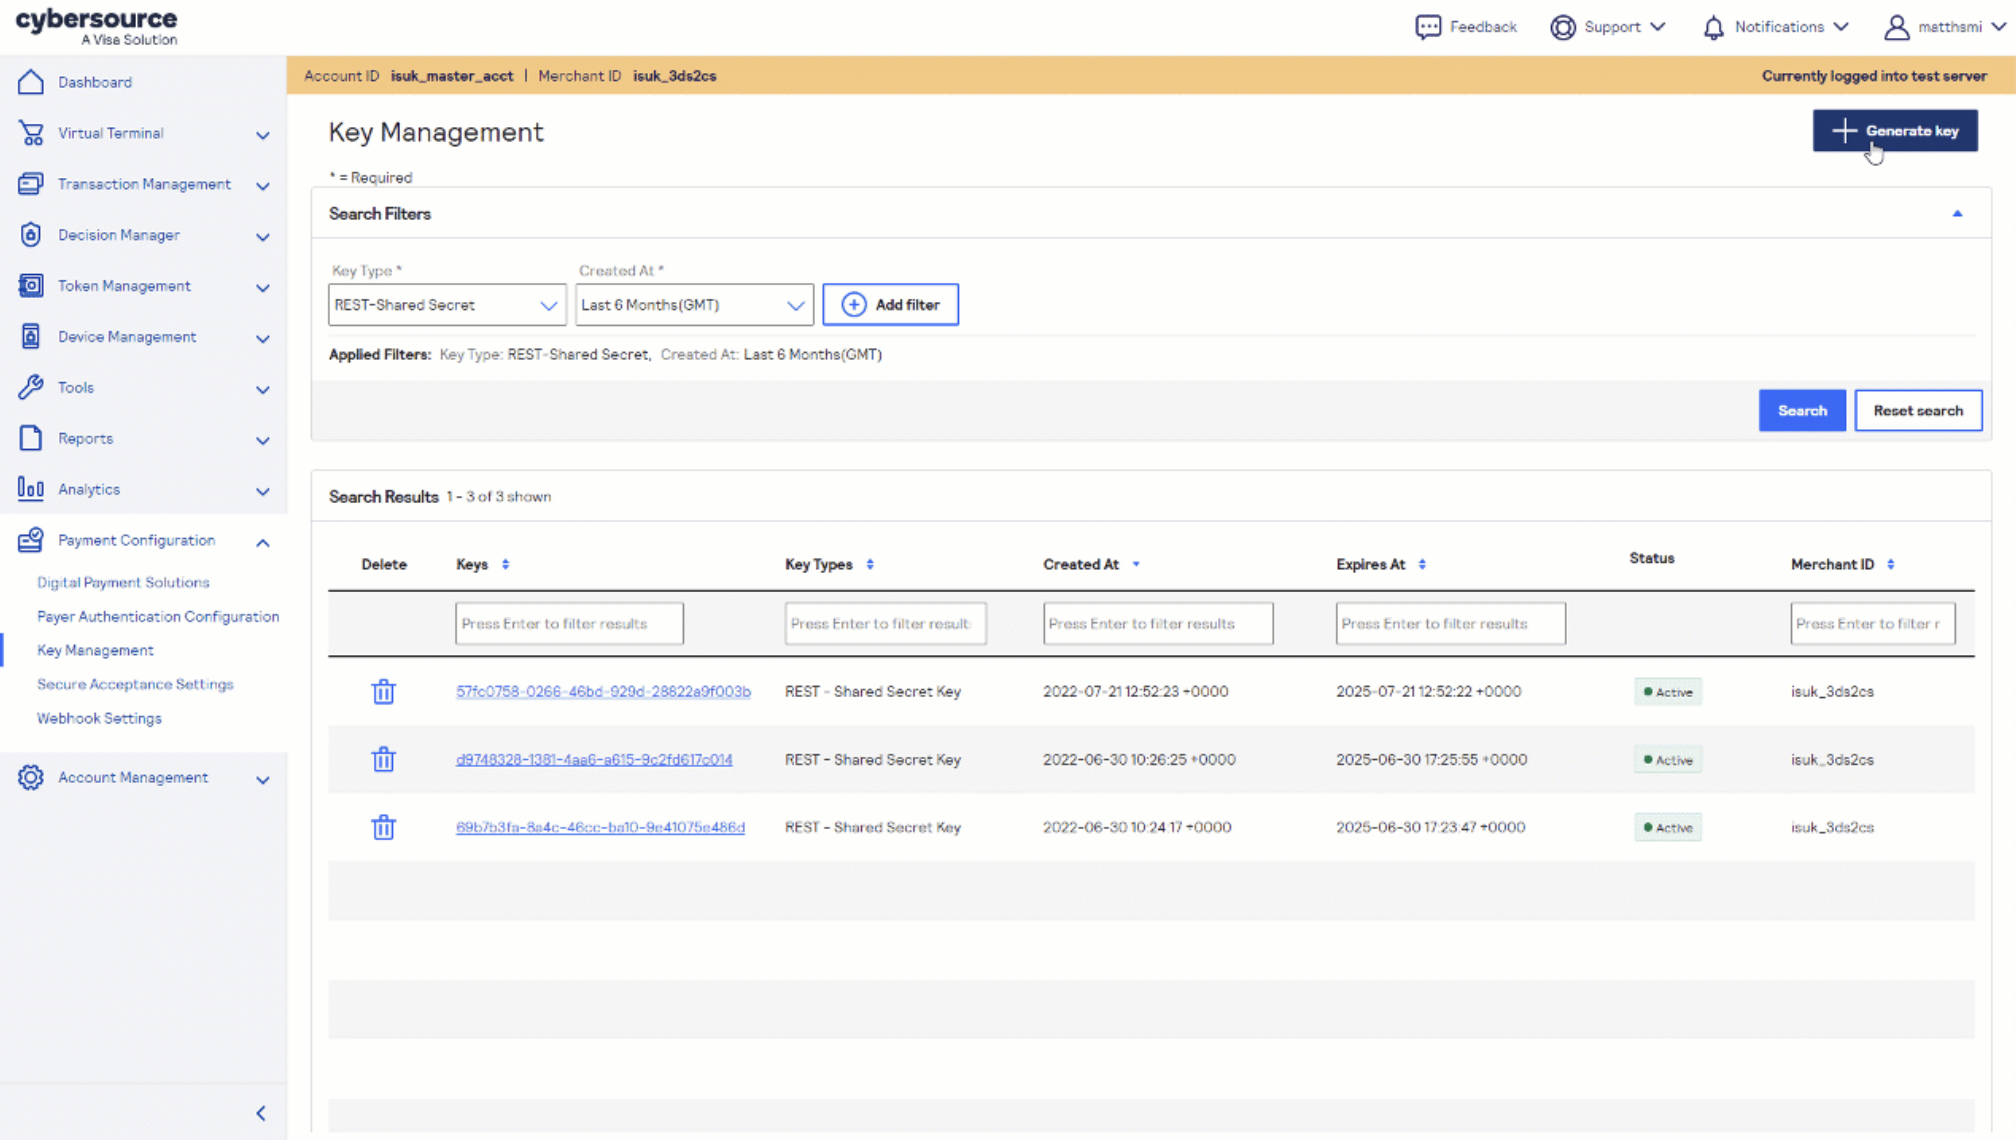
- After accepting the Cybersource invitation email, retrieve the following credentials from the Cybersource Business Center under Payment Configuration → Secure Acceptance Settings — you'll need these to configure Gravity Forms:
- Merchant ID
- REST API Key
- Profile ID
Before you proceed, ensure you have:
- Approved Finix Merchant Account
- Cybersource Gateway Integration linked to your Finix Merchant Account
- Cybersource credentials from Step 2
- Gravity Forms 2.3.0 or later installed on your WordPress site
- A valid SSL certificate on your WordPress site
The Cybersource Gateway for Gravity Forms is a third-party add-on developed by WP Gateways. For full installation details, refer to the Gravity Forms Cybersource Gateway add-on page.
To install:
- Purchase and download the add-on from WP Gateways.
- In your WordPress admin, navigate to Plugins → Add New → Upload Plugin.
- Upload the plugin
.zipfile and click Install Now. - Click Activate Plugin.
This add-on uses CyberSource's Secure Acceptance Hosted Checkout — customers are redirected to CyberSource's hosted payment page to enter their card details, keeping your site out of PCI scope.
In your WordPress admin:
- Navigate to Forms → Settings → Cybersource.
- Enter the following credentials from Step 2:
- Merchant ID — your Cybersource Merchant ID
- Access Key — your Secure Acceptance Access Key
- Profile ID — your Secure Acceptance Profile ID
- Secret Key — your Secure Acceptance Secret Key
- Set the Environment to Test for sandbox or Production for live payments.
- Save the settings.
After completing configuration, you can now take payments through Finix via our Cybersource Gateway Integration.
To learn more about our Cybersource Gateway Integration, you can read our guide.
If you need additional assistance contact support@finix.com.
When you run a transaction on Gravity Forms, you'll see it:
- In your WordPress admin under Forms → Entries.
- In the Cybersource Business Center.
- In your Finix Dashboard under Transactions → Payments.
These transactions will be ingested by Finix and added to Settlements. To track transfers between Finix and Cybersource, please refer to our guide, here.