Accept payments with Finix on your WooCommerce Store

Download Finix for WooCommerce
Accept Card and Bank Payments with WooCommerce.
View Sample Site
View a demo of our plugin at finixsamplewoo.com
The Finix plugin for WooCommerce lets you accept payments and manage orders directly from your WordPress admin.
- Payment methods: Credit and debit cards, Apple Pay, Google Pay, and bank transfers (ACH).
- Pricing: Interchange-plus pricing with itemized fee breakdowns.
- Blocks checkout: Compatible with WooCommerce's block-based checkout and the classic checkout flow.
- Dispute and bank return handling: Order statuses update automatically via webhooks when disputes or bank returns occur.
- Sandbox environment: Test your integration before going live.
Finix for WooCommerce is available for download at wordpress.org.
- Finix Sandbox Account to process Sandbox transactions. You will not be able to move real money in this environment.
- Finix Live Account to run card or ACH transactions.
Apple Pay requires domain verification, which involves hosting a file in the /.well-known/ directory of your site. Whether this is supported depends on your WordPress hosting plan.
| Platform | Can Host Verification File? | Notes |
|---|---|---|
| WordPress.org (self-hosted) | Yes | Full server access to place files in /.well-known/ |
| WordPress.com Business/Commerce plan | Yes | Allows plugins and some server-level access |
| WordPress.com Free/Personal/Premium | No | No access to server file system; cannot place arbitrary files at custom paths |
Keep your existing payment gateway enabled while you install and configure Finix. After you have configured and verified Finix in Production, disable the old gateway if you do not want to present multiple payment options.
To disable an existing payment gateway:
- In your WordPress admin, go to WooCommerce → Settings → Payments.
- Find the gateway you want to remove and toggle it off.
The steps below are split into two tabs - Sandbox and Production. If you want to test your setup before going live, start with Sandbox. Once you are approved and ready to accept real payments, follow the Production tab.
- Sandbox: A test environment where no real money is moved. Use this to verify your integration before launch.
- Production: Your live environment that processes real transactions with real customers.
Download Finix for WooCommerce
Accept Card and Bank Payments with WooCommerce.

- In your WordPress admin, click Plugins → Add New Plugin.
- Click Upload Plugin.
- Click Choose File, select the downloaded plugin file, and click Install Now.
- Click Activate Plugin.
To create a Sandbox account, read our guide or sign up directly.
We recommend choosing Direct Merchant as your Customer Type.

- In your WordPress admin, go to WooCommerce → Settings.
- Click the Payments tab.
- Find Finix Gateway in the list and click Manage.
- Locate the Environment dropdown and select Sandbox.
A webhook is an automated notification that Finix sends to your WooCommerce store when an event occurs - for example, when a payment is processed or a dispute is opened. Setting up a webhook keeps your order statuses in sync automatically.

In the Finix plugin settings, scroll down to the webhook section. Note the Webhook URL, Username, and Password - you will need these in the next step.
- Log in to your Finix Dashboard.
- Select the Sandbox environment from the environment selector. Finix automatically selects your environment if you only have access to one.
- Click Developer in the left menu.
- Click the Webhooks tab.
- Click Create Webhook.
- Enter the URL, Username, and Password from Part 1. Set Authentication Type to
Basic. Add a nickname to identify this webhook later. - Go to Events and select Only the following entities and types.
- Check Transfer and Disputes for both created and updated, then save the webhook.
API keys are unique credentials that let the Finix plugin securely communicate with Finix on your behalf.
In the Finix Dashboard, go to the Developer page. You will find:
- Application ID: starts with
AP - Merchant ID: starts with
MU
Enter both values in the Finix plugin settings.
To generate API keys:
- On the Developer page, click Create API Key.
- Copy the Username and Password and enter them in the Finix plugin settings.
With your credentials saved, enable the Finix Gateway. Your customers will now see Finix as a payment option at checkout.
Credit card payment is enabled by default. Apple Pay, Google Pay, and bank transfer are available but disabled. You can enable them in their respective tabs within the plugin settings if you want to offer them.
Because WooCommerce already collects billing and shipping information during checkout, your customers will not be asked to re-enter their billing details in the Finix payment form.
- Navigate to the Apple Pay tab in the Finix plugin settings.
- Select Enable Apple Pay Gateway.
- Customize your Apple Pay button style and type to match your storefront.
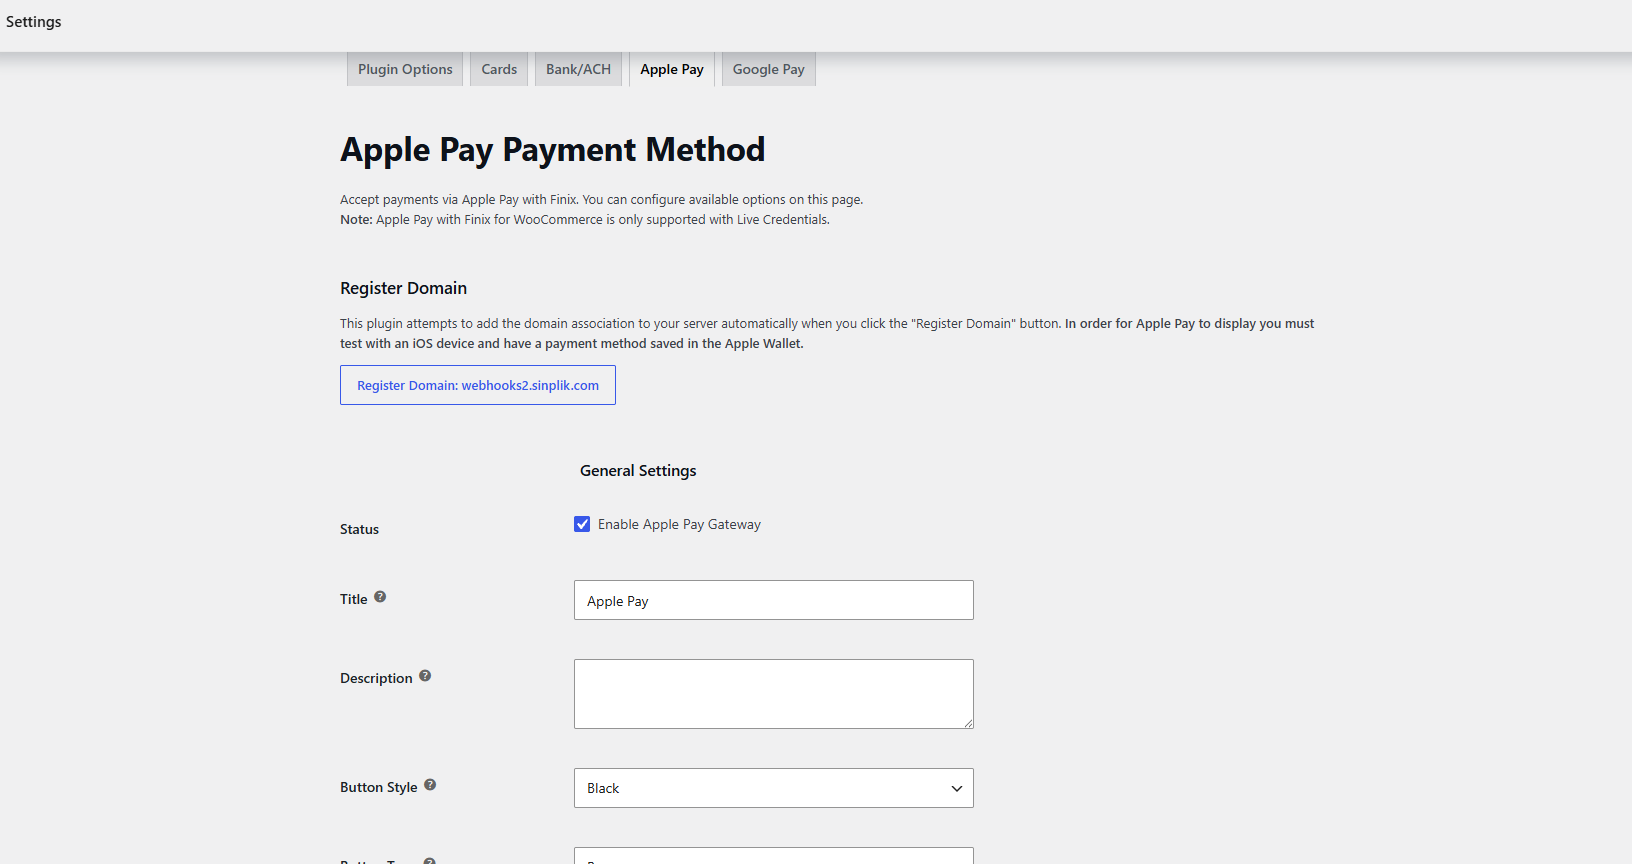
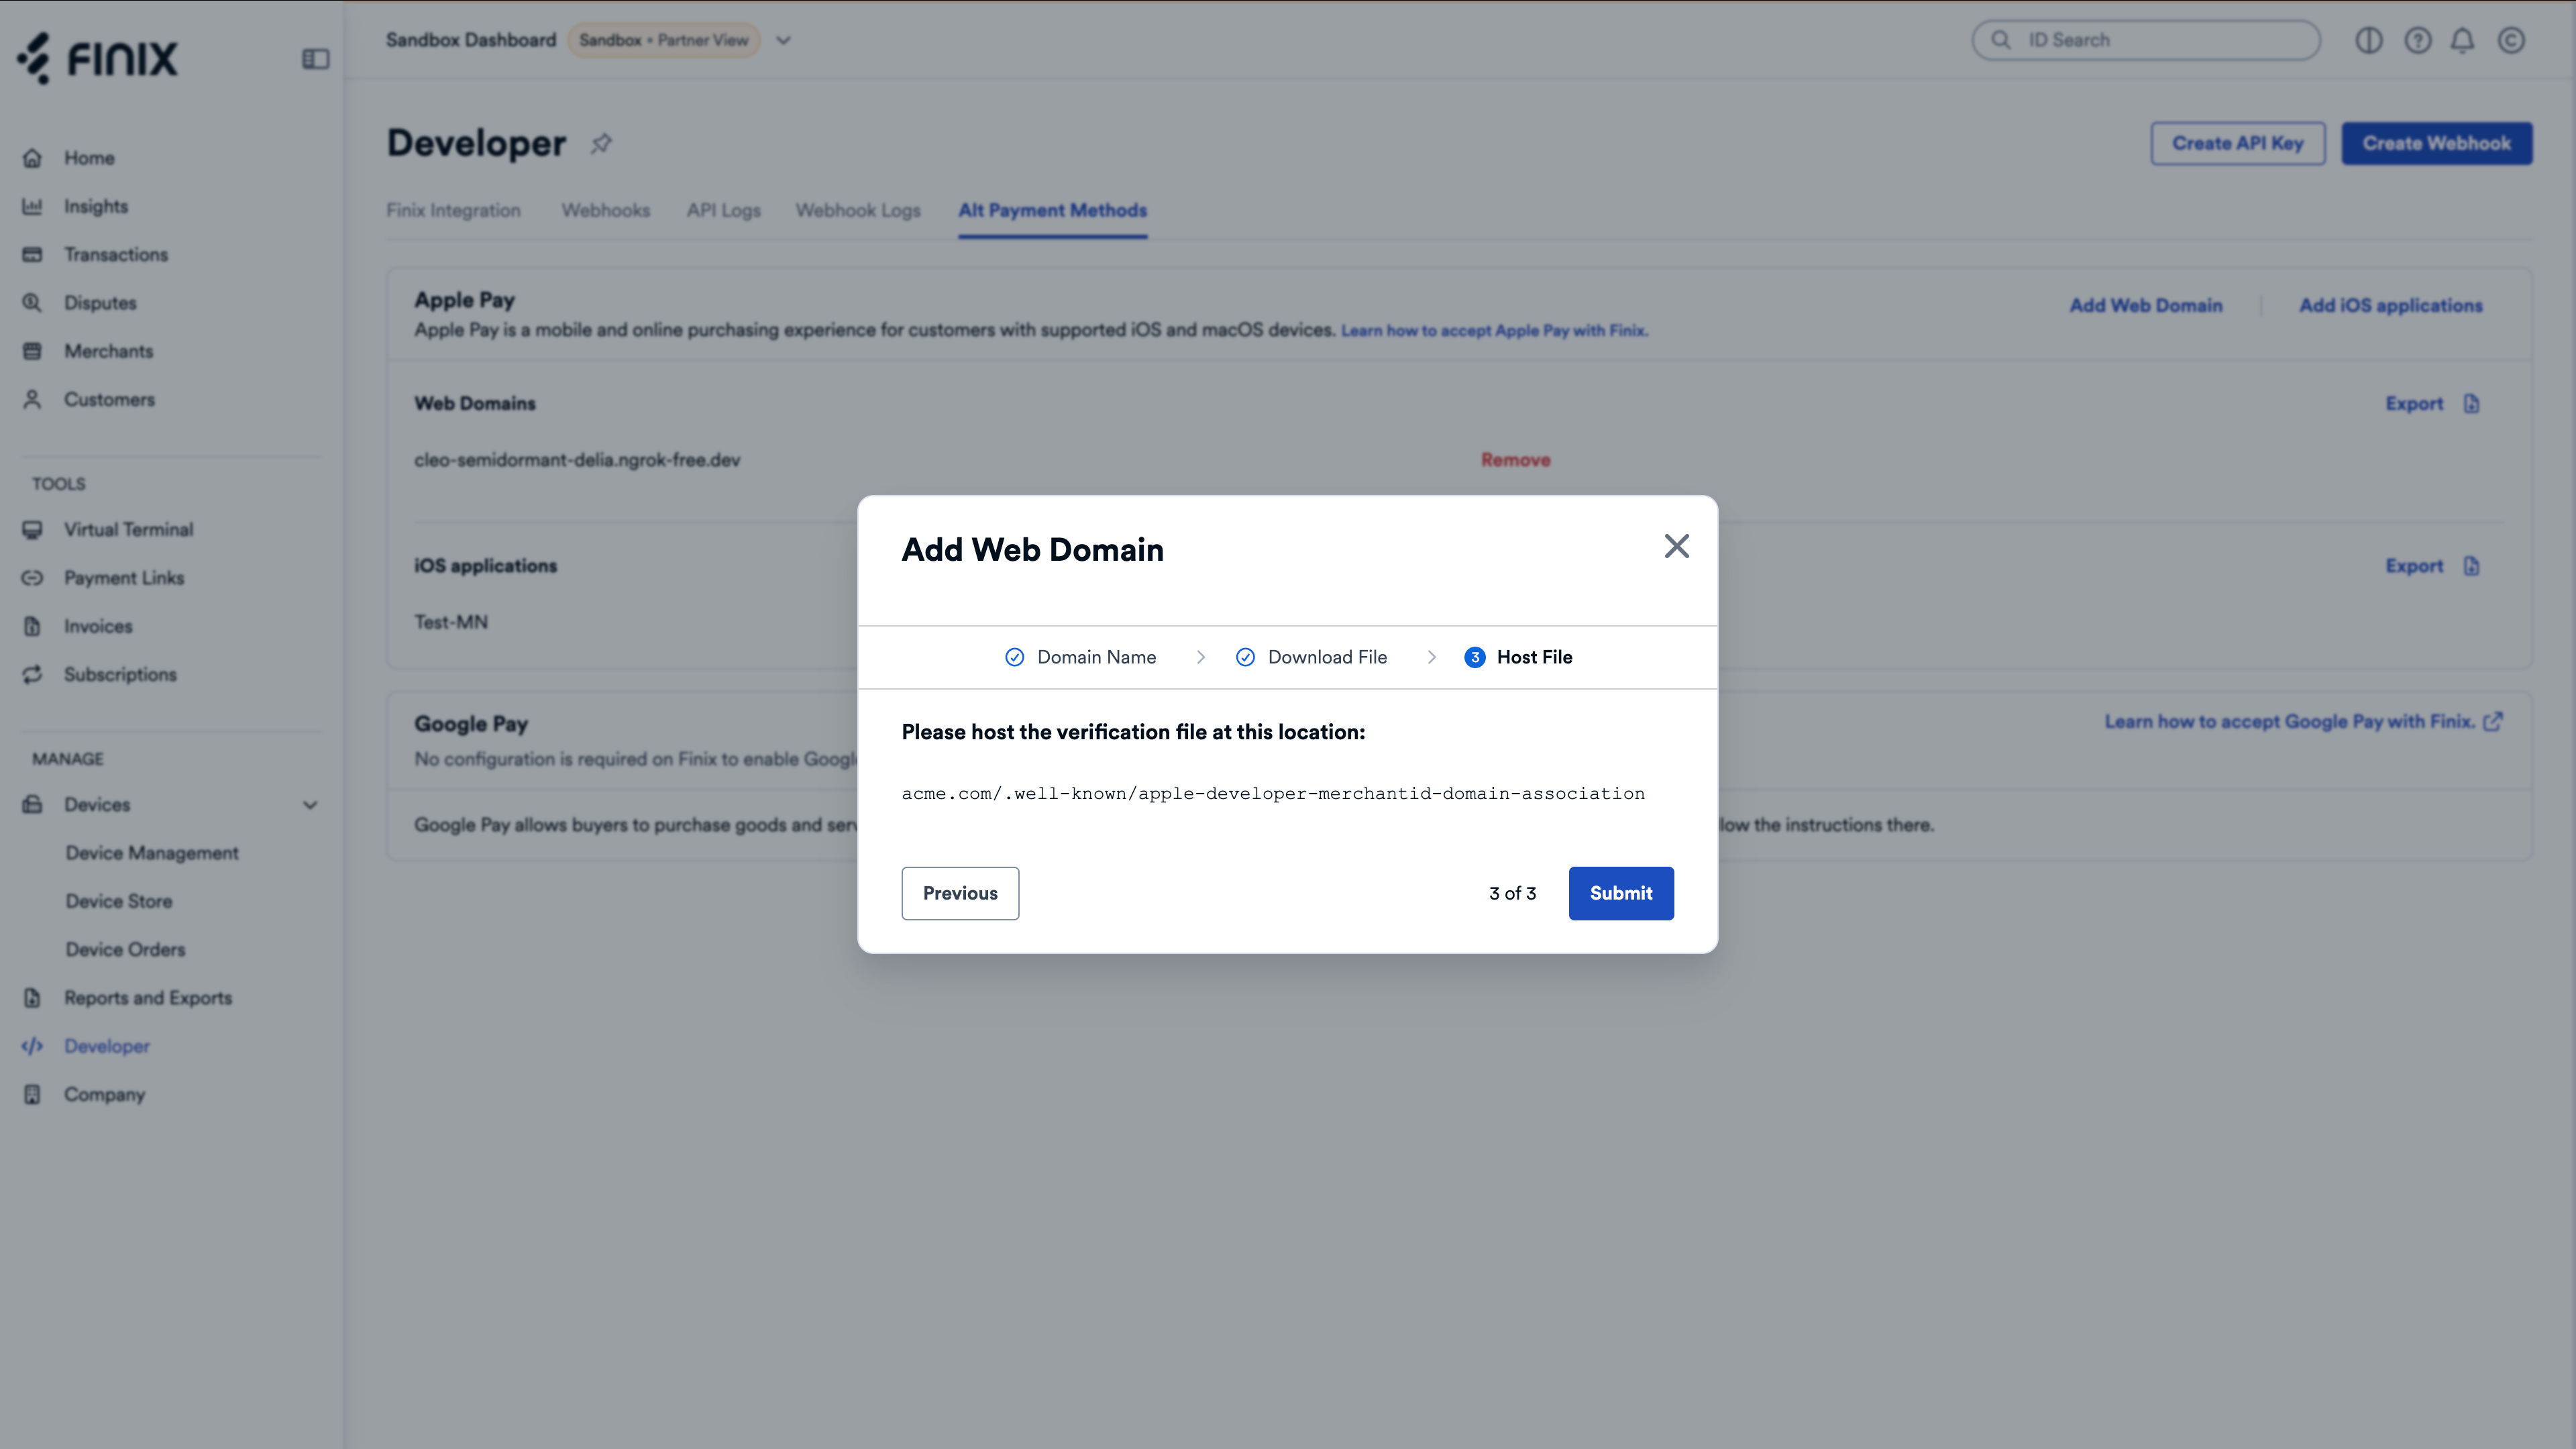
Before you can accept Apple Pay, verify and register your domain with Apple. You complete this step in the Finix Dashboard. After you register the domain, download the verification file and host it on your website.
To register your domain:
- Log in to your Finix Dashboard and click Developer.
- Click the Alt Payment Methods tab.
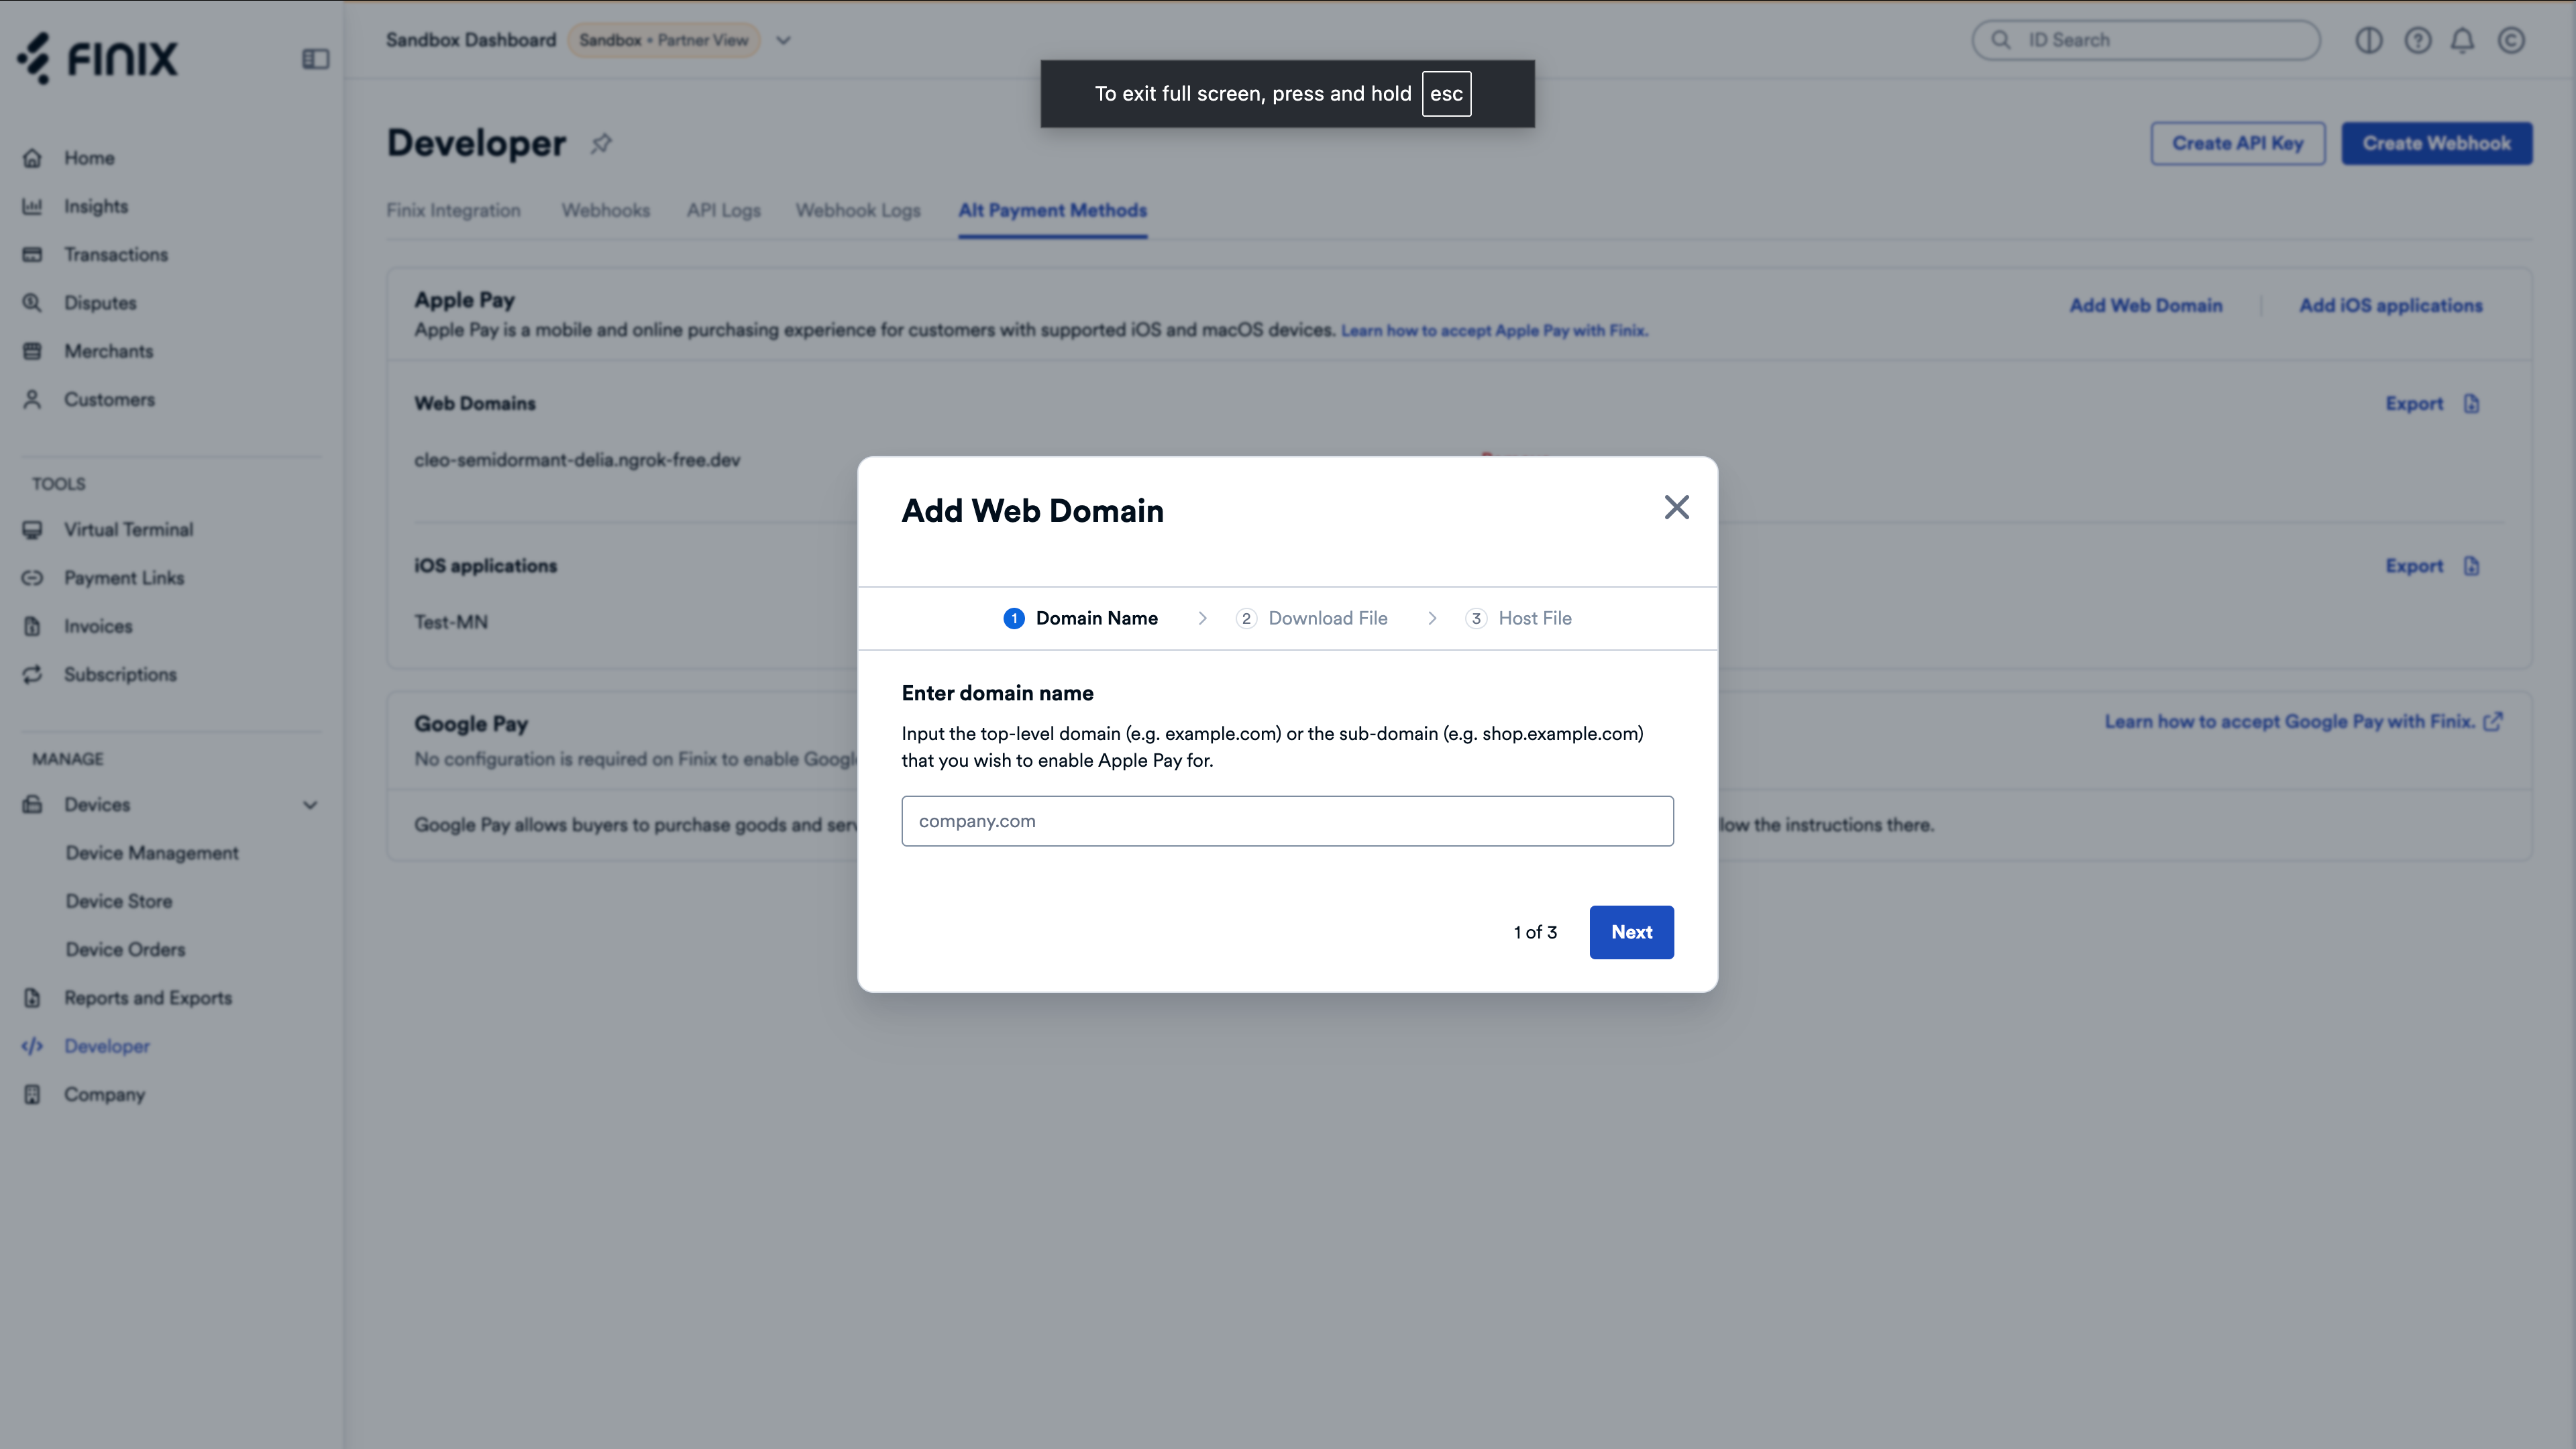
- Click Add Web Domain and follow the instructions to host the verification file.
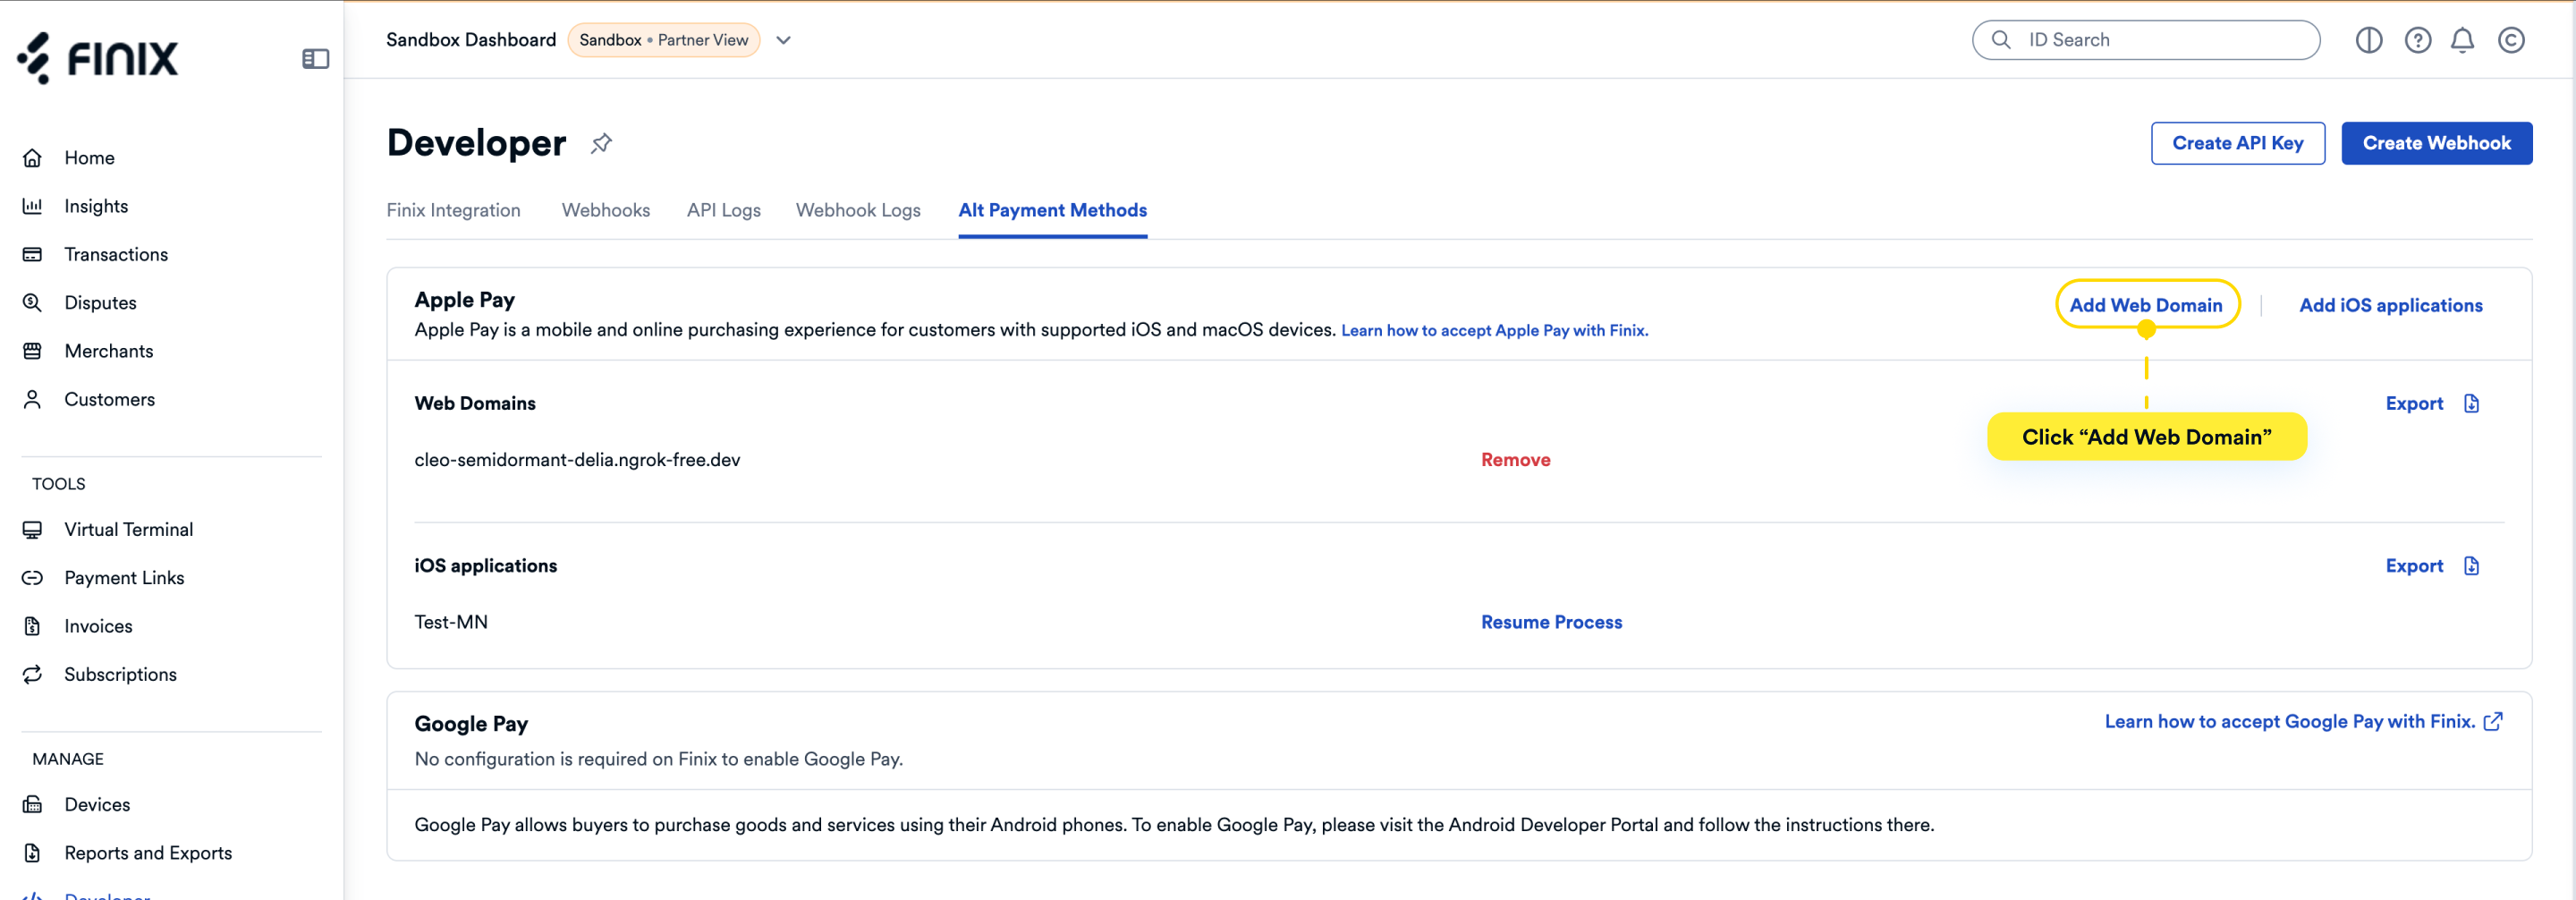
Do not click Submit on step 3 in the modal until you have uploaded the verification file that Finix generates in the steps below.
- Enter a domain name.
- Download the verification file.
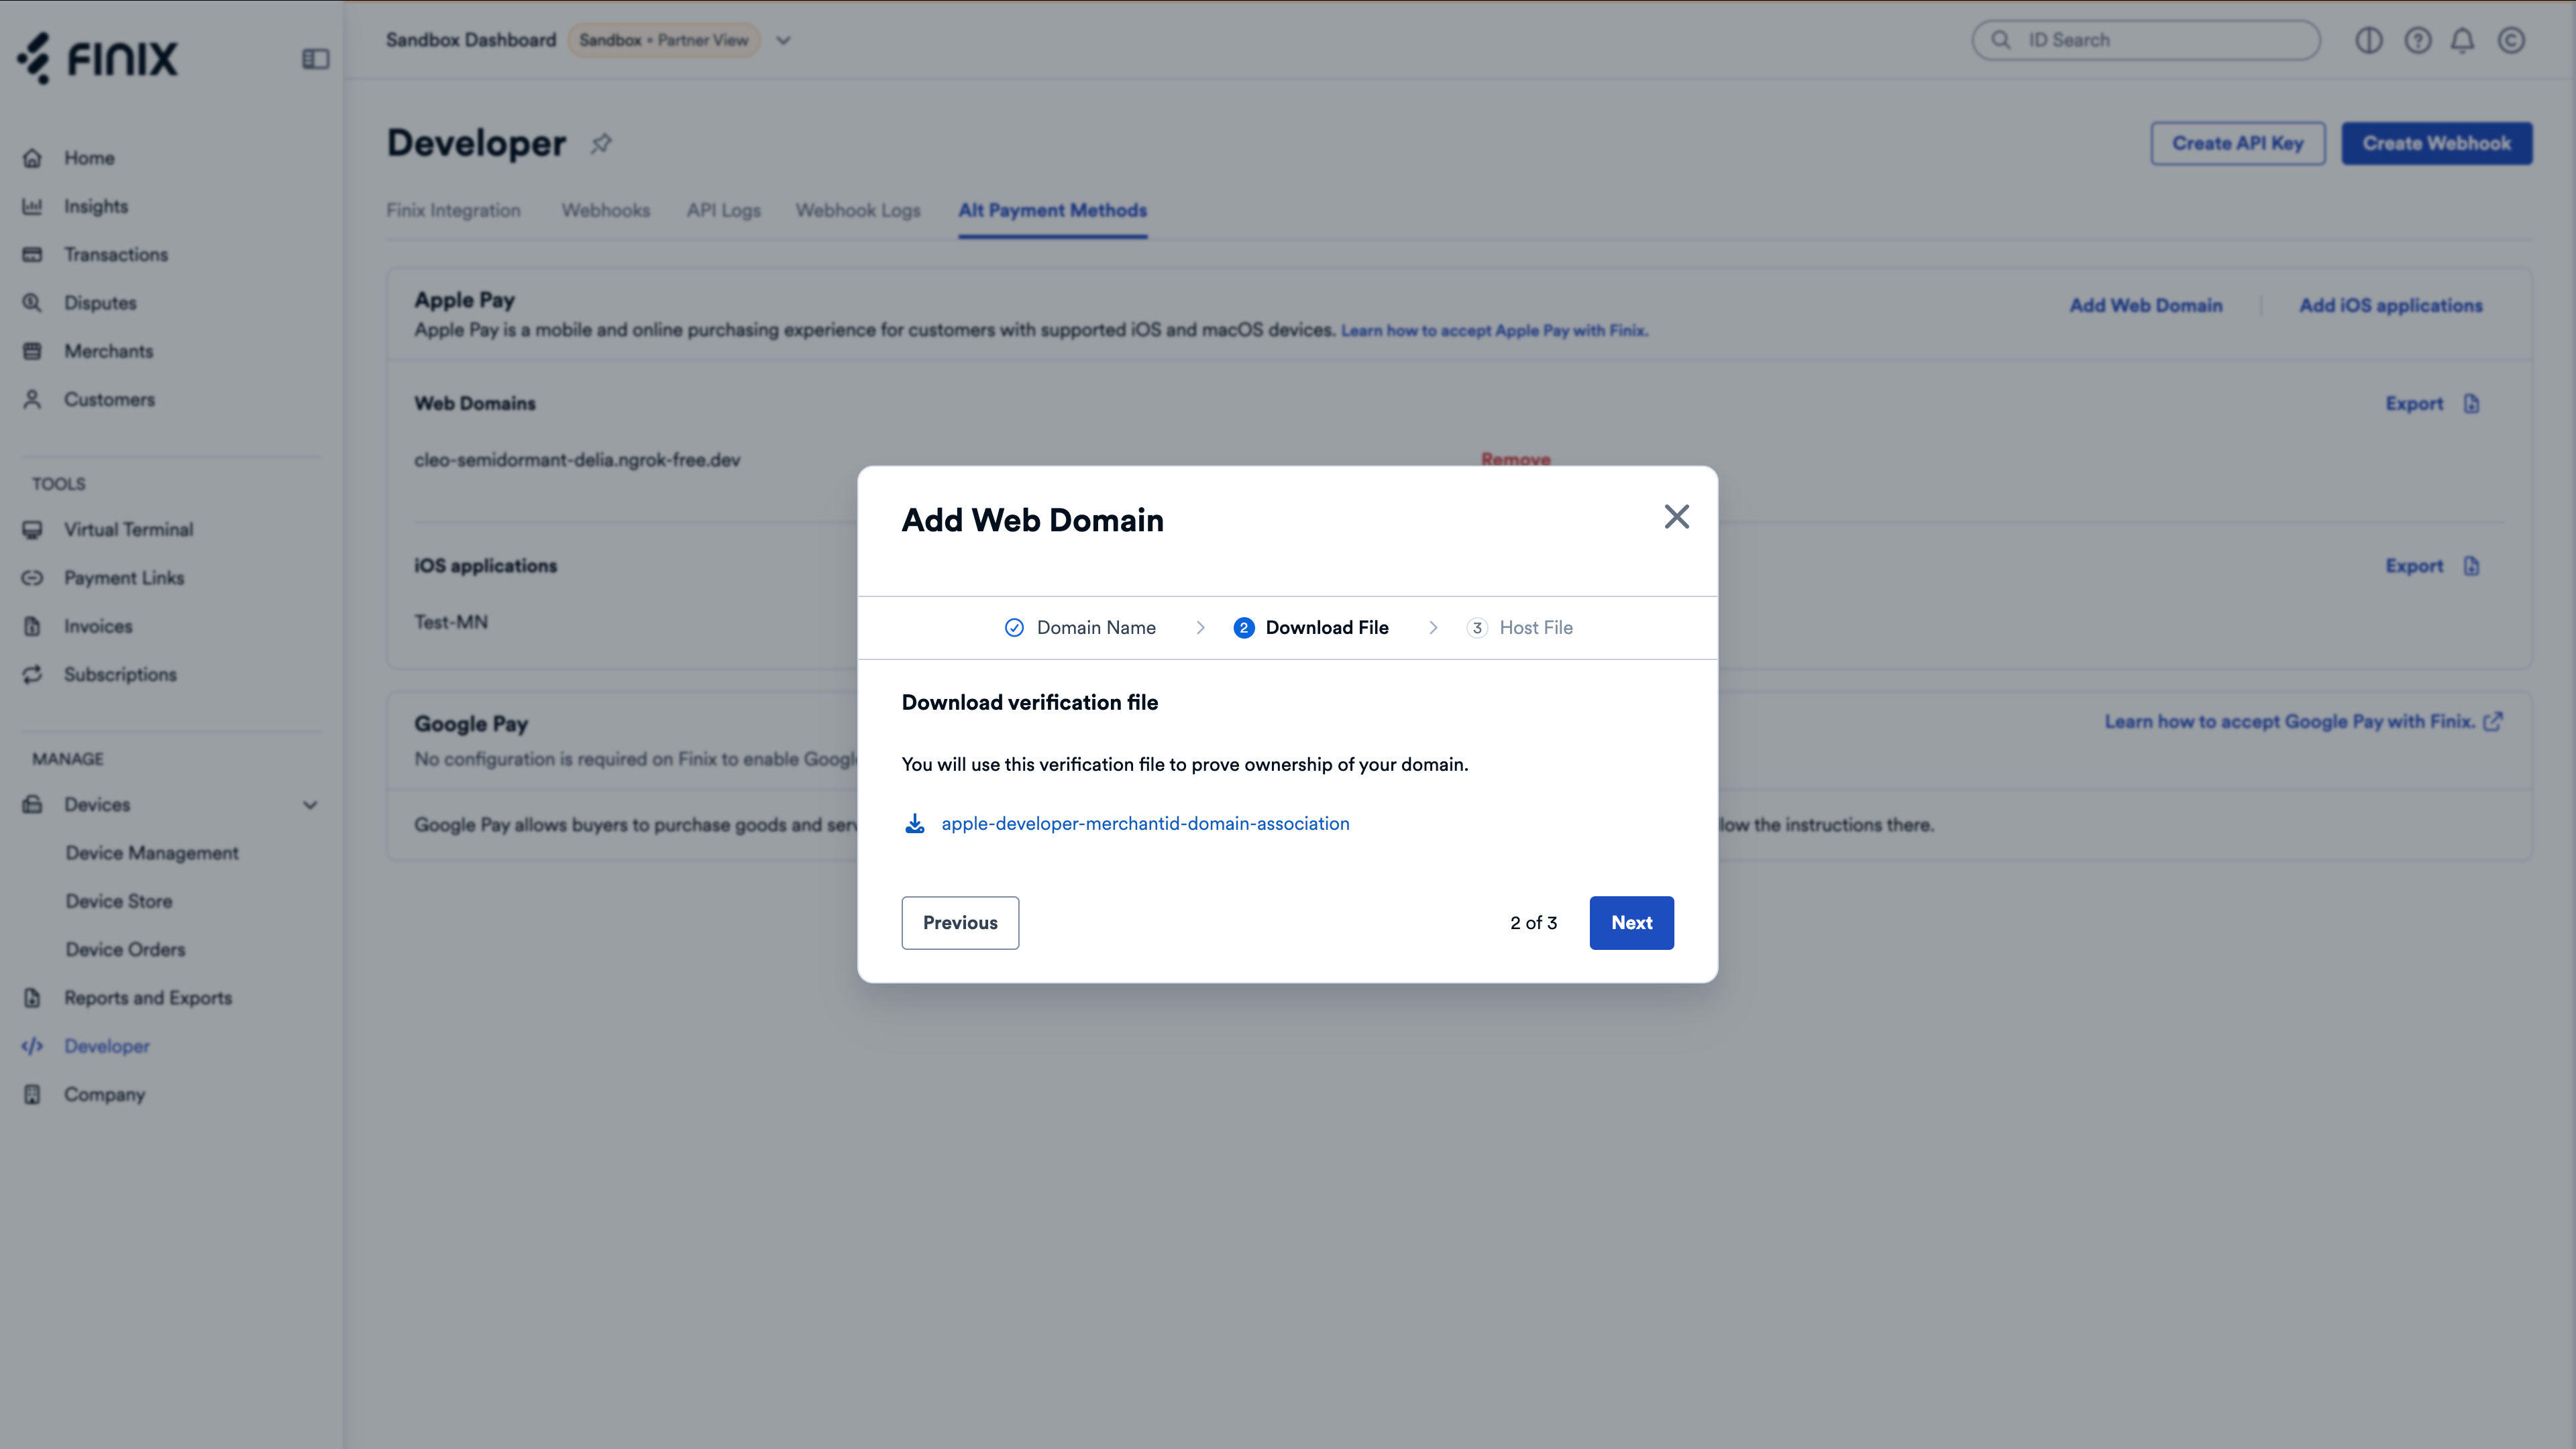
- Host the verification file at
/.well-known/apple-developer-merchantid-domain-association.
- Navigate to the Google Pay tab in the Finix plugin settings.
- Select Enable Google Pay Gateway.
- Customize your Google Pay button style and type to match your storefront.
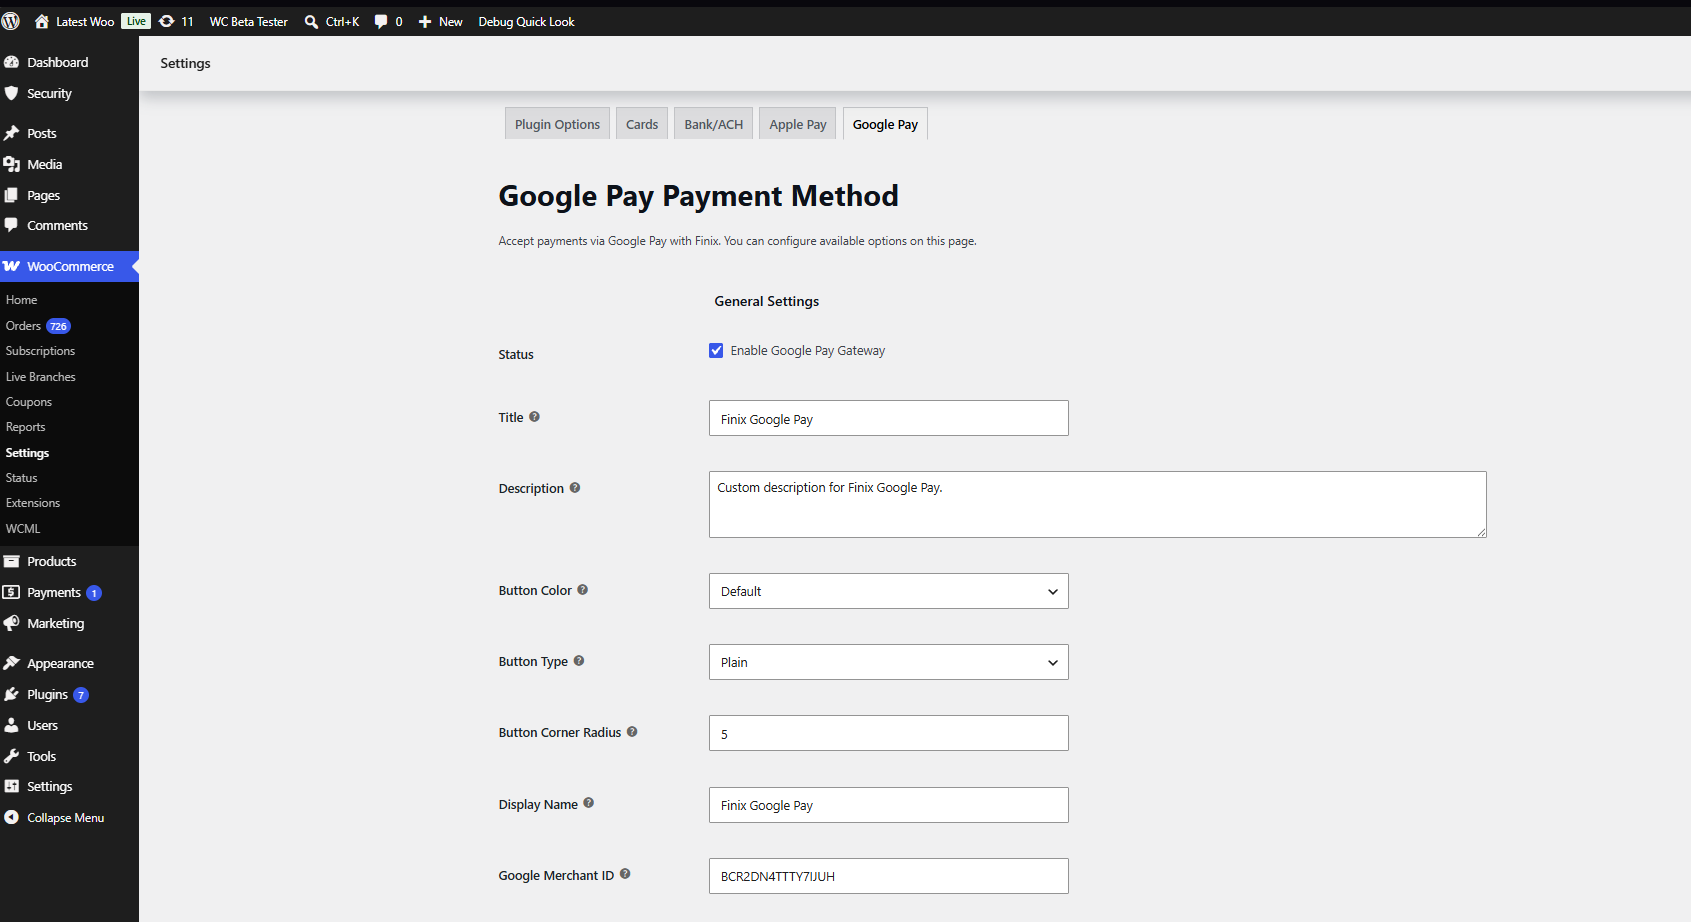
To accept Google Pay, you need a Google Merchant ID from the Google Pay & Wallet Console.
- Sign in to the Google Pay & Wallet Console.
- Complete the business profile and agree to the Google Pay API Terms of Service.
- Once approved, copy your Google Merchant ID.
- Enter your Google Merchant ID in the Finix plugin settings.

You can find Payments using WooCommerce Order Ids on the Finix Dashboard.
- Navigate to the Payments list page.
- Click on the Filters.
- Under Tags, enter WooCommerce Order Id.
- Click Apply.