Instead of creating subscriptions one by one, you can import multiple subscriptions at once with a CSV file in the Finix Dashboard. During the import process, Finix provides a link to download a sample template (CSV) to help format your data.
- You must have a subscription plan created before you can import subscriptions. At this time, you cannot import subscriptions without providing a
subscription_plan_id. - You must have the
identity_idand paymentinstrument_idfor the subscriber.
From the Subscriptions page, click the options (...) drop-down and select Bulk Import CSV.
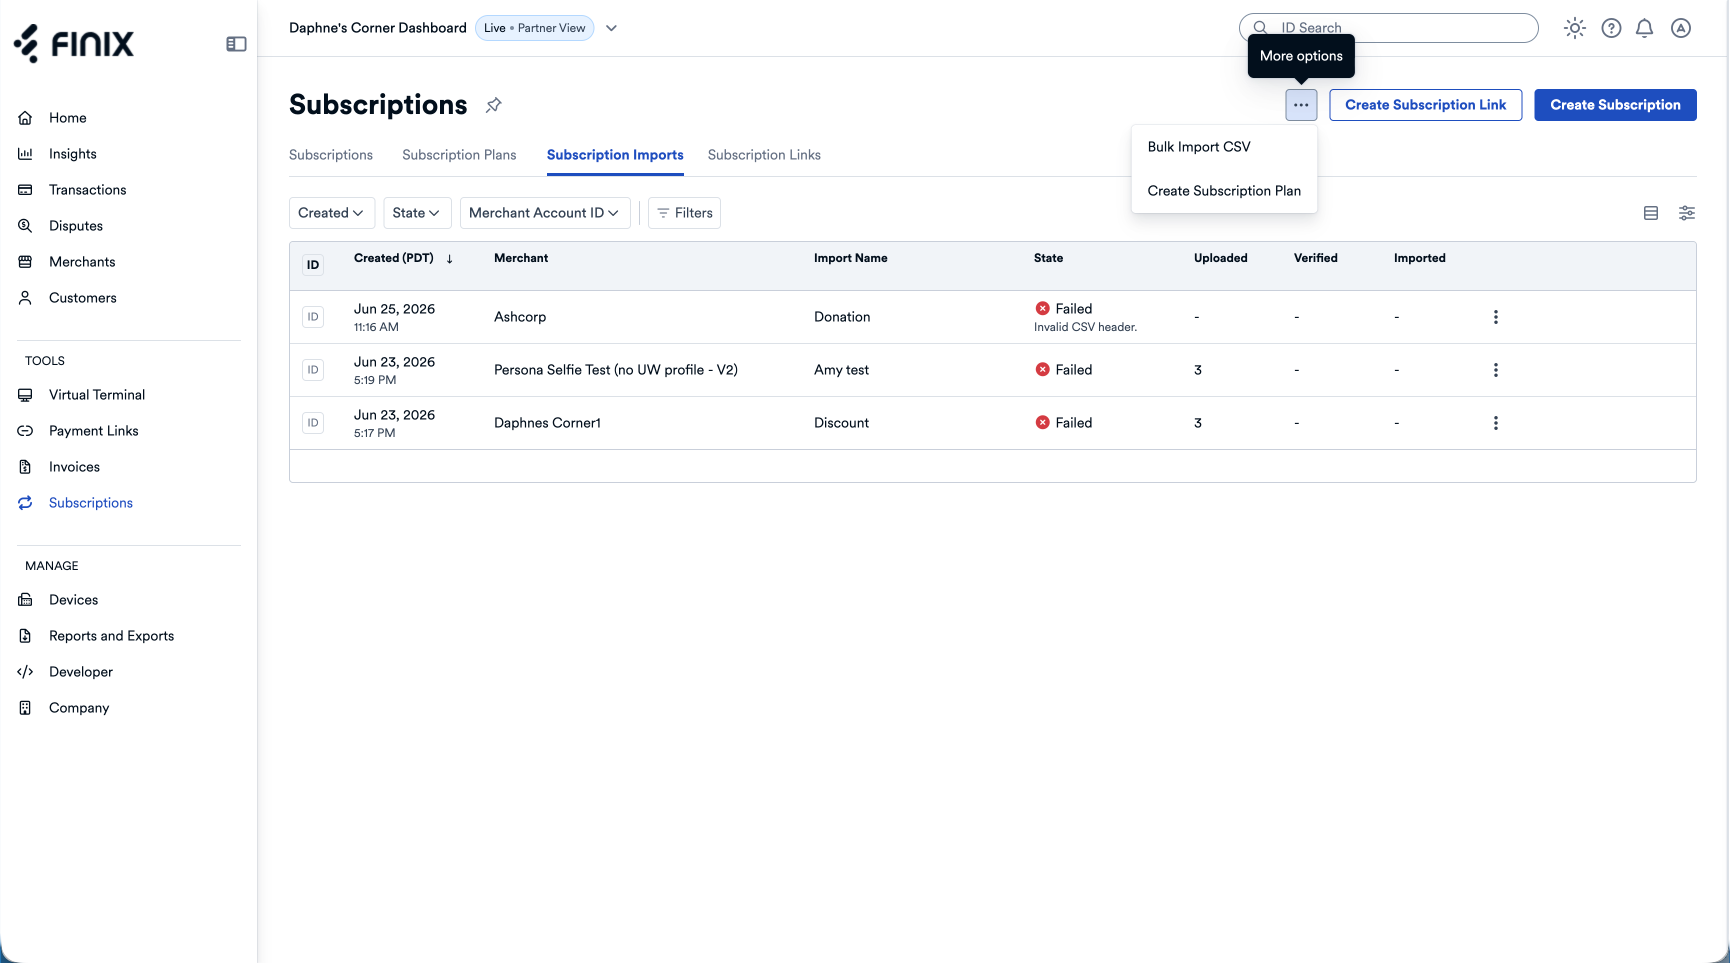
- A Select Merchant Account popover displays.
Select a Merchant Account.
Click Proceed.
- An Import Subscriptions page displays.
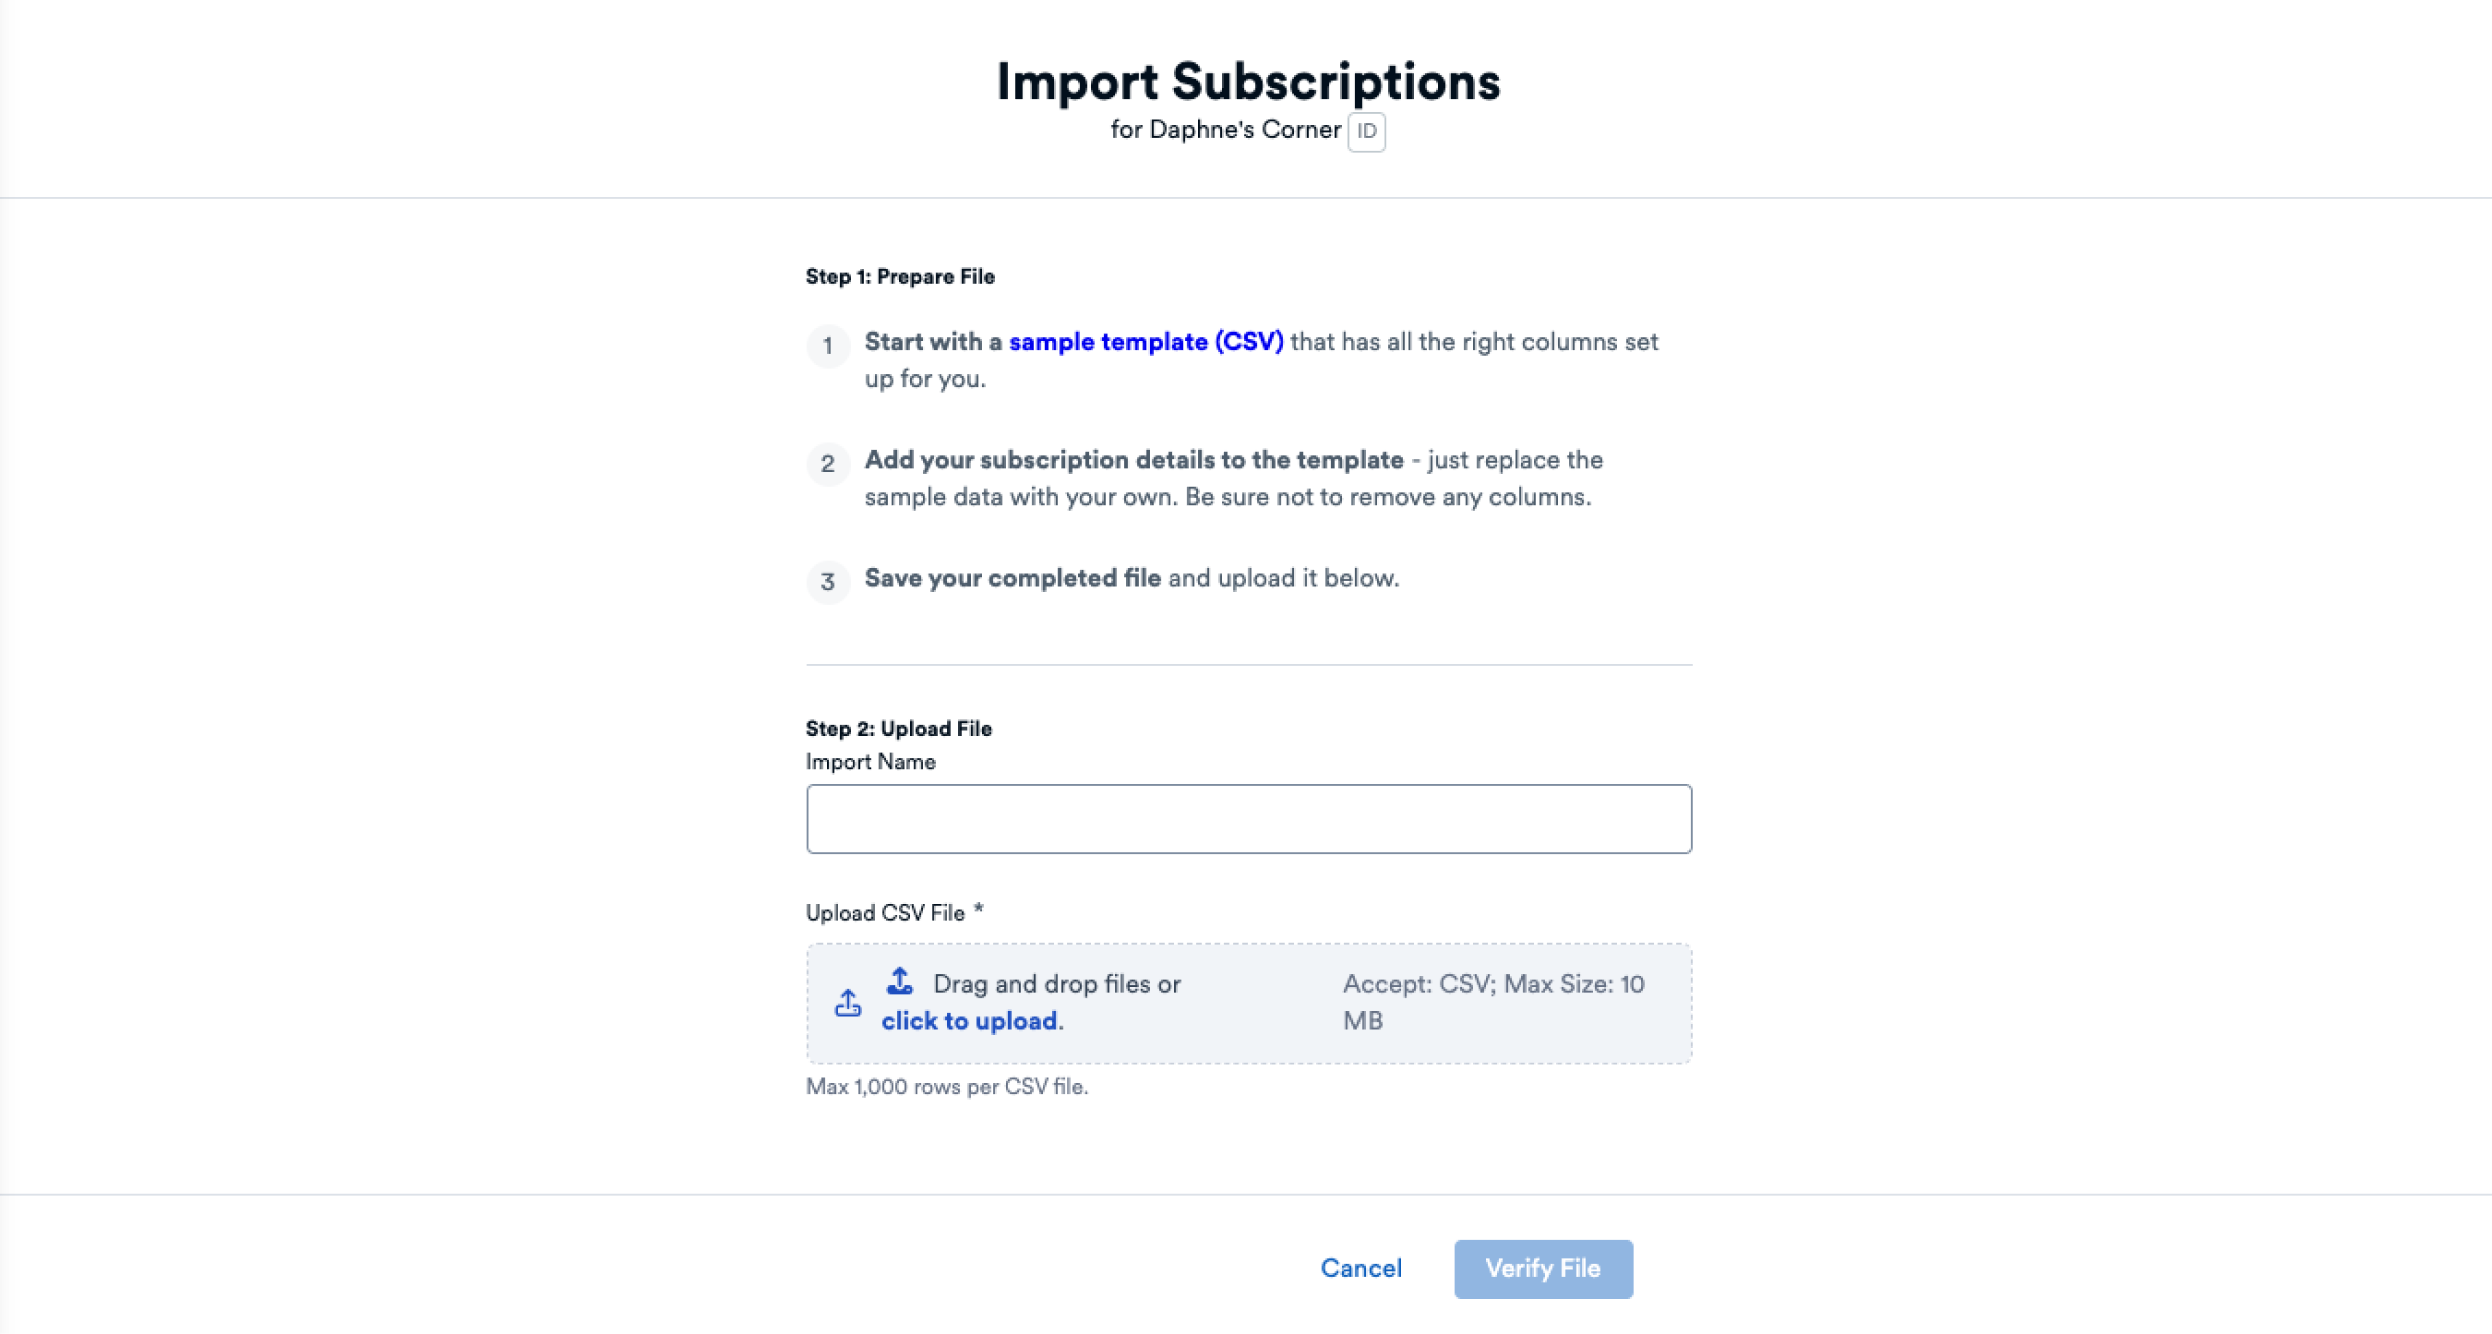
Follow the instructions to prepare your subscription import file, including downloading the sample template (CSV) and filling in the fields.
The following table shows the required and optional columns for importing subscriptions from an existing plan.
Currently, you can only import subscriptions that were created from subscription plans. For each subscription, you need to provide a subscription_plan_id.
| Column Name | Type | Description |
|---|---|---|
billing_overrides. collection_method | string, optional |
|
billing_overrides. send_invoice | boolean, optional |
|
billing_overrides. send_receipt | boolean, optional |
|
buyer_details. identity_id | string, required |
|
buyer_details. instrument_id | string, required |
|
buyer_details. requested_delivery_methods. email_destinations | string, optional |
|
buyer_details. requested_delivery_methods. sms_destinations | string, optional |
|
buyer_details. shipping_address. city | string, optional |
|
buyer_details. shipping_address. country | string, optional |
|
buyer_details. shipping_address. line1 | string, optional |
|
buyer_details. shipping_address. line2 | string, optional |
|
buyer_details. shipping_address. postal_code | string, optional |
|
buyer_details. shipping_address. region | string, optional |
|
currency | string, required |
|
linked_to | string, required |
|
nickname | string, optional |
|
start_subscription_at | string (date-time), optional |
|
subscription_details. notification_preferences. send_confirmation | boolean, optional |
|
subscription_plan_id | string, required |
|
total_billing_intervals | integer, optional |
|
From the Import Subscriptions page, name your import file and upload the CSV file you filled out with your information.
After uploading the file, click Verify File.
- A Subscription Import page displays with an "Uploading and Verifying File" banner indicating the file is being verified.
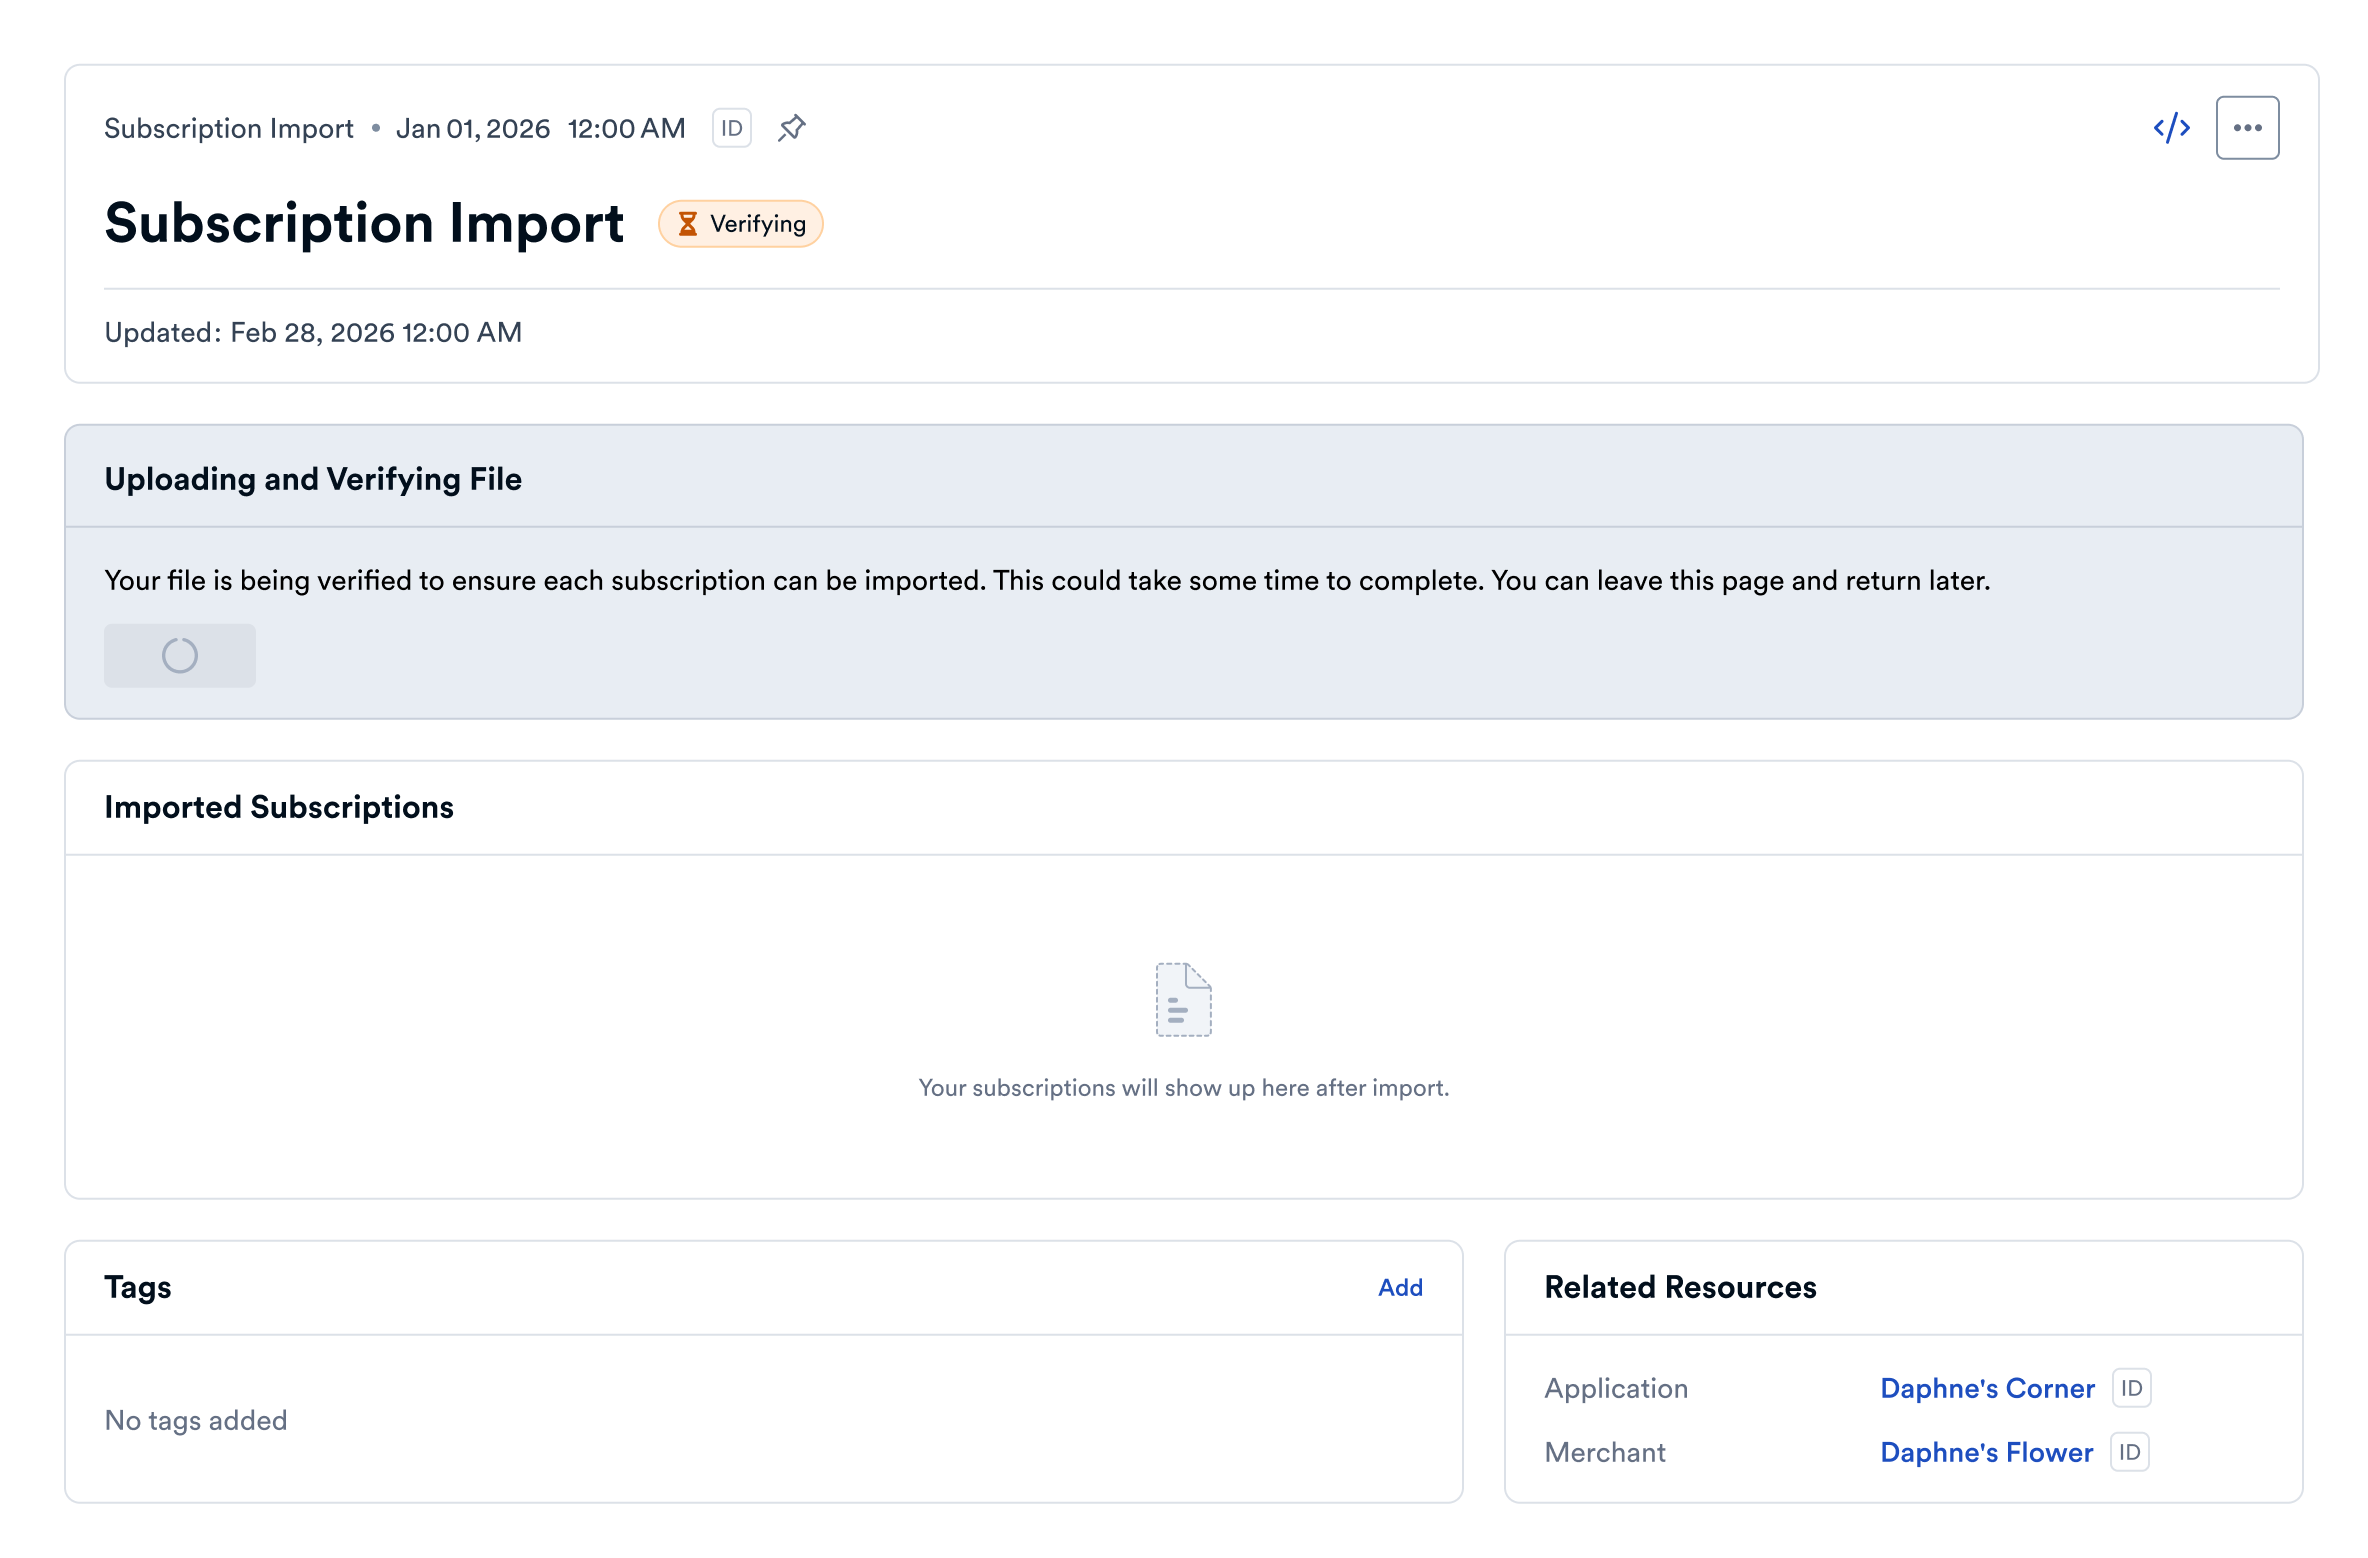
You don’t need to wait for the import to complete. You can leave and return later to check the status from the Subscription Imports tab on the main Subscriptions page.
If file verification fails, the banner title changes to "File Verification Failed" with a link to Download the verification errors (CSV) and the option to Upload a Corrected File.
If file verification succeeds, the banner title changes to "File Verified" to show your subscriptions were successfully verified.
A Confirm Import popover appears with a message showing how many subscriptions will be imported and asks if you want to proceed.
Click Import Now to import all subscriptions in the file. The banner text updates to show the import is in progress.
When the import finishes, the banner text updates to show completion. It also provides an option to download CSV results.
Imported subscriptions now appear under Imported Subscriptions.
You can view the imported subscriptions from the main Subscriptions page › Subscription Imports tab.
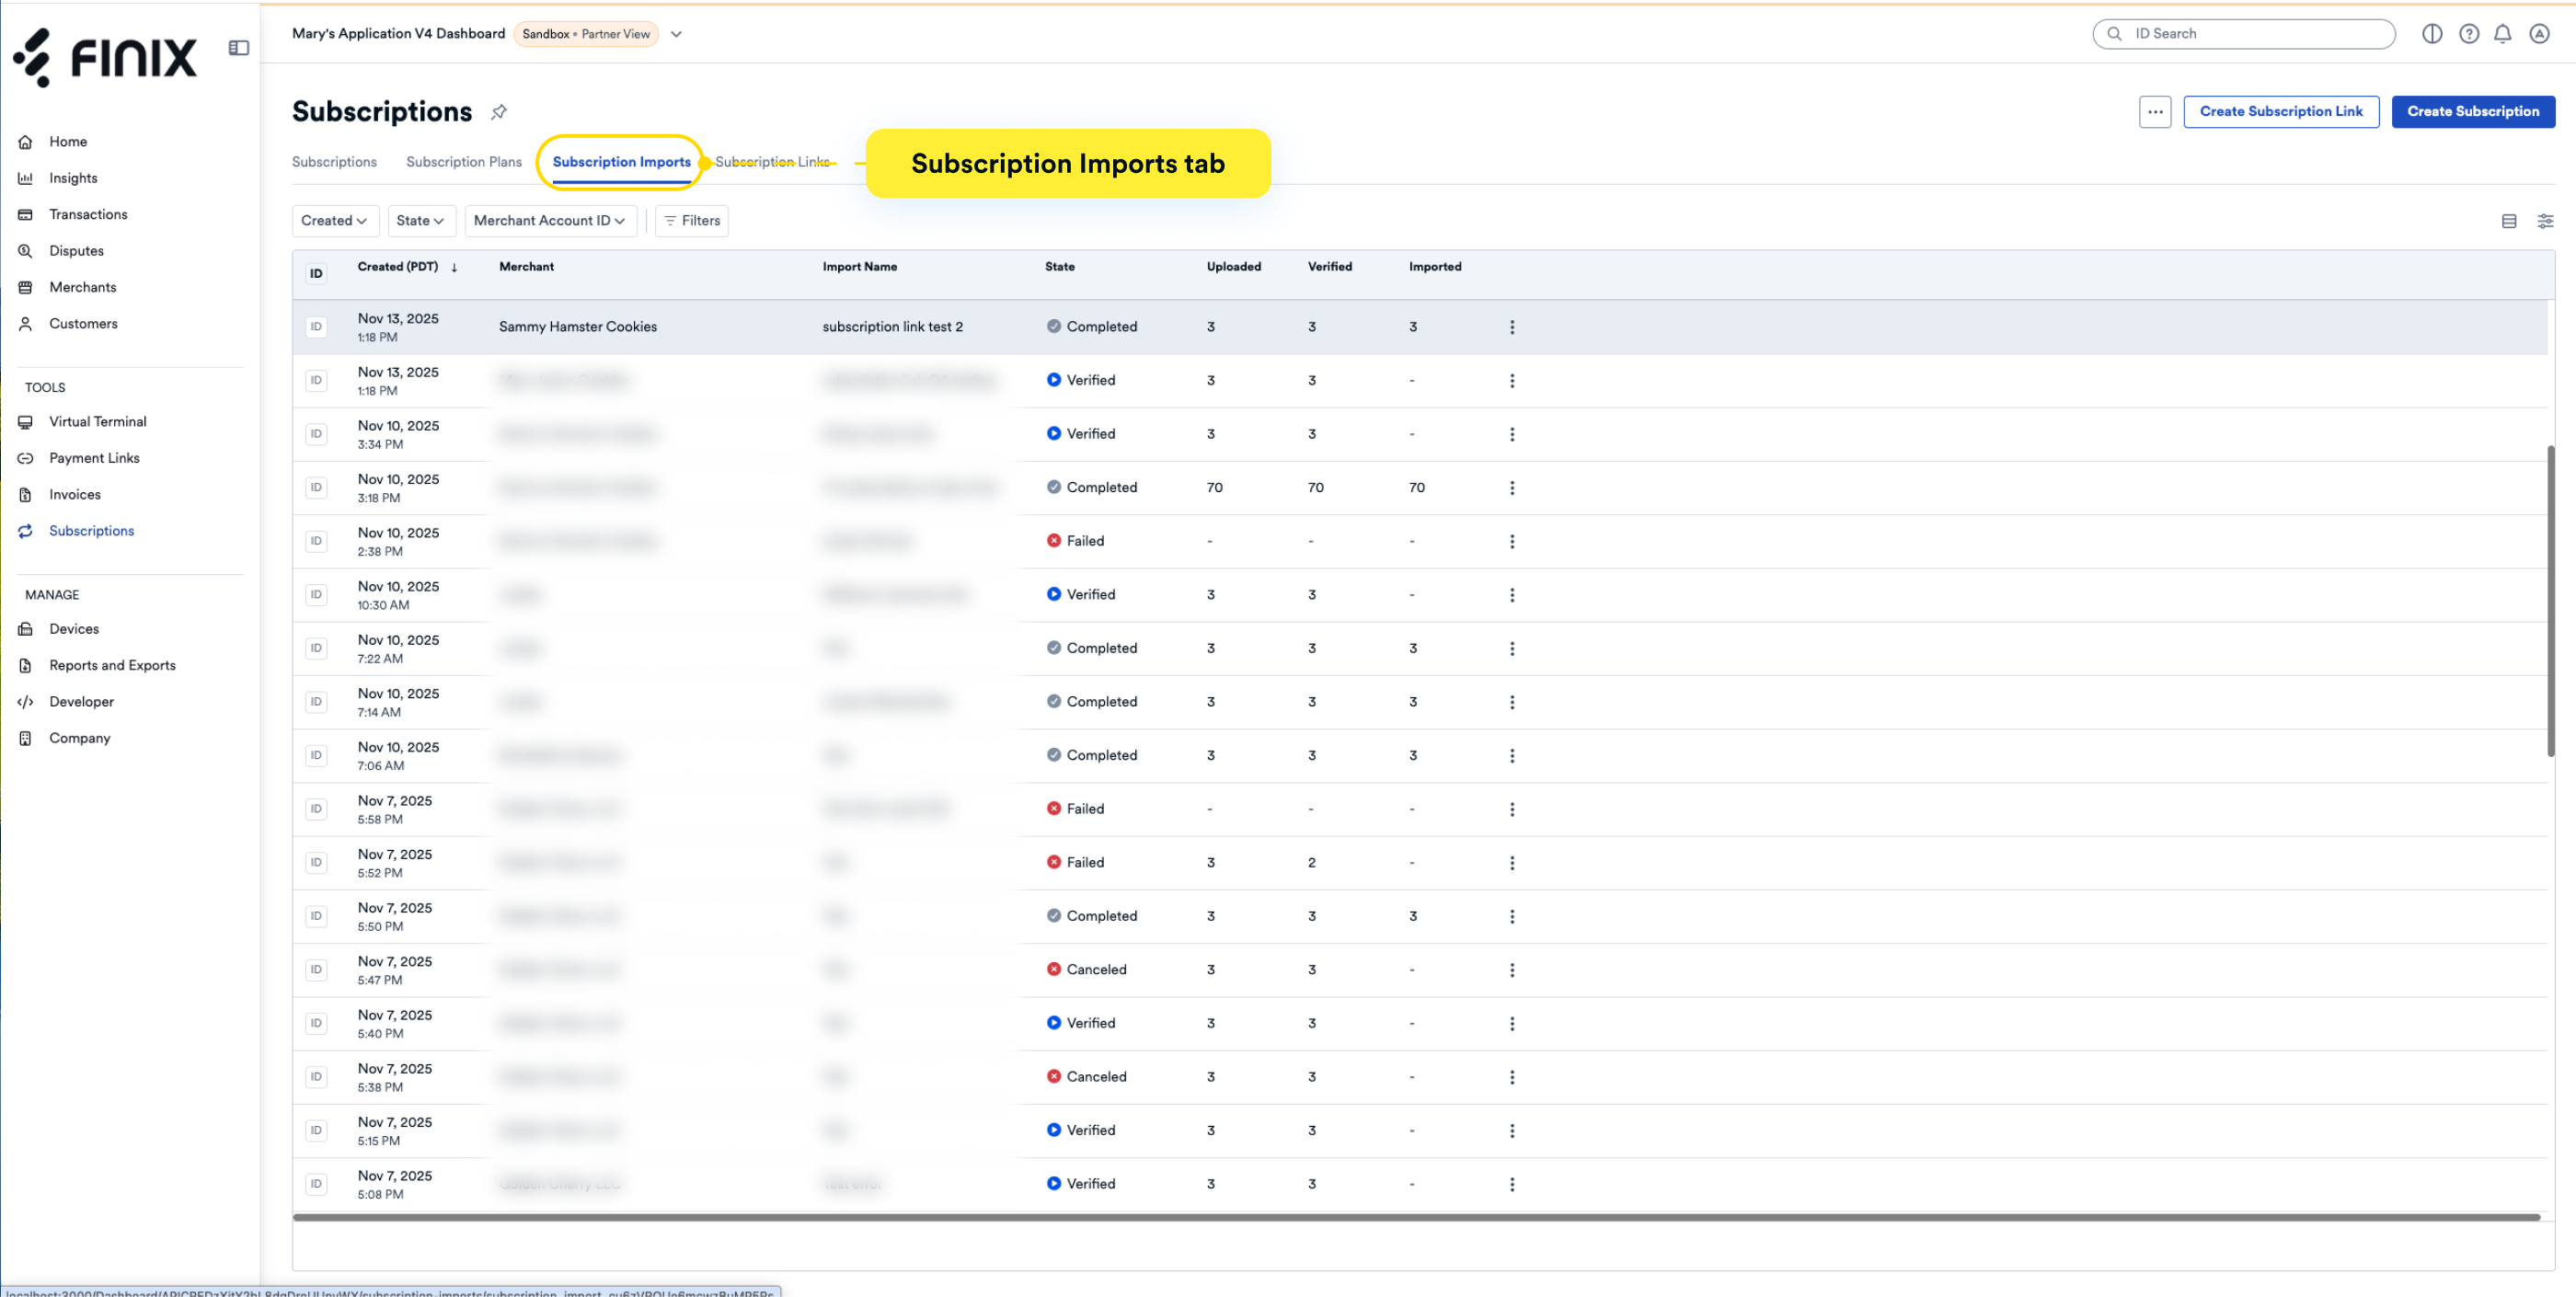
This page is helpful to view the status of your subscription imports.