Let buyers pay with Google Pay on your website, using any debit or credit card saved to their Google account.
To add Google Pay to your website, you load the Google Pay JavaScript library, configure the payment methods and tokenization your site accepts, and add the Google Pay button. When a buyer pays, you process the resulting token with the Finix API.
After setup, buyers can complete checkout with Google Pay and you process the payment like any other Finix transaction.
Finix recommends passing the address field shown in the steps below. If you do not pass the address, the card network charges additional dues and assessments per transaction.
Before you start, familiarize yourself with the Google Pay requirements for Finix, including the Finix API key, seller onboarding, and Google Pay merchant account steps.
See a live demo of Google Pay on the Finix sample store. All of the sample store code is available in the accept-a-payment GitHub project.
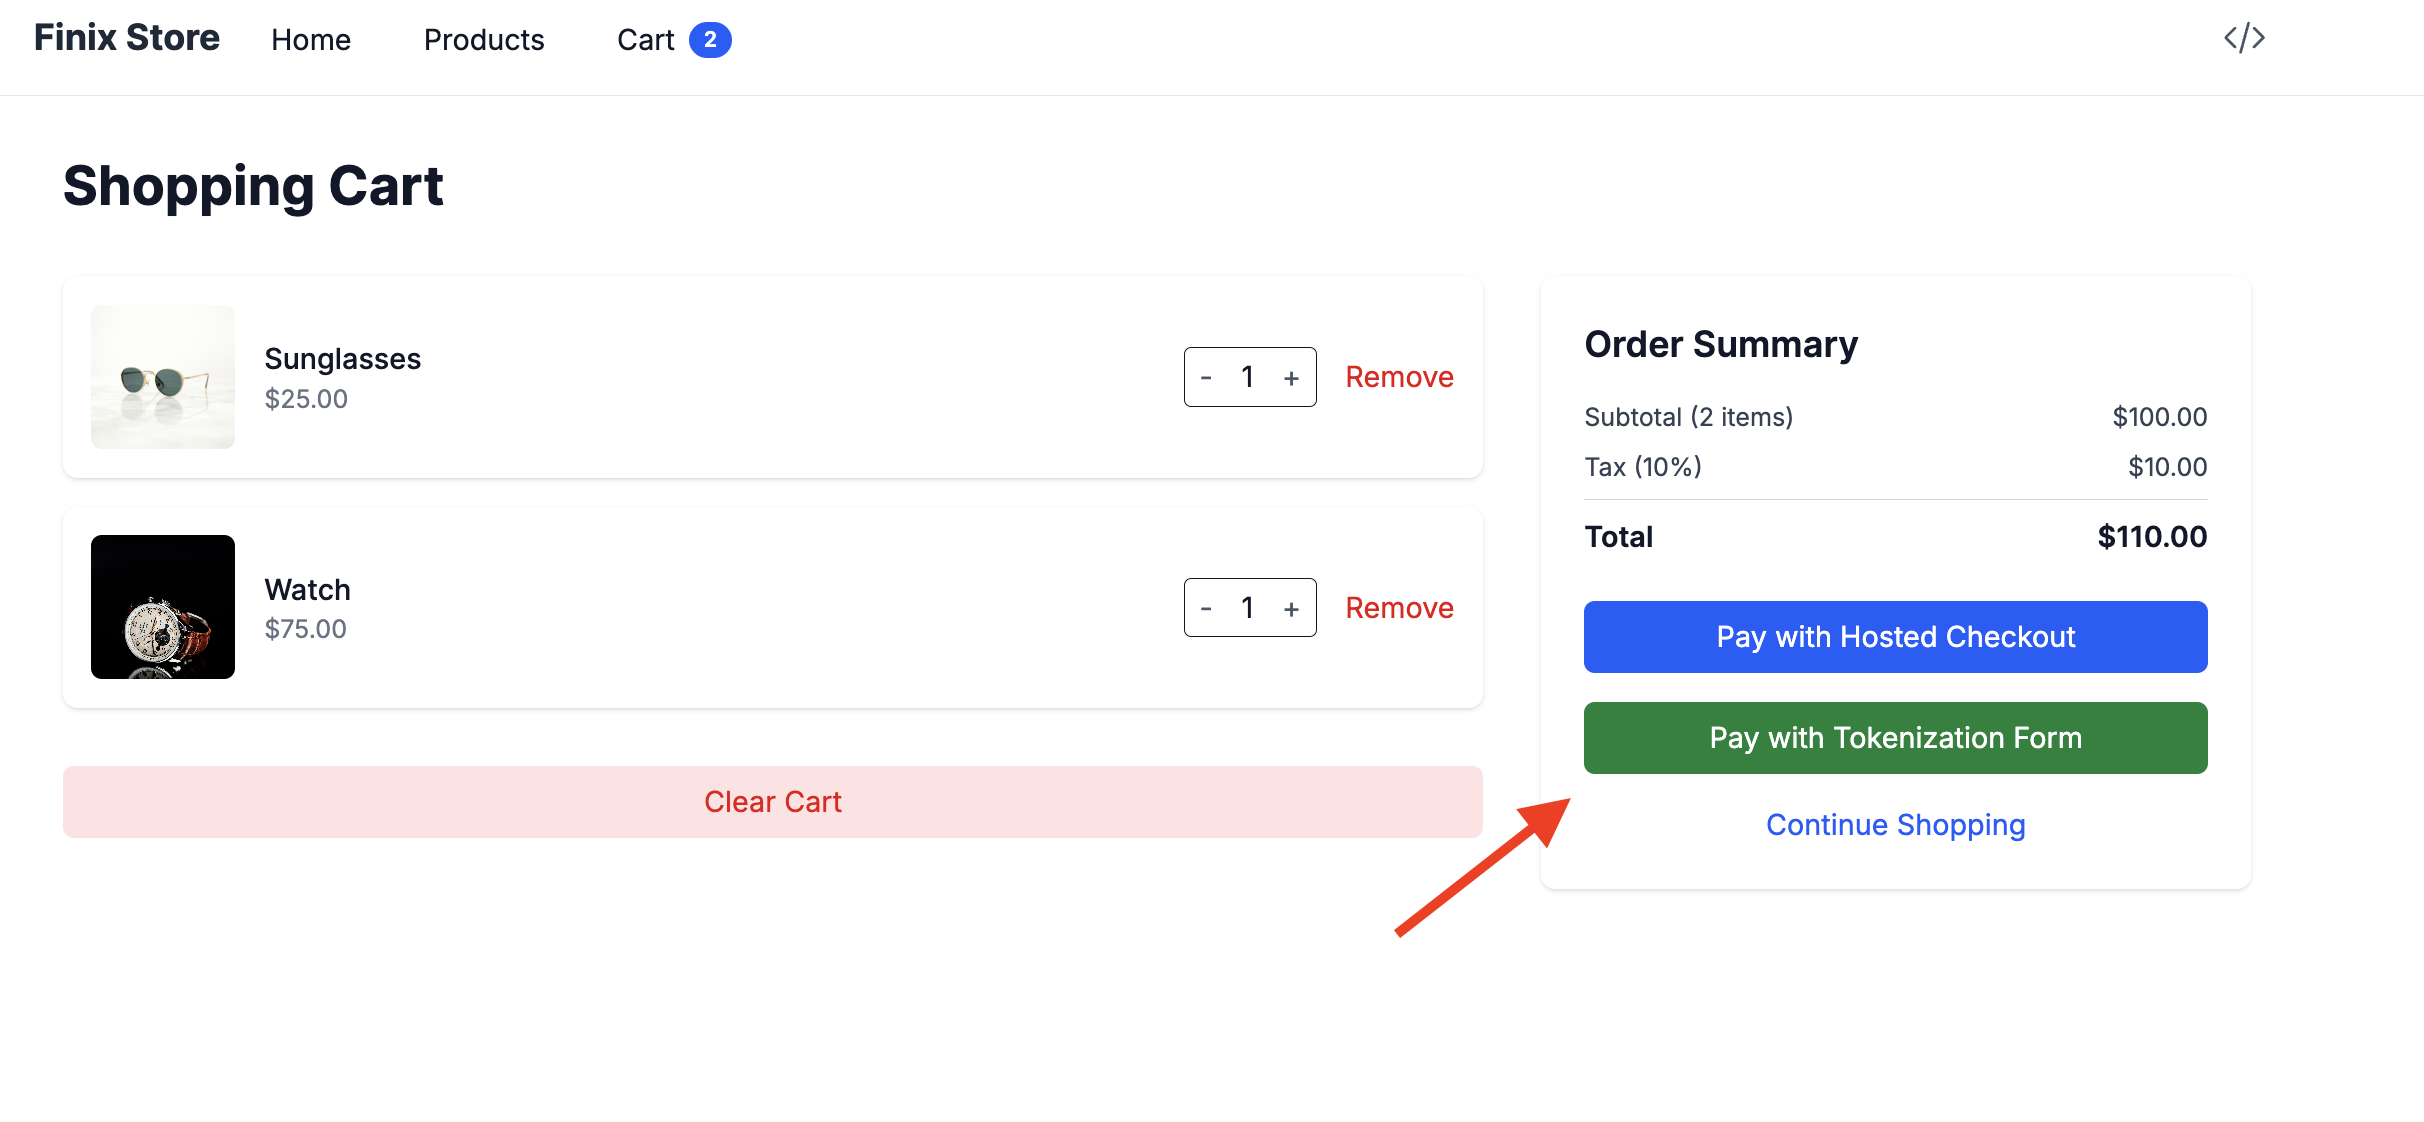
In the sample store, add a few items to your cart and click Checkout with Tokenization Form.
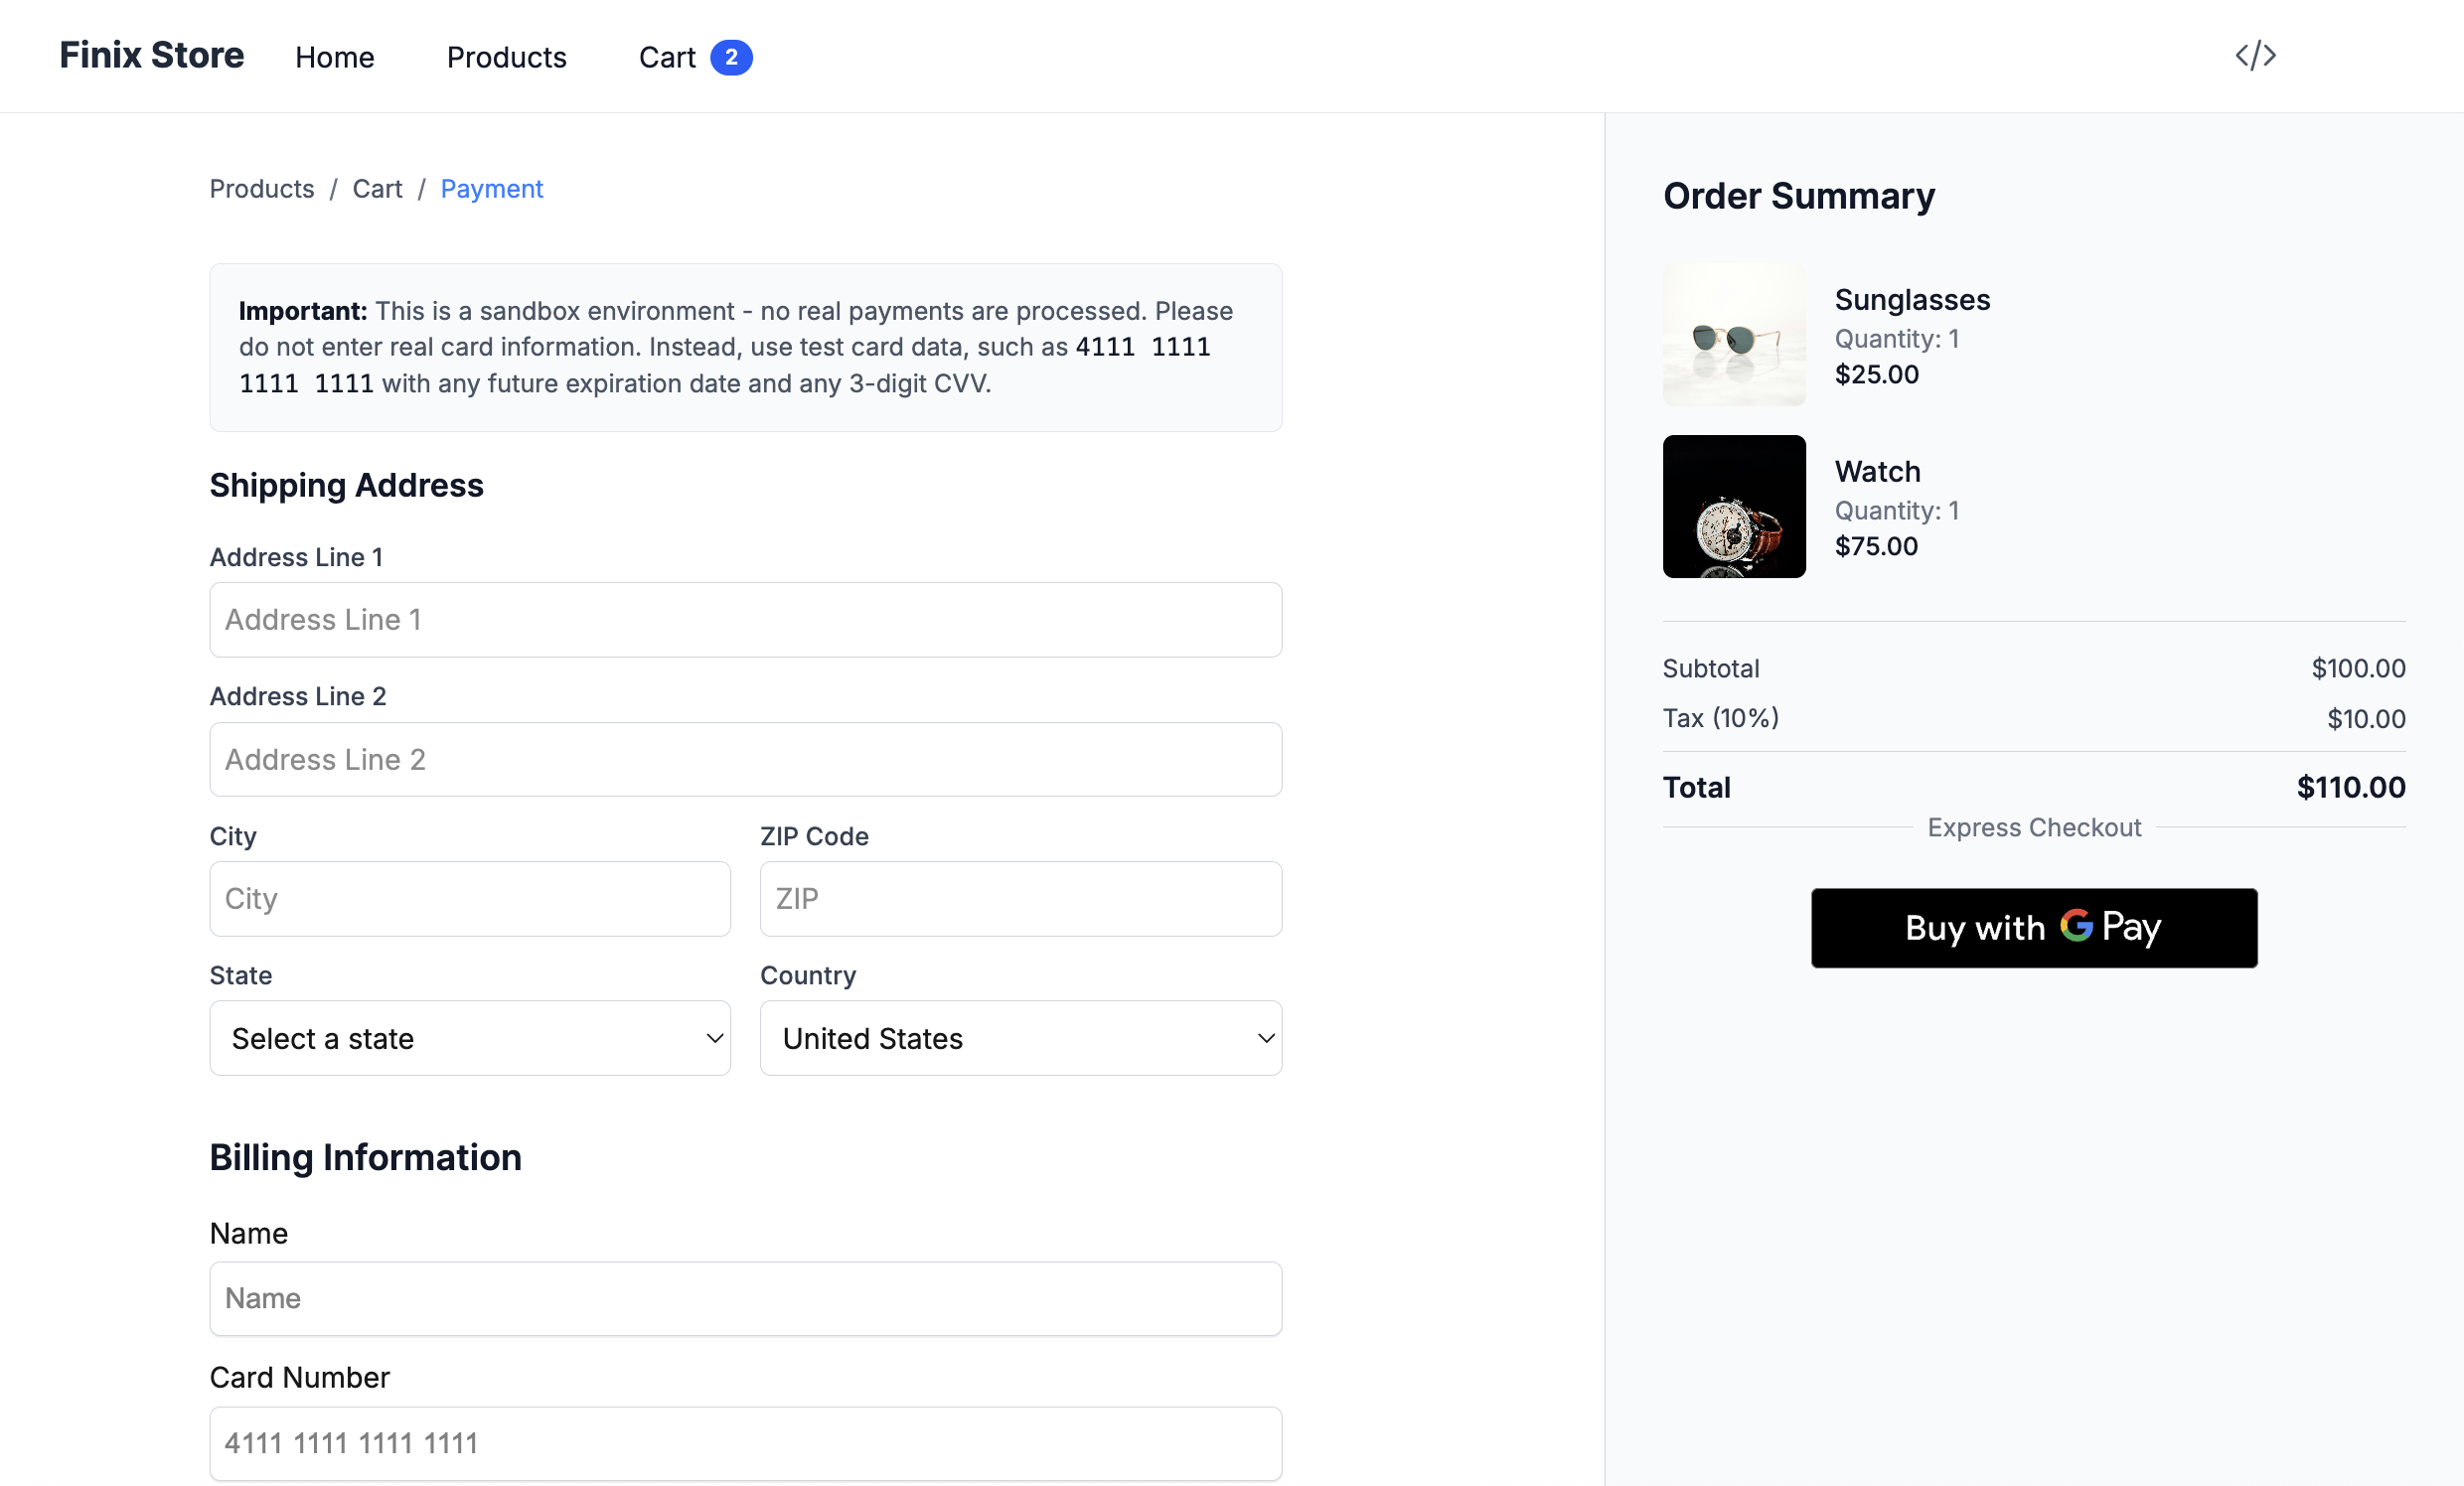
An express checkout button brings up the Google Pay modal.
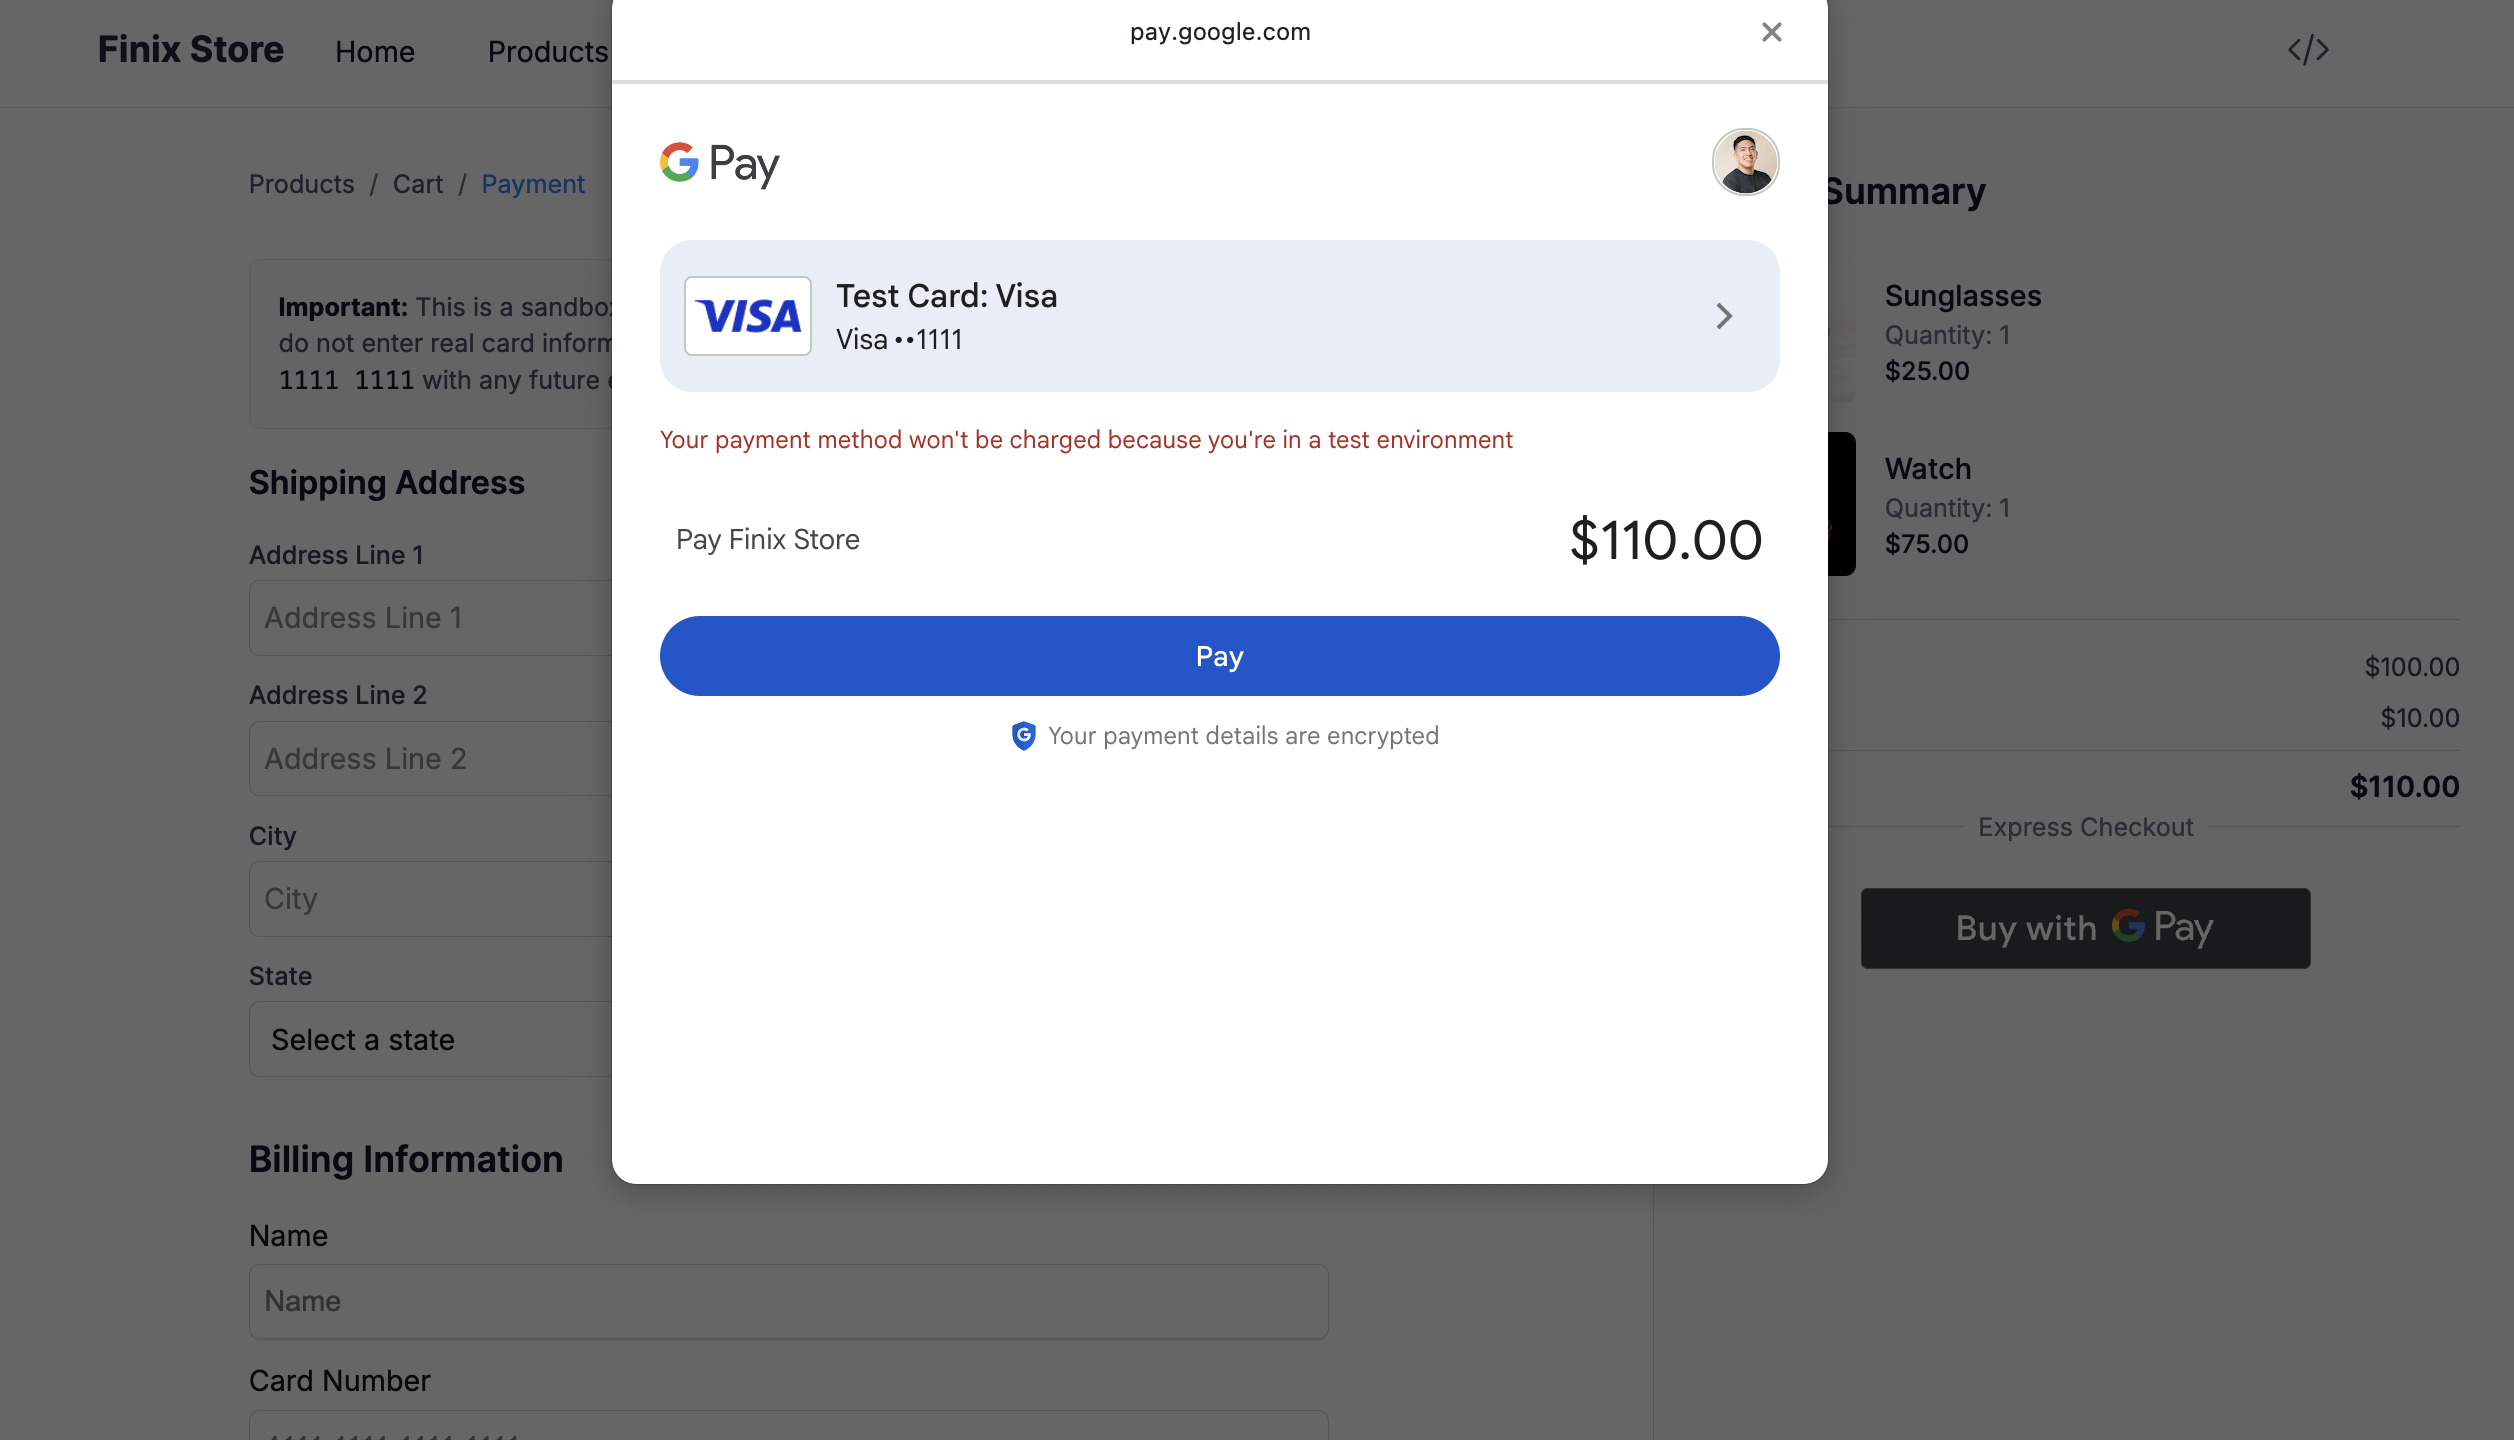
The sample store uses Sandbox credentials, so you are not charged.
First, load the Google Pay API JavaScript library into your site.
- Include the following script in your website so your site can call the Google Pay API.
<script async src="https://pay.google.com/gp/p/js/pay.js" onload="onGooglePayLoaded()">
 function onGooglePayLoaded() {
   window.googlePayClient = new google.payments.api.PaymentsClient({
     environment: "TEST"
   });
 }
</script>- After the library loads, create a
PaymentsClientobject.- For a Sandbox environment, use
environment: "TEST". This returns test payment methods for Sandbox transactions. - For a Live environment, use
environment: "PRODUCTION".
- For a Sandbox environment, use
const paymentsClient = new google.payments.api.PaymentsClient({
  environment: "TEST",
});After you add the library, declare the version of the Google Pay API that your site uses. The major and minor versions are required in each passed object and are included in the response.
const baseRequest = {
  apiVersion: 2,
  apiVersionMinor: 0,
};Configure the tokenization specification so Google Pay returns a Finix payment token.
- Set
gatewaytofinix. - Set
gatewayMerchantIdto the application owner Identity or merchant owner Identity. To choose the appropriate Identity ID, see Choose a Merchant identifier value.
const tokenizationSpecification = {
  type: "PAYMENT_GATEWAY",
  parameters: {
    gateway: "finix",
    gatewayMerchantId: "IDxxx",
  },
};Set which card networks your site accepts:
- Define
allowedCardNetworksto list the accepted networks. - Define
allowedCardAuthMethodsto set the authentication methods your site and gateway support.
const allowedCardNetworks = [
  "AMEX",
  "DISCOVER",
  "INTERAC",
  "JCB",
  "MASTERCARD",
  "VISA",
];
const allowedCardAuthMethods = ["PAN_ONLY", "CRYPTOGRAM_3DS"];
For both PAN_ONLY and CRYPTOGRAM_3DS authorization methods, support for 3D Secure depends on the processors you integrate with in allowedCardNetworks. Finix accepts both PAN_ONLY and CRYPTOGRAM_3DS authorization methods.
After you define the supported card networks, describe your allowed payment methods:
- Combine
allowedAuthMethodsandallowedCardNetworksto describe how your site supports theCARDpayment method. - Extend the
baseCardPaymentMethodobject with the information you expect returned to your site, including a description of the tokenized payment data.
const baseCardPaymentMethod = {
  type: "CARD",
  parameters: {
    allowedAuthMethods: allowedCardAuthMethods,
    allowedCardNetworks: allowedCardNetworks,
  },
};
const cardPaymentMethod = Object.assign(
  { tokenizationSpecification: tokenizationSpecification },
  baseCardPaymentMethod,
);After you describe your allowed payment methods, check readiness to pay with the Google Pay API:
- Add
allowedPaymentMethodsto thebaseRequestobject. - Call
isReadyToPay()to check whether the current device and browser support the Google Pay API for the payment methods you specified.
const isReadyToPayRequest = Object.assign({}, baseRequest);
isReadyToPayRequest.allowedPaymentMethods = [baseCardPaymentMethod];

paymentsClient
  .isReadyToPay(isReadyToPayRequest)
  .then(function (response) {
    if (response.result) {
      // add a Google Pay payment button
    }
  })
  .catch(function (err) {
    // show error in developer console for debugging
    console.error(err);
});After you check readiness to pay, add a Google Pay payment button to your website.
- For the different button types and display requirements, see Google's brand guidelines.
- To try every Google Pay button, see Google Pay's interactive demo.
const button = paymentsClient.createButton({
  onClick: () => console.log("TODO: click handler"),
  allowedPaymentMethods: [],
}); // make sure to provide an allowed payment method
document.getElementById("container").appendChild(button);
The button element supports the following attributes.
| Field | Type | Description |
|---|---|---|
button-color | string, optional | Color of the button. Available values are default, black, and white. |
button-type | string, optional | The button type that initiates the transaction. Available values include book, buy, checkout, donate, order, pay, plain, and subscribe. |
button-locale | string, required | The language of the button. |
After you add the Google Pay button, create a PaymentDataRequest object.
- Build a JavaScript object that describes your site's support for the Google Pay API. For the supported properties, see the
PaymentDataRequestobject.
const paymentDataRequest = Object.assign({}, baseRequest);
paymentDataRequest.allowedPaymentMethods = [cardPaymentMethod];
paymentDataRequest.transactionInfo = {
  countryCode: "US",
  currencyCode: "USD",
  totalPrice: "123.45",
  totalPriceStatus: "FINAL",
};
paymentDataRequest.merchantInfo = {
  merchantId: "12345678901234567890",
  merchantName: "Example Merchant",
};
The transactionInfo object accepts the following arguments.
| Field | Type | Description |
|---|---|---|
countryCode | string, required | The ISO country code. |
currencyCode | string, required | The currency code of the locale. |
totalPrice | string, required | Total value of the transaction, with optional decimal precision of two places. |
totalPriceStatus | string, required | The status of the total price. Pass FINAL if the total price does not change from the amount presented to the buyer. Pass ESTIMATED if the total price might adjust based on the response, such as sales tax based on a billing address. Pass NOT_CURRENTLY_KNOWN when using totalPriceStatus for a capability check. |
The merchantInfo object accepts the following arguments.
| Field | Type | Description |
|---|---|---|
merchantId | string, required | A Google merchant identifier issued after registration with the Google Pay Business Console. Required when PaymentsClient is initialized with an environment property of PRODUCTION. |
merchantName | string, required | The name of the Merchant. |
- Add the payment methods your site supports and any additional data you expect in the response.
- Set a
totalPriceandcurrencyCodefor the buyer to authorize. - Provide a buyer-visible
merchantName. In a Sandbox environment, use theTESTMerchant ID.
Merchants that process transactions in the European Economic Area (EEA) or any other region subject to Strong Customer Authentication (SCA) must include the countryCode, totalPrice, and merchantName parameters to meet SCA requirements.
A Buyer Identity is required before you can process a payment. You can create a new Buyer Identity with the Finix API, or use an existing one.
All Buyer Identity fields are optional. Finix recommends including basic information (name, email, address, and phone) to make payment operations easier.
To find and reuse an existing Buyer Identity:
- Log in to your Finix Dashboard.
- In the left sidebar, select Data Resources → Identities.
- Search for the Buyer Identity you want to use, and confirm its Role is Buyer.
- Copy the Buyer Identity ID (for example,
IDjWktr7BPDGhz4amrPJZoXg).
After you call loadPaymentData using the Google Pay payments client object, the response returns a token.
paymentsClient
  .loadPaymentData(paymentDataRequest)
  .then(function (paymentData) {
    // if using gateway tokenization, pass this token without modification
    paymentToken = paymentData.paymentMethodData.tokenizationData.token;
    // for billing details
    name = paymentData.paymentMethodData.info.billingAddress.name;
    address = {
      postal_code: paymentData.paymentMethodData.info.billingAddress.postalCode,
      country: paymentData.paymentMethodData.info.billingAddress.countryCode,
    };
  })
  .catch(function (err) {
    // show error in developer console for debugging
    console.error(err);
  });
Pass the third_party_token, address, and name when creating a Payment Instrument.
- Sandbox serverhttps://finix.sandbox-payments-api.com/payment_instruments
curl -i -X POST \
  -u USfdccsr1Z5iVbXDyYt7hjZZ:313636f3-fac2-45a7-bff7-a334b93e7bda \
  https://finix.sandbox-payments-api.com/payment_instruments \
  -H 'Content-Type: application/json' \
  -H 'Finix-Version: 2022-02-01' \
  -d '{
    "address": {
      "city": "San Francisco",
      "country": "USA",
      "line1": "900 Metro Center Blv",
      "line2": "APT 200",
      "postal_code": "94404",
      "region": "CA"
    },
    "identity": "IDmj1yA97RS4rMjiQgvK3Vio",
    "merchant_identity": "IDwhCCvPwCDEmiFd8Be7pDzN",
    "name": "John Doe",
    "third_party_token": "<GOOGLE_PAY_TOKEN>",
    "type": "GOOGLE_PAY"
  }'
A successful request returns the newly created Payment Instrument, which you use to process the payment.
{
  "id": "PIxr84Gjvm6Wee3wUbAaBRzK",
  "created_at": "2026-09-25T20:36:37.61Z",
  "updated_at": "2026-09-25T20:36:37.61Z",
  "application": "APc9vhYcPsRuTSpKD9KpMtPe",
  "created_via": "API",
  "currency": "USD",
  "disabled_code": null,
  "disabled_message": null,
  "enabled": true,
  "fingerprint": "FPRrcobjtdU98gr4sjiqYR1Qg",
  "identity": "IDmj1yA97RS4rMjiQgvK3Vio",
  "instrument_type": "GOOGLE_PAY",
  "address": {
    "line1": "900 Metro Center Blv",
    "line2": "APT 200",
    "city": "San Francisco",
    "region": "CA",
    "postal_code": "94404",
    "country": "USA"
  },
  "bin": "411111",
  "brand": "VISA",
  "card_type": "UNKNOWN",
  "expiration_month": 12,
  "expiration_year": 2028,
  "issuer_country": "UNKNOWN",
  "last_four": "1111",
  "name": "John Doe",
  "tags": {},
  "third_party": null,
  "third_party_token": null,
  "type": "GOOGLE_PAY",
  "_links": {
    "self": {
      "href": "https://finix.sandbox-payments-api.com/payment_instruments/PIxr84Gjvm6Wee3wUbAaBRzK"
    },
    "authorizations": {
      "href": "https://finix.sandbox-payments-api.com/payment_instruments/PIxr84Gjvm6Wee3wUbAaBRzK/authorizations"
    },
    "transfers": {
      "href": "https://finix.sandbox-payments-api.com/payment_instruments/PIxr84Gjvm6Wee3wUbAaBRzK/transfers"
    },
    "verifications": {
      "href": "https://finix.sandbox-payments-api.com/payment_instruments/PIxr84Gjvm6Wee3wUbAaBRzK/verifications"
    },
    "application": {
      "href": "https://finix.sandbox-payments-api.com/applications/APc9vhYcPsRuTSpKD9KpMtPe"
    },
    "identity": {
      "href": "https://finix.sandbox-payments-api.com/identities/IDmj1yA97RS4rMjiQgvK3Vio"
    }
  }
}
For security, Google Pay tokens are active for only a short period of time. The third_party_token in the request above has expired. To test the request, use your own third_party_token and Finix credentials.
After the Payment Instrument is created, use it to create a Transfer or an Authorization, the same as any other Finix transaction.
To process a sale:
- Set the
sourceto the buyer's Payment Instrument ID. - Set the
merchantto anAPPROVEDMerchant account. - Set the
amountin cents.
curl https://finix.sandbox-payments-api.com/transfers \
    -H "Content-Type: application/json" \
    -H 'Finix-Version: 2022-02-01' \
    -u  USsRhsHYZGBPnQw8CByJyEQW:8a14c2f9-d94b-4c72-8f5c-a62908e5b30e \
    -d '{
        "merchant": "MUeDVrf2ahuKc9Eg5TeZugvs",
        "currency": "USD",
        "amount": 662154,
        "source": "PIwpqpJZCharsZAt6WKVopPS"
}'{
"id": "TR29av3LN1TAGPbXscsup1tt",
"amount": 662154,
"tags": {},
"state": "SUCCEEDED",
"trace_id": "34f40e87-2599-414b-874b-f472790ff521",
"currency": "USD",
"application": "APgPDQrLD52TYvqazjHJJchM",
"source": "PIwpqpJZCharsZAt6WKVopPS",
"destination": null,
"ready_to_settle_at": null,
"externally_funded": "UNKNOWN",
"fee": 0,
"statement_descriptor": "FNX*FINIX FLOWERS",
"type": "DEBIT",
"messages": [],
"raw": null,
"created_at": "2022-08-25T20:39:37.59Z",
"updated_at": "2022-08-25T20:39:38.17Z",
"idempotency_id": null,
"merchant": "MUeDVrf2ahuKc9Eg5TeZugvs",
"merchant_identity": "IDpYDM7J9n57q849o9E9yNrG",
"subtype": "API",
"failure_code": null,
"failure_message": null,
"additional_buyer_charges": null,
"_links": {
"application": {
"href": "https://finix.sandbox-payments-api.com/applications/APgPDQrLD52TYvqazjHJJchM"
},
"self": {
"href": "https://finix.sandbox-payments-api.com/transfers/TR29av3LN1TAGPbXscsup1tt"
},
"merchant_identity": {
"href": "https://finix.sandbox-payments-api.com/identities/IDpYDM7J9n57q849o9E9yNrG"
},
"payment_instruments": {
"href": "https://finix.sandbox-payments-api.com/transfers/TR29av3LN1TAGPbXscsup1tt/payment_instruments"
},
"reversals": {
"href": "https://finix.sandbox-payments-api.com/transfers/TR29av3LN1TAGPbXscsup1tt/reversals"
},
"fees": {
"href": "https://finix.sandbox-payments-api.com/transfers/TR29av3LN1TAGPbXscsup1tt/fees"
},
"disputes": {
"href": "https://finix.sandbox-payments-api.com/transfers/TR29av3LN1TAGPbXscsup1tt/disputes"
},
"source": {
"href": "https://finix.sandbox-payments-api.com/payment_instruments/PIwpqpJZCharsZAt6WKVopPS"
},
"fee_profile": {
"href": "https://finix.sandbox-payments-api.com/fee_profiles/FPvCQUcnsueN3Bc3zR1qCBG8"
}
}
}Alternatively, create an Authorization and capture it later with two separate API calls. This is useful when you need to verify the payment details first and capture a specific amount later. For more information, see Creating and capturing an Authorization.