Adding a custom domain can help build customer confidence by showing your company name in the short links. Custom domains can be used on Finix's low-code solutions, including checkout forms, payment links, and subscription links.
If your domain is example.com, we recommend using payments.example.com or pay.example.com as your custom subdomain. You must use a subdomain (like payments.example.com) rather than a path (like example.com/checkout).
Note: Custom Domains can only be enabled in our Production (Live) environment.
On the Finix Dashboard, navigate to Settings > Company > Branding > Domains.
Click Add next to Domain (Advanced).

Enter your desired subdomain (for example,
paymentsif your domain isexample.com):payments.example.com
Click Add Domain.
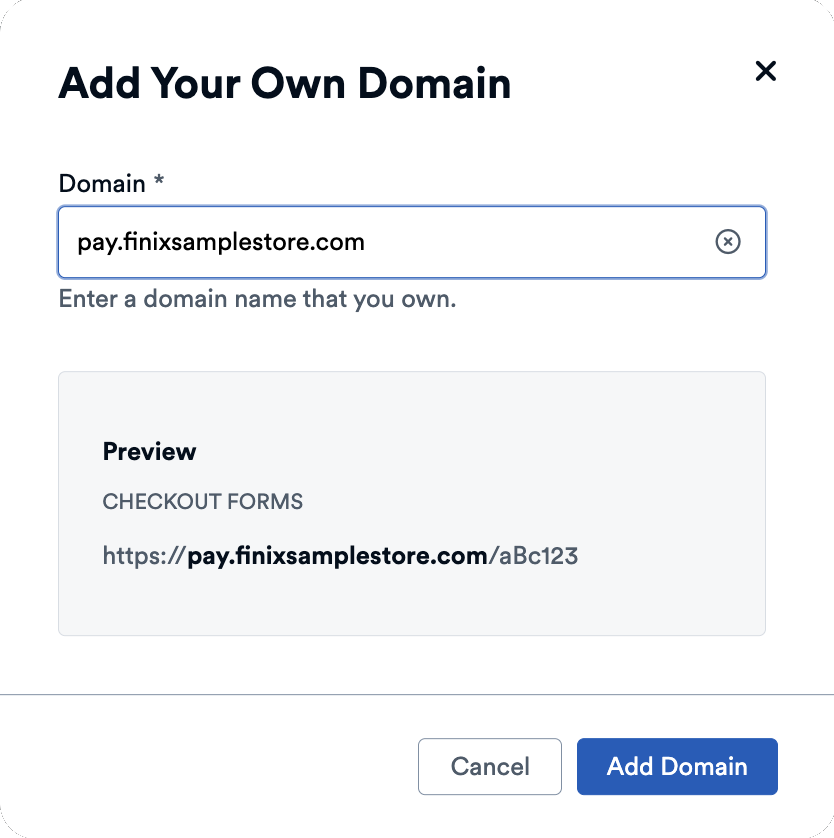
- A popup displays the DNS records you need to add to your domain provider.
- Copy these details.
- Click Done to close the popup.

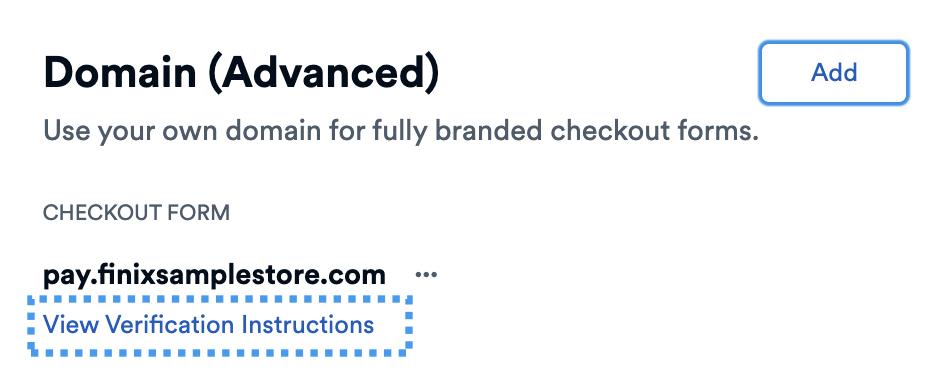
You can view the DNS record details again by clicking View Verification Instructions next to your custom domain.
Your DNS provider is usually the company where you registered your domain. If you're not sure, check your domain registration email or contact the company where you purchased your domain.
Sign in to your DNS provider's control panel.
Find the page to manage DNS records for your domain.
Add the two DNS records from the Finix Dashboard popup:
- CNAME record - This connects your subdomain to Finix
Enter the values exactly as shown in the Domain Verification popup and save the records.
If you need help, contact your DNS provider's support team. Share the DNS record details provided by Finix with them, and they can help you add the records.
After you add the DNS records to your provider, it may take up to 72 hours for them to propagate and be verified.
Once Finix verifies the DNS records, your domain will show an Verified indicator in the Finix Dashboard, confirming it's ready to activate.

THe last step you will need to do is to Activate your domain. This happens after your domain is verified. If your domain is not yet verified, you can click View Verification Instructions next to your domain to see the DNS record details again.
We recommend creating a test payment link to verify your DNS and Finix are configured correctly.
On the Finix Dashboard, navigate to Settings > Company > Branding > Domains.
Verify you have an Active indicator next to your custom domain.
You'll see your new custom domain in the details page of your newly created payment link.
If you need to remove your custom domain:
On the Finix Dashboard, navigate to Settings > Company > Branding > Domains.
Click the three dots (
...) next to the domain you want to remove, and select Remove.Read the popup confirmation, and click Remove to confirm the removal.
Log in to your DNS provider and delete the two DNS records you created for your custom subdomain.
Note: After you remove your custom domain, previous payment links urls using your custom domain may contain errors. We recommend de-activating payment links and subscription links before proceeding forward.